@tutorial:
i2c comunication with an LCD
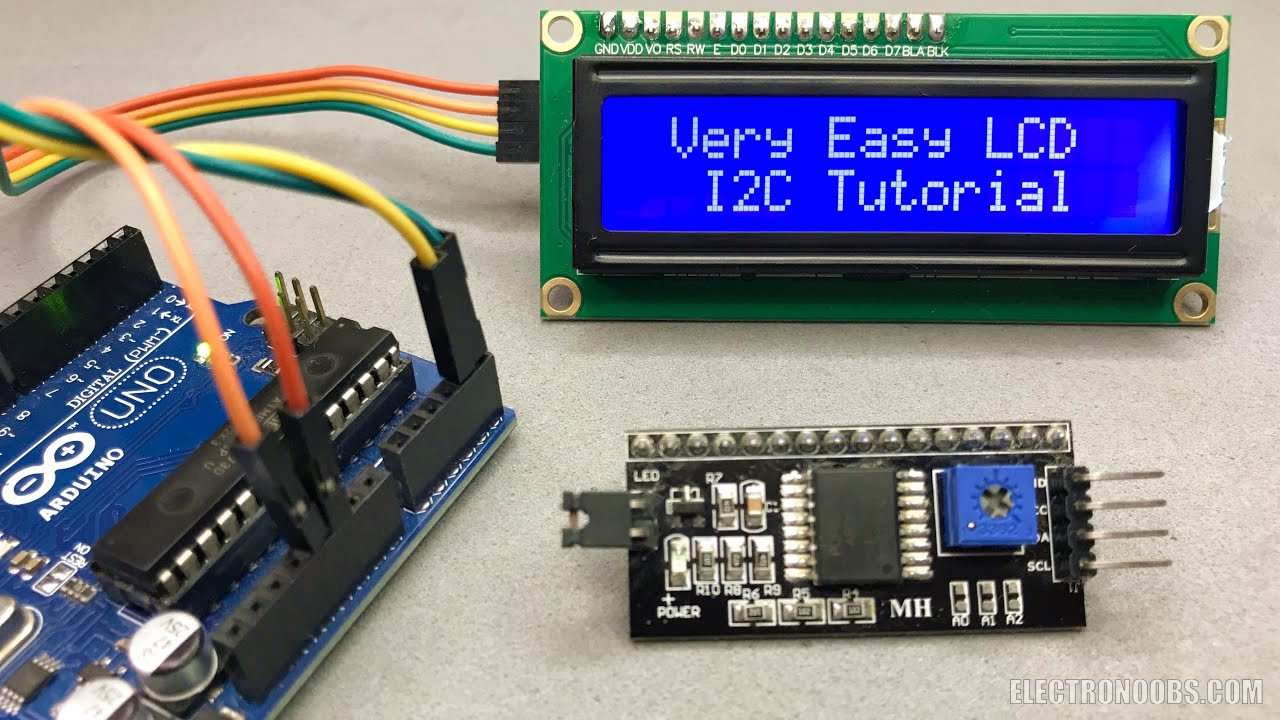
Since the use of an LCD requires many microcontroller pins, we will reduce that number using serial communication, which is basically sending "packages" of data one after another, using only two pins of our microcontroller , pins SDA and SCL which are the analog pins A4 and A5 of the Arduino NANO or pro mini.
by: ELECTRONOOBS on 2026-05-26
All the prices are low due to China purchase. It's up to you wait or not.
1. One Arduino NANo or pro mini (small size) (2€-3€) LINK eBay
2. One i2c module (1€-2€) LINK eBay
3. One LCD 16x2 module (2€-3€) LINK eBay
4. Serial TTL/FTDI FT232RL module (Just in an Arduino pro mini case) (2€-3€) LINK eBay
5. 9V battery (2€)
6. Wires, conectors, solder, soldering iron... (0€)
Connections!
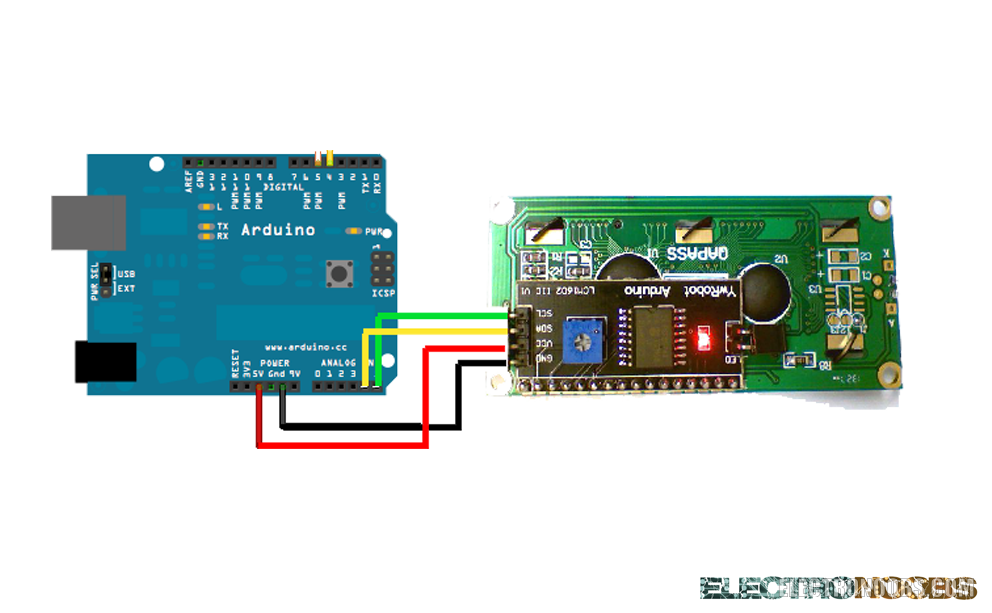
First of all we connect i2c pins module as shown in the schematic. Power the LCD module to 5 volts and connect the ground as well. The SDA pin of the i2c module conected to arduinio A5 and the SCL pin to A4. We connect the arduino to USB and we are ready to program. In order to make the LCD work we need to inport the LCD library for arduino.
/* http://www.electronoobs.com */

/*-----( Inport library )-----*/
#include <Wire.h>
#include <LiquidCrystal_I2C.h>
//i2c pins
LiquidCrystal_I2C lcd(0x27, 2, 1, 0, 4, 5, 6, 7, 3, POSITIVE); //

void setup()
{
//WE define our LCD 16 columns and 2 rows
lcd.begin(16,2);
lcd.backlight();//Power on the back light
//lcd.backlight(); Power off the back light

}

void loop()
{
//Write your text:
lcd.setCursor(0,0); //we start writing from the first row first column
lcd.print(" ELECTRONOOBS"); //16 characters poer line
delay(1000);//Delay used to give a dinamic effect
lcd.setCursor(0,1);
lcd.print("Thanks, share");
delay(8000);

lcd.clear();//Clean the screen
lcd.setCursor(0,0);
lcd.print(" How r U?");
lcd.setCursor(0,1);
lcd.print(" ELECTRONOOBS");
delay(8000);
}Comments

Leave a comment
Please login in order to comment.