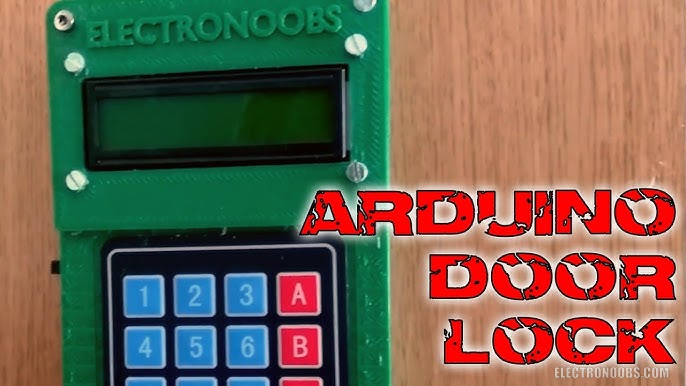
This should be a cool and easy project. We will conect a small thin Keypad that I've bought from eBay for less than 70 cnts to one Arduino microntroller.
by: ELECTRONOOBS on 2026-05-26
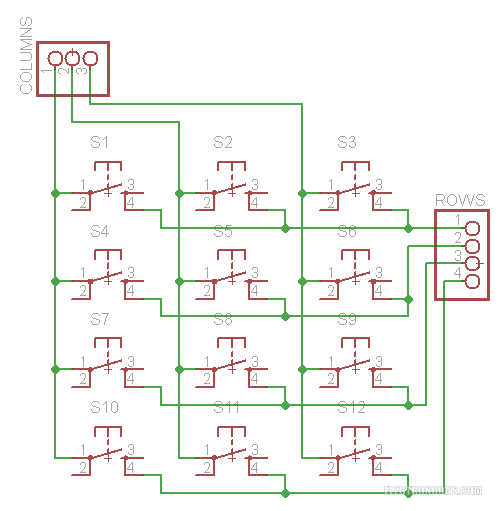
You could use any Arduino boar that you want. Using the KeyPad library we will be able to read each of the 16 buttons that this keypad has using just 8 pins of the arduino. The library use is simple. Normally we shoud use two pins for each button to be able to detech esch push. But this library uses 4 pins for columns and 4 pins for rows for this 4x4 keypad. The library is non-blocking which means you can press and hold the key all day long and your Arduino will continue processing the rest of your code. Consider, though, when you are writing your code that every delay() you use will take processing time away from the keypad. Something as short as delay(250) can make the keypad seem very unresponsive. And the same thing will happen if you sprinkle a bunch of delay(10)'s all through your code. The function getKey() returns a key value as soon as you press the key but it does not repeat automatically. Also, when you release the key you can track the key RELEASED event if you are using the eventListener feature of the library.
Now that we know how this keypad should work we can take a look at our schematic. So we will connect this keypad to digital pins D2 to D9 of the microcontroller. We will have a simple code that will read each inserted character in order to create our password. If the password is OK, a servo connected to pin D10 will spin in order to slide a door lock. If not, an error will show up and we have to try again. We also connect a buzzer to pin 11 in order to give sound error signals as well. A push button will be connected to dgital pin D12 and this button will be placed inside of the room. This button will open the door from inside for "emergency" exit. Another push button connected to pin D13 will close the door from inside of the room. Let's take a look at the schematic first.
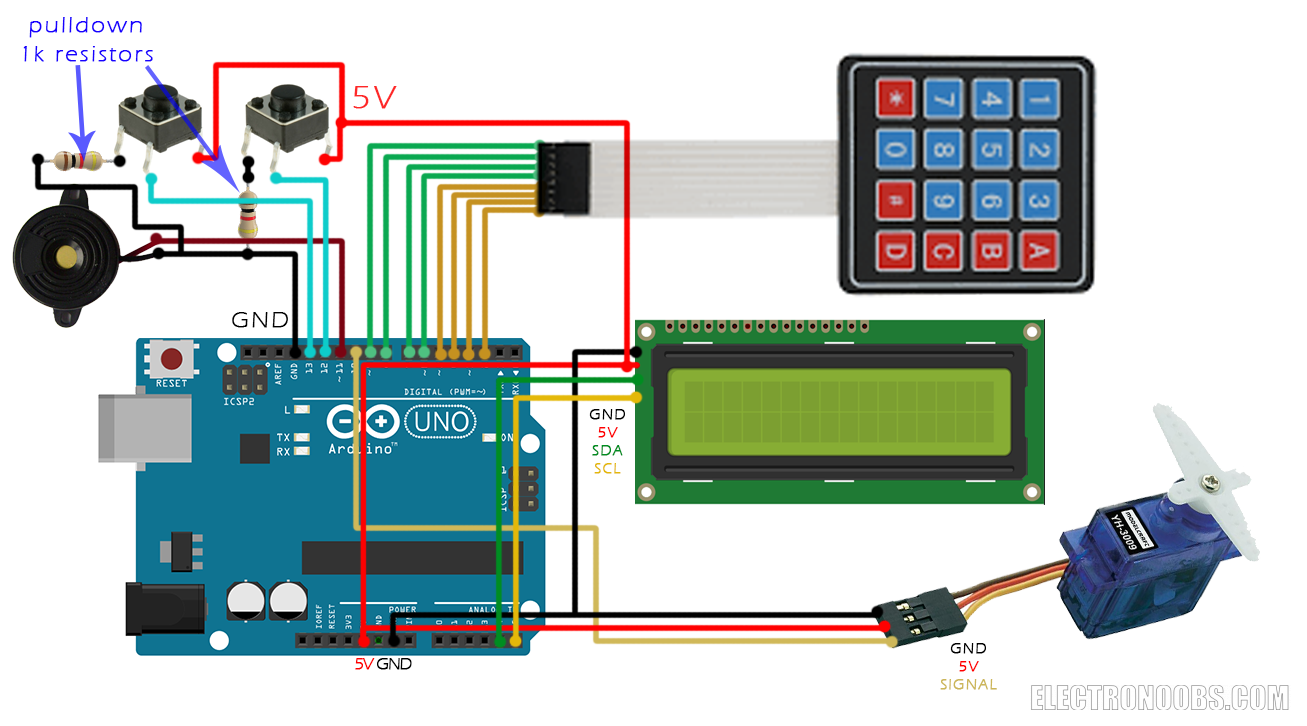
Remember that to any push button that we add we have to give it a pullup or pulldown resistor. In this case I want to detect HIGH state of the button and that means that the button will normally be in the LOW state. For that we add a 1k ohm resistor from the push button output pin to ground. We supply 5 volts to the oposite pin. In this way every time that the button is pushed we detect a 5 volts voltage which representes a HIGH digital read. Connect the Keypad as shown in the schematic. Also connect the LCD data and clock pins to analog pins A4 and A5. Supply 5V and GND to the servo motor and connect the signal pin to D10 of the microcontroller. All we need now is to upload the next code and pue everything togheder in a case and install the system to the door. Remember, in order to use this i2c LCD module you have to install the i2c liquid crystal library to the Arduino IDE. Download it from the link below.
If you press a key and the LCD prints another, that means that your ROW and COL pins are inverted or so... Make tests and edit your "hexaKeys[ROWS][COLS]" to match your KEYPAD.
#include <Wire.h>
#include <LiquidCrystal_I2C.h>
#include <Servo.h>
#include <Keypad.h>

LiquidCrystal_I2C lcd(0x3f, 20, 4);
Servo myservo;

// Variables & Pins
int mot_min = 90;
int mot_max = 180;
int character = 0;
int activated = 0;
char Str[17] = "      -***      "; // 16 chars + null terminator

int buzzer = 11;
int external = 12;
int internal = 13;

// Keypad Config
const byte ROWS = 4;
const byte COLS = 4;
char hexaKeys[ROWS][COLS] = {
  {'1','4','7','*'}, {'2','5','8','0'}, {'3','6','9','#'}, {'A','B','C','D'}
};
byte rowPins[ROWS] = {5, 4, 3, 2};
byte colPins[COLS] = {9, 8, 7, 6};
Keypad customKeypad = Keypad(makeKeymap(hexaKeys), rowPins, colPins, ROWS, COLS);

void setup() {
  Serial.begin(9600);
  myservo.attach(10);
  pinMode(buzzer, OUTPUT);
  pinMode(external, INPUT);
  pinMode(internal, INPUT);

  lcd.init();
  lcd.backlight();
  resetSystem();
}

void loop() {
  // Emergency / Inside Buttons
  if (digitalRead(external)) {
    openDoor("INSIDE  OPEN");
  }

  if (digitalRead(internal) || (activated == 2 && customKeypad.getKey() == 'B')) {
    resetSystem();
  }

  // Keypad Logic
  char customKey = customKeypad.getKey();
  if (customKey && activated == 0) {
    Serial.println(customKey);

    if (character < 5) {
      Str[6 + character] = customKey;
      character++;

      if (character < 5) {
        showScreen("    PASSWORD", Str);
      } else {
        activated = 1; // 5th character entered, lock the keypad to check pass
      }
    }
  }

  // Password Verification
  if (activated == 1) {
    // FIXED: Changed assignment Str[10]='A' to comparison Str[10]=='A'
    if (Str[10] == 'A' && character == 5 && Str[6] == '3' && Str[7] == '0' && Str[8] == '0' && Str[9] == '7') {
      openDoor("ACCEPTED");
    } else {
      showScreen("PASSWORD ERROR", "   TRY  AGAIN");
      analogWrite(buzzer, 150);
      delay(3000);
      analogWrite(buzzer, LOW);
      resetSystem();
    }
  }
}

// --- HELPER FUNCTIONS FOR EFFICIENCY ---

void showScreen(const char* line1, const char* line2) {
  lcd.clear();
  lcd.setCursor(0, 0); lcd.print(line1);
  lcd.setCursor(0, 1); lcd.print(line2);
}

void playBuzzer() {
  int tones[] = {240, 200, 180, 250};
  for (int i = 0; i < 4; i++) {
    analogWrite(buzzer, tones[i]);
    delay(250);
  }
  analogWrite(buzzer, LOW);
}

void resetSystem() {
  myservo.write(mot_min);
  activated = 0;
  character = 0;
  strcpy(Str, "      -***      ");
  showScreen("    PASSWORD", Str);
}

void openDoor(const char* initialMsg) {
  myservo.write(mot_max);
  showScreen(initialMsg, "");
  activated = 2;
  playBuzzer();
  delay(1000);

  showScreen("    WELLCOME", "  ELECTRONOOBS");
  delay(1000);
  showScreen("   DOOR  OPEN", "  ELECTRONOOBS");
}
So, upload this code. The "customKeypad.getKey()" function will read the pressed key. The function will read just one key at a time and if you keep pushing the button it won't start reading more keys. You can see in the code that first we use the "internal" and "external" pins to open/close the door using the two push buttons. Then we read the pressed key and start editing the password "characters". When the all the 4 charracters were inserted we check if those are the same as the one that we want. If they are we open the door with the servo. If not, we give an error.
To change your password just go to the line from the photo below and change each of the four Str values. In this example the password is 3007. The "A" character will be the "OK" and the "B" will be the "close".
Now that everything is ready, turn on the Arduino and start typeing your password. Press "A" for OK when all the 4 characters were inserted. To close the door press "B". I hope you'll enjoy this tut.
Comments


Leave a comment
Please login in order to comment.