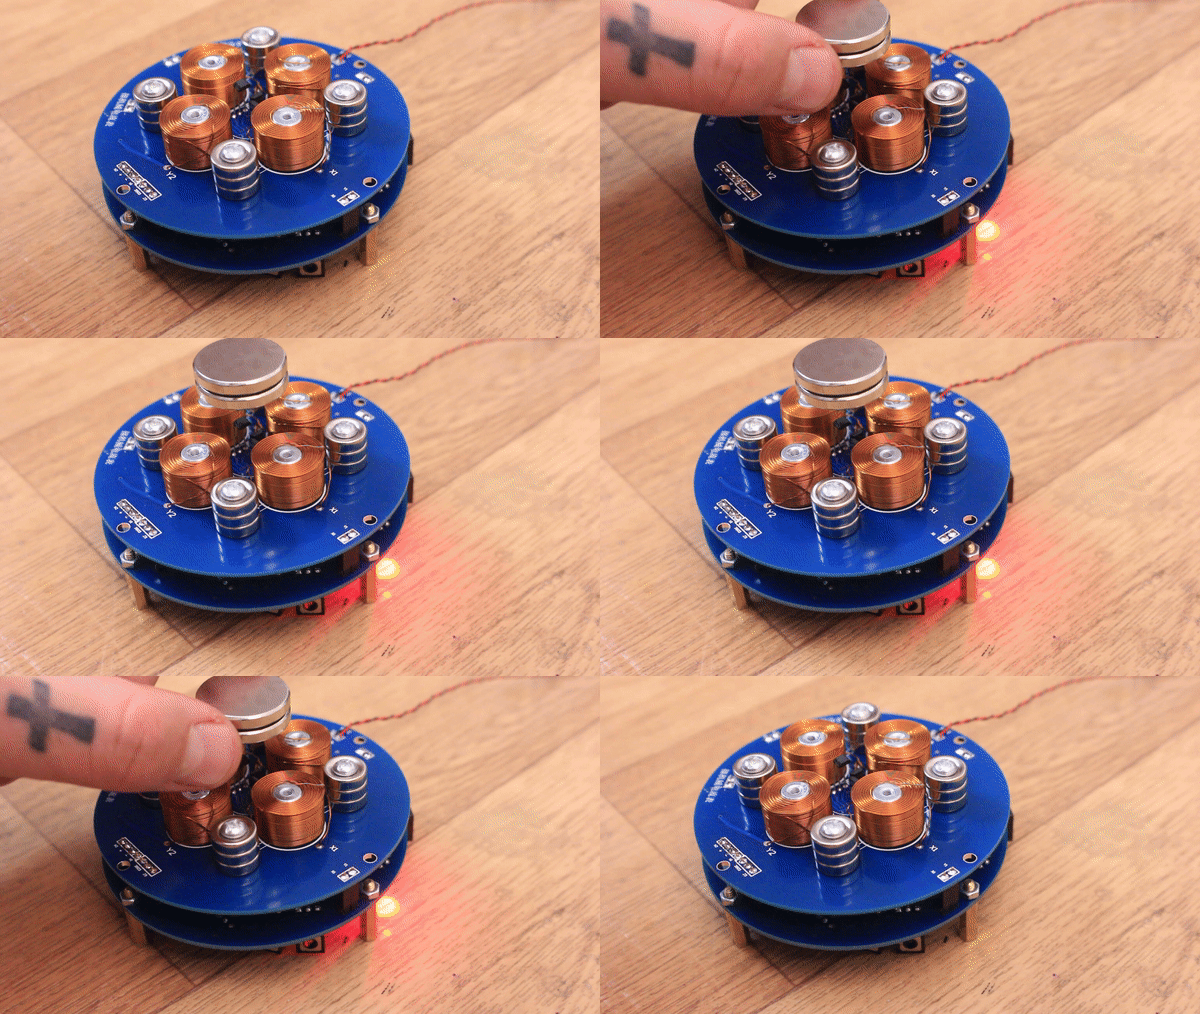

Now I connect both parts together. Then I connect some wires and apply 12V at the input and also add the jumpers for those male pins. Now the module is powered on but you will see that the LED will turn on only when it detects the levitation magnet. So, put close in the center the big magnet and you will see it will stay in the air. If the magnetic force will push that to the sides, just use the potentiometers to adjust the gain for the X or Y axis and by that center the magnet better. It's so awesome to see the magnet floating in the air.

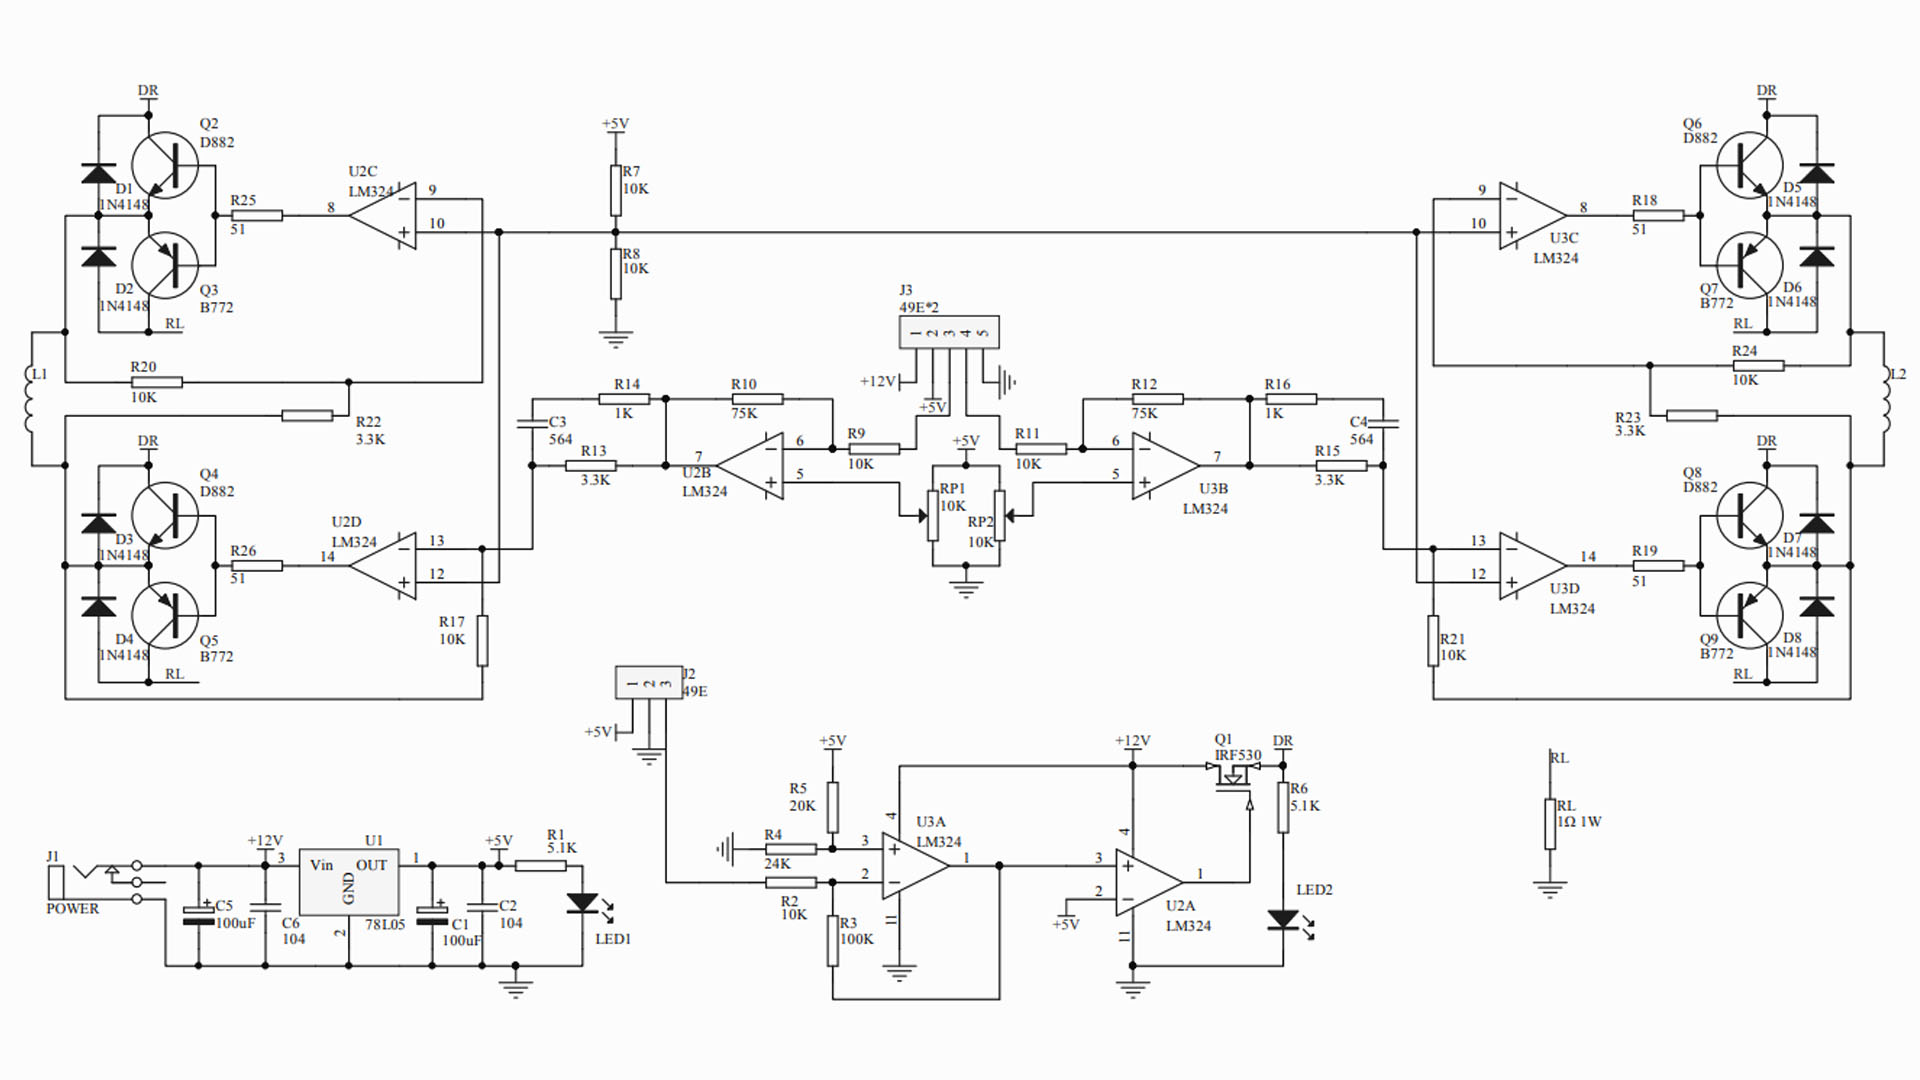
So, the kit works with no problems. You might need to adjust the potentiometers and the position of the hall sensors to be perfectly aligned. The circuits works quite well. All is done in an analog way. There are no microcontrollers. The signal from the Hall sensors is amplified with the OPAMPs and then applied to the transistors. If the magnet is too much to the left, the sensor detects that, gets amplified and increases the magnetic field inside the left coil so the magnet gets pushed back to the center and so on... But now let's get the circuit.
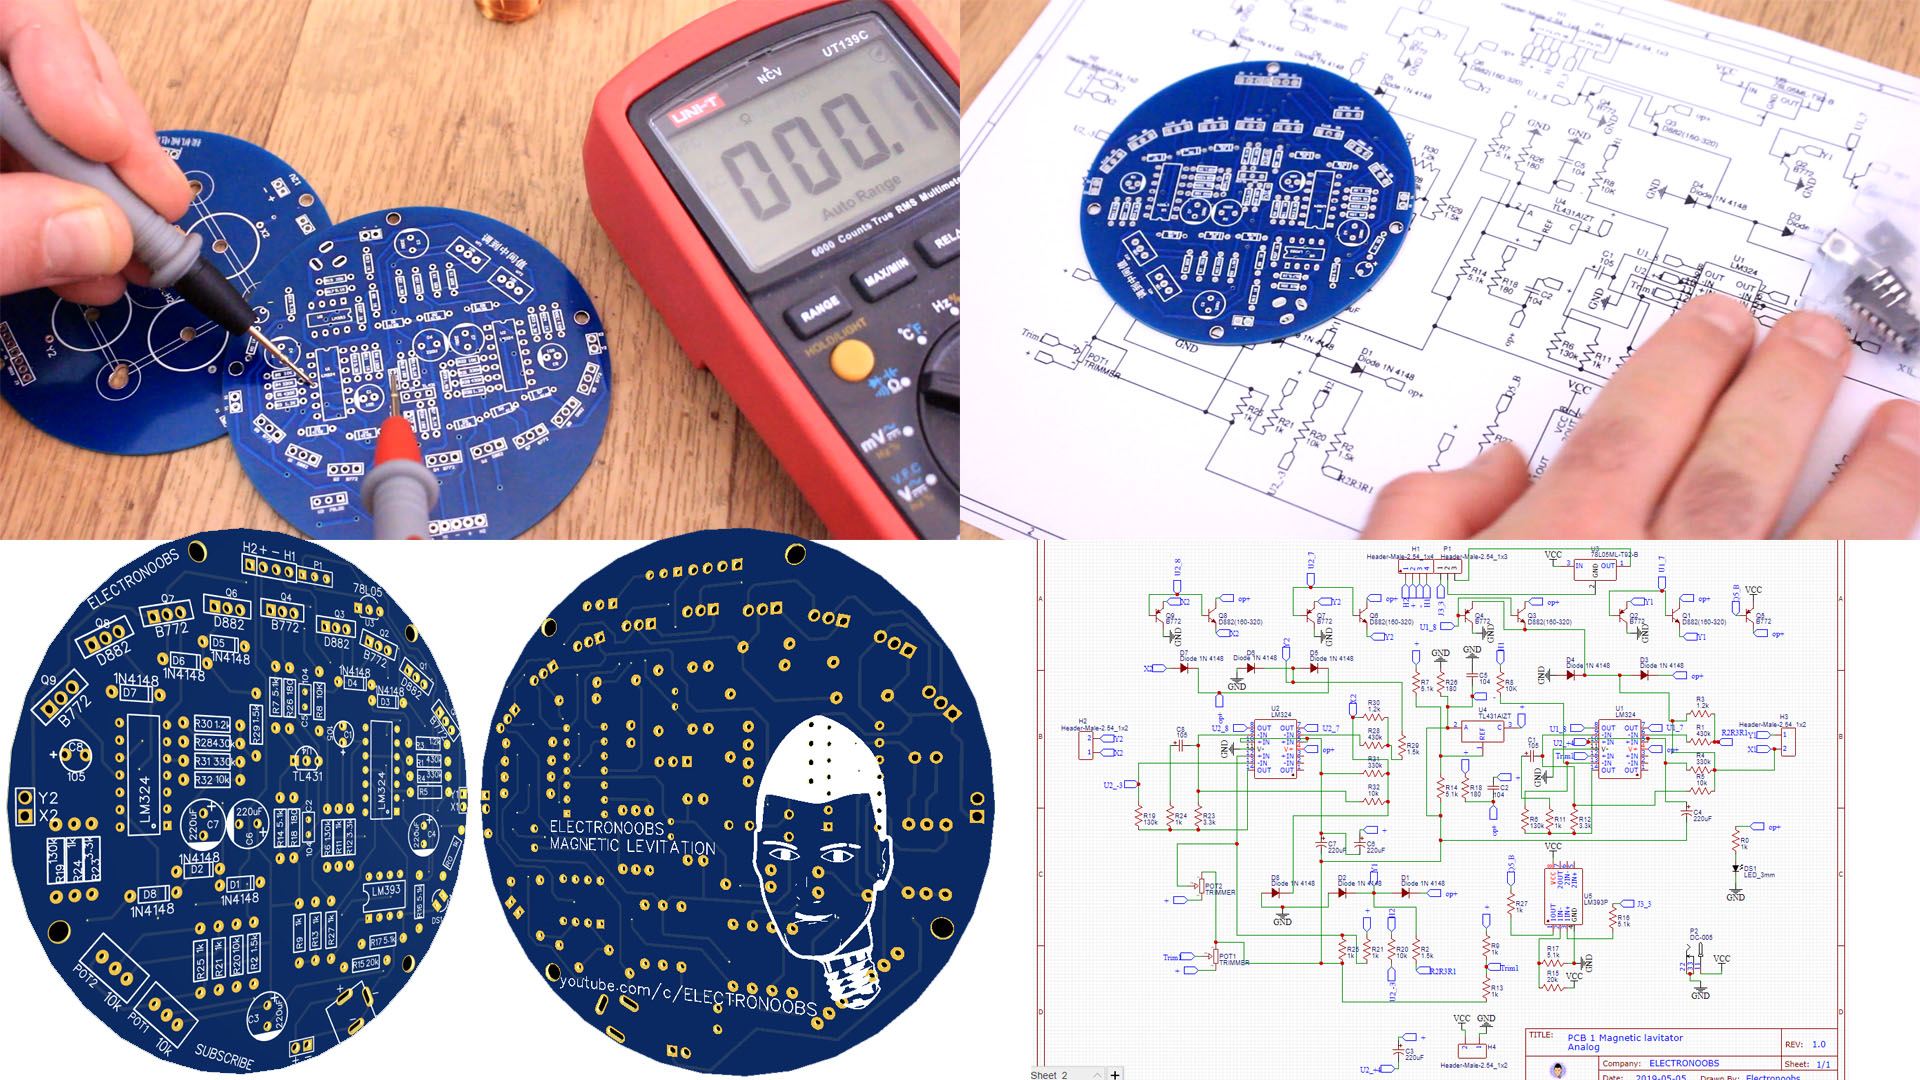
I get the PCB and start testing each pad for connections. After hours of routeing, I finally had the entire circuit. You can download that from below and also get tge GERBER files for the PCB or see the EasyEDA project if you need to make your own board and give it the shape you want. The scheamtic is a bit chaotic but coul be understood. For the PCB I've made it in the same round shape and with the same size as the kit PCB. You need both PCBs to complete the kit and you could get them both from below.

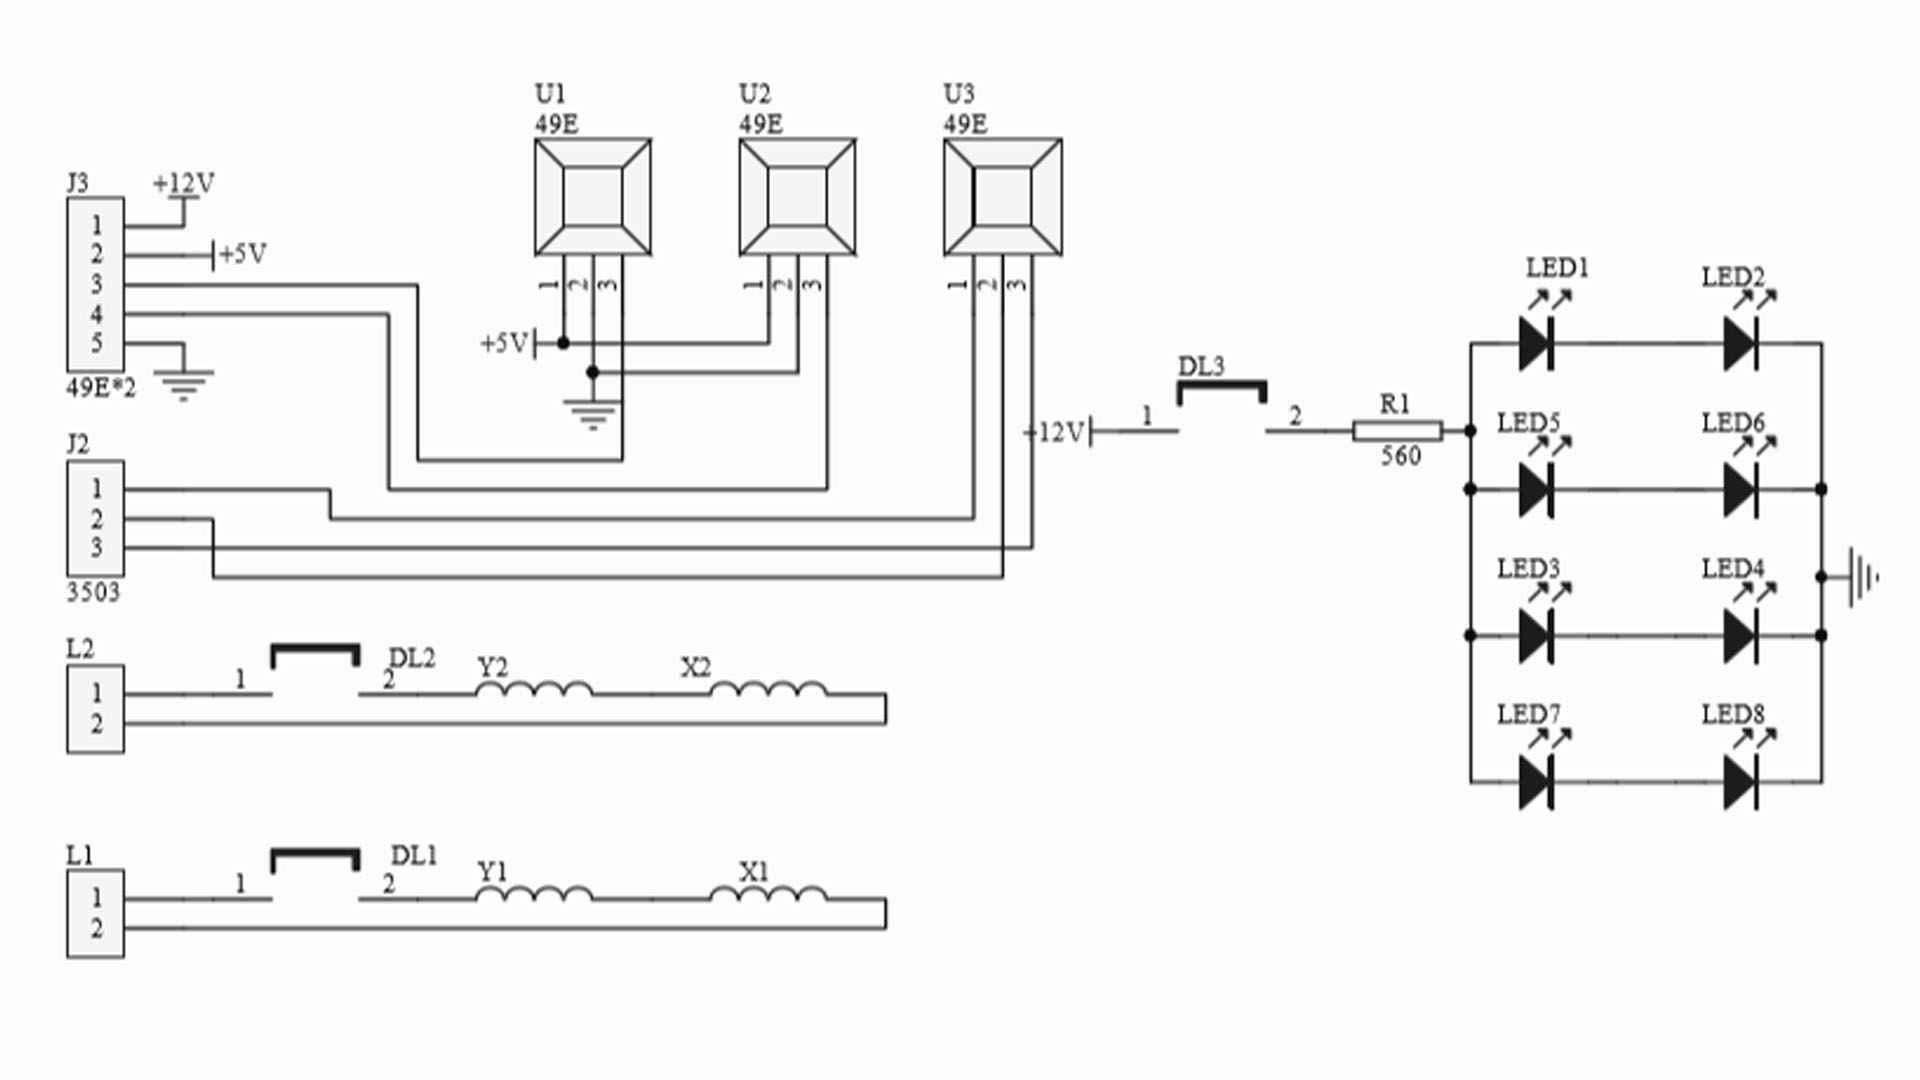
Below you have the schematic for the components PCB. Follow all the values on the schematic and solder those to the PCB. You also have the EasyEDA project below if you want to make a copy and make your own board. I hope this circuit will help you. On the EasyEDA project you have both schematics and PCBs.
I get the PCB and start testing each pad for connections. After hours of routeing, I finally had the entire circuit. You can download that from below and also get tge GERBER files for the PCB or see the EasyEDA project if you need to make your own board and give it the shape you want. The scheamtic is a bit chaotic but coul be understood. For the PCB I've made it in the same round shape and with the same size as the kit PCB. You need both PCBs to complete the kit and you could get them both from below.

