This is a very basic tutorial and there are already a lot of guides on how make something like this. But, since this is part of a future project (electric longbaord), well I'm doing this first step and show you how to connect the batteries, add charging protection. I'll use some Samsung INR18650 li-ion batteries connected in series and parallel, add a BMS module and solder everything using nickel strips and a spot welder. So lets see...

Ok, first of all you need to ahve in mind what kind of battery pack you want to make. For that I check the specs of my system. I'll make an electric longboard. The ESCs and the brushless motors maximum voltage is 26V. Since the speed of the brushless motors is also given by the voltage, I want the maximum voltage. Now, I could use LiPo batteries or LiIon batteries. I will use the Samsung INR18650 LiIon batteries. The nominal voltage of these batteries is 3.7V.

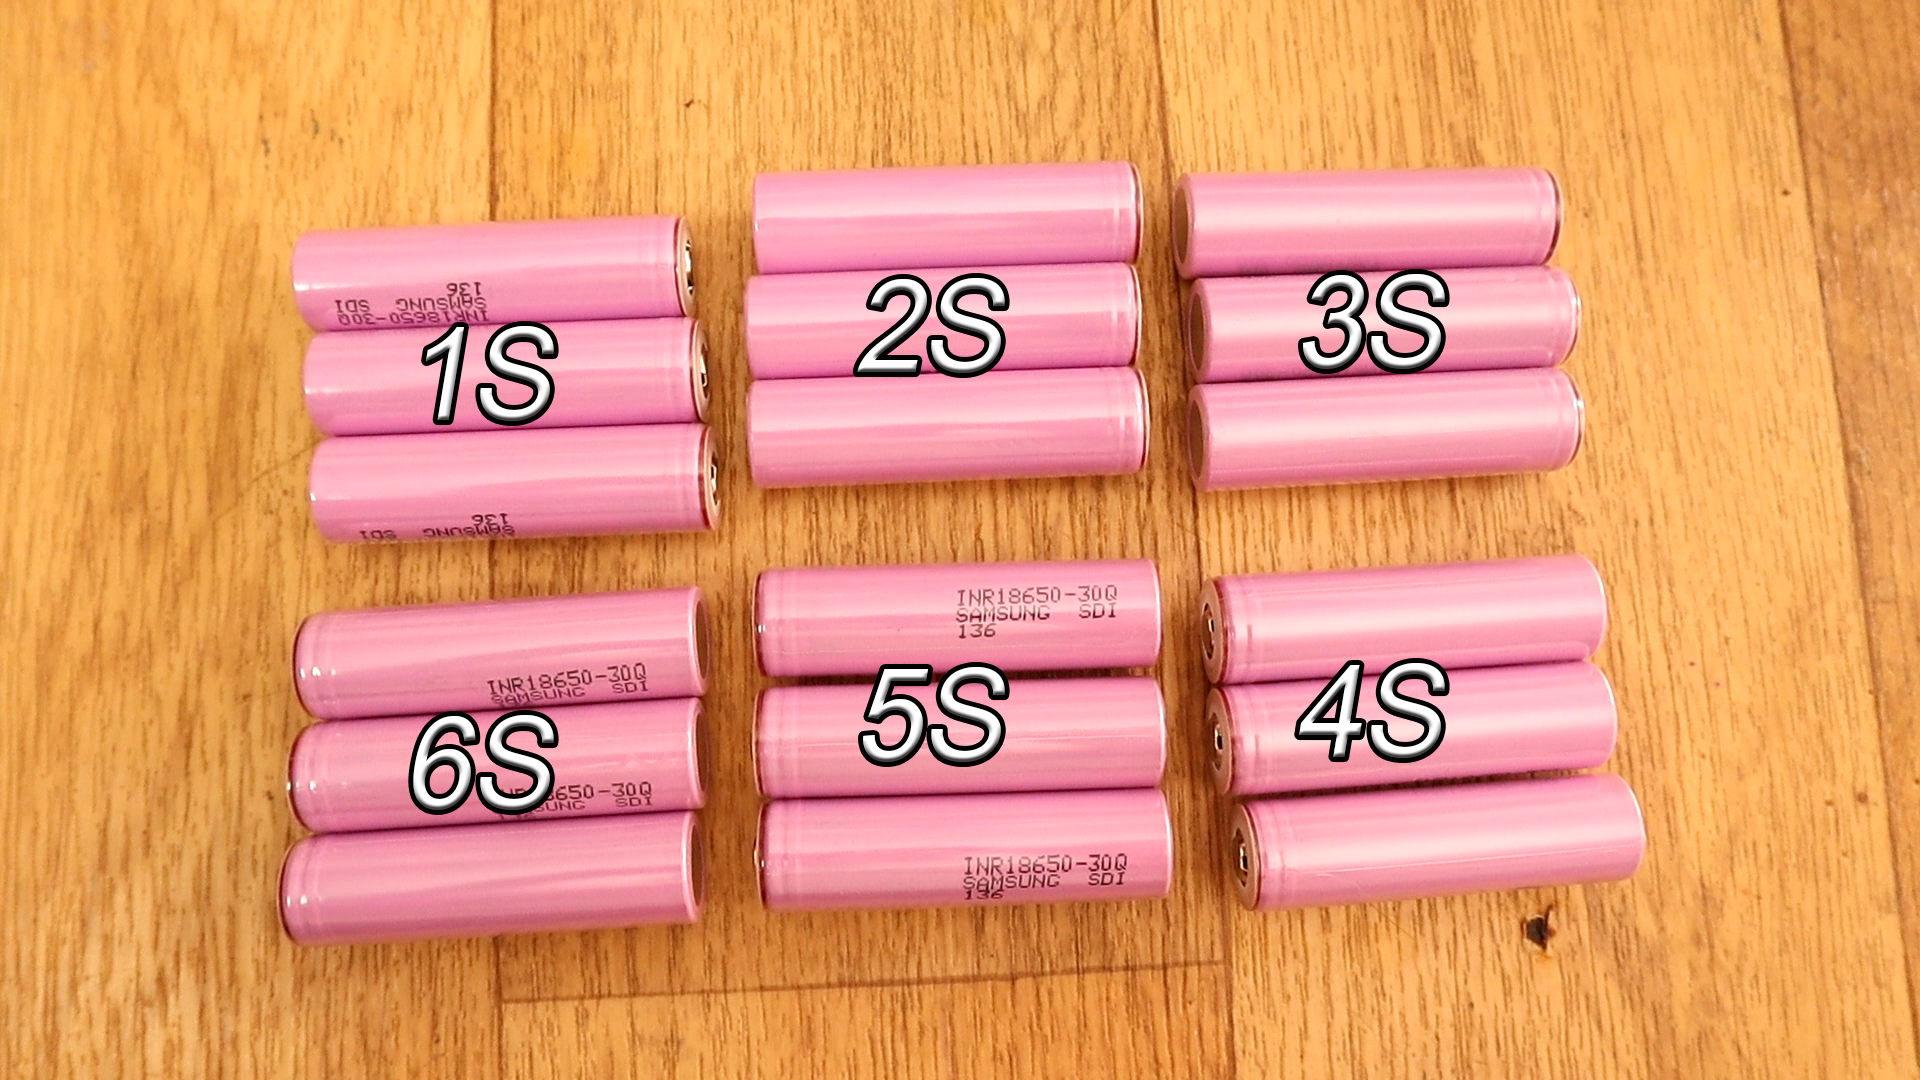
Ok so I want the maximum voltage for my ESCs and motors that is 26V. Each of these batteries have a nominal voltage of 3.7V and a maximum voltage when fully caharged of 4.2. For more check the datasheet of the batteries here on this LINK. So, if I want around 26V, with 4.2V batteries I need 6 abtteries in series and get a total maximum voltage of 25.2V. We know that batteries in series will sum their voltages but have the same capacity and in paralel they sum the capacity but have the same voltage.

Ok, now we know we need 6 batteries in series. But what about capacity. Each of this 7INR18650 have a capacity of 3000mAh. That means it could deliver 3A for an hour or 1A for 3 full hours. But that value is not always perfect. I want more capacity so, in addition to having 6 batteries in series, each of these batteries will actuall be a pack of 3 batteries in parallel. So I will have 6 packs in series of 3 x 4.2V batteries in parallel and that will give me a total of 25.2V and a capacity of 9000mAh.
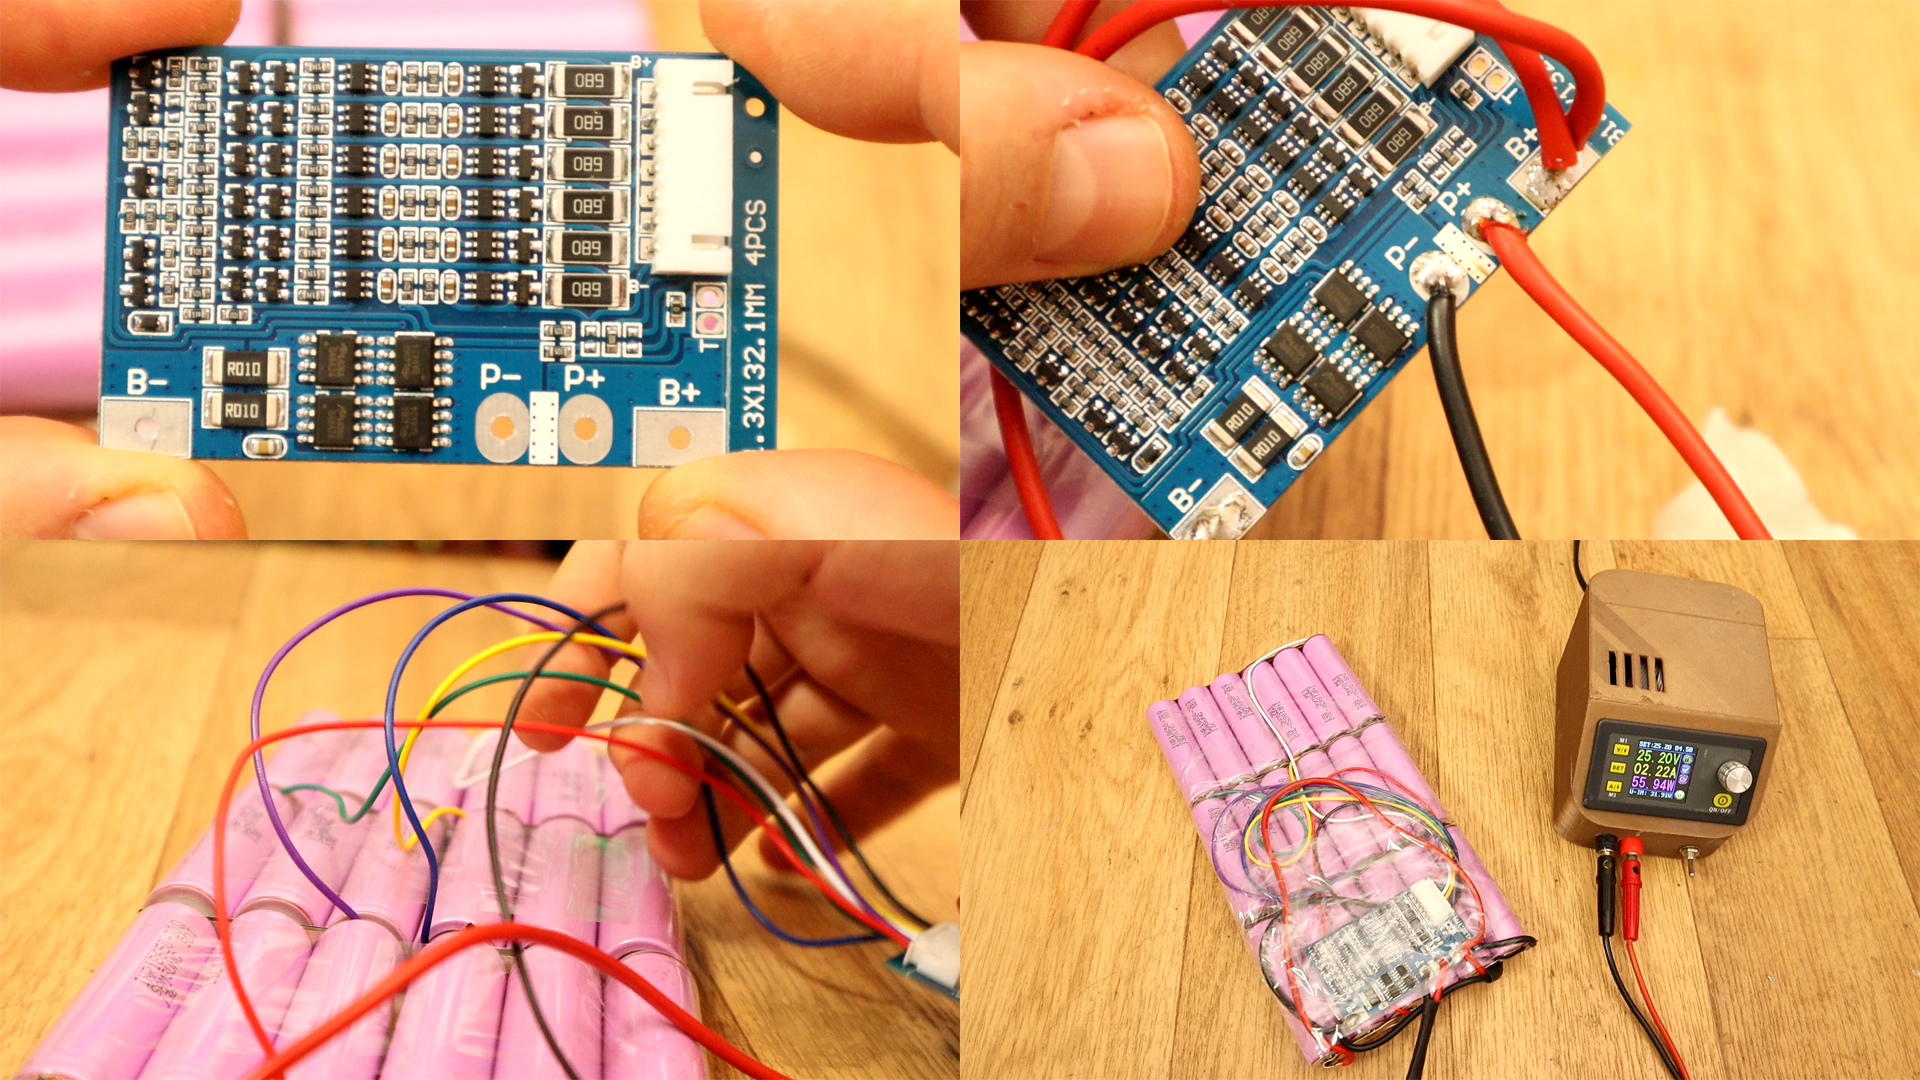
To charge the batteries, the manual recommends a CC and CV or better said constant current and constant voltage. So, if I put my pwoer supply to 25.2V and 4.5A the batteries will get charged. But that will damage the batteries over time since one battery could get charged faster than others. For taht we need a balanced charging process. We need a battery management systemm or BMS. Use the schematic below to connect the BMS to the batteries.
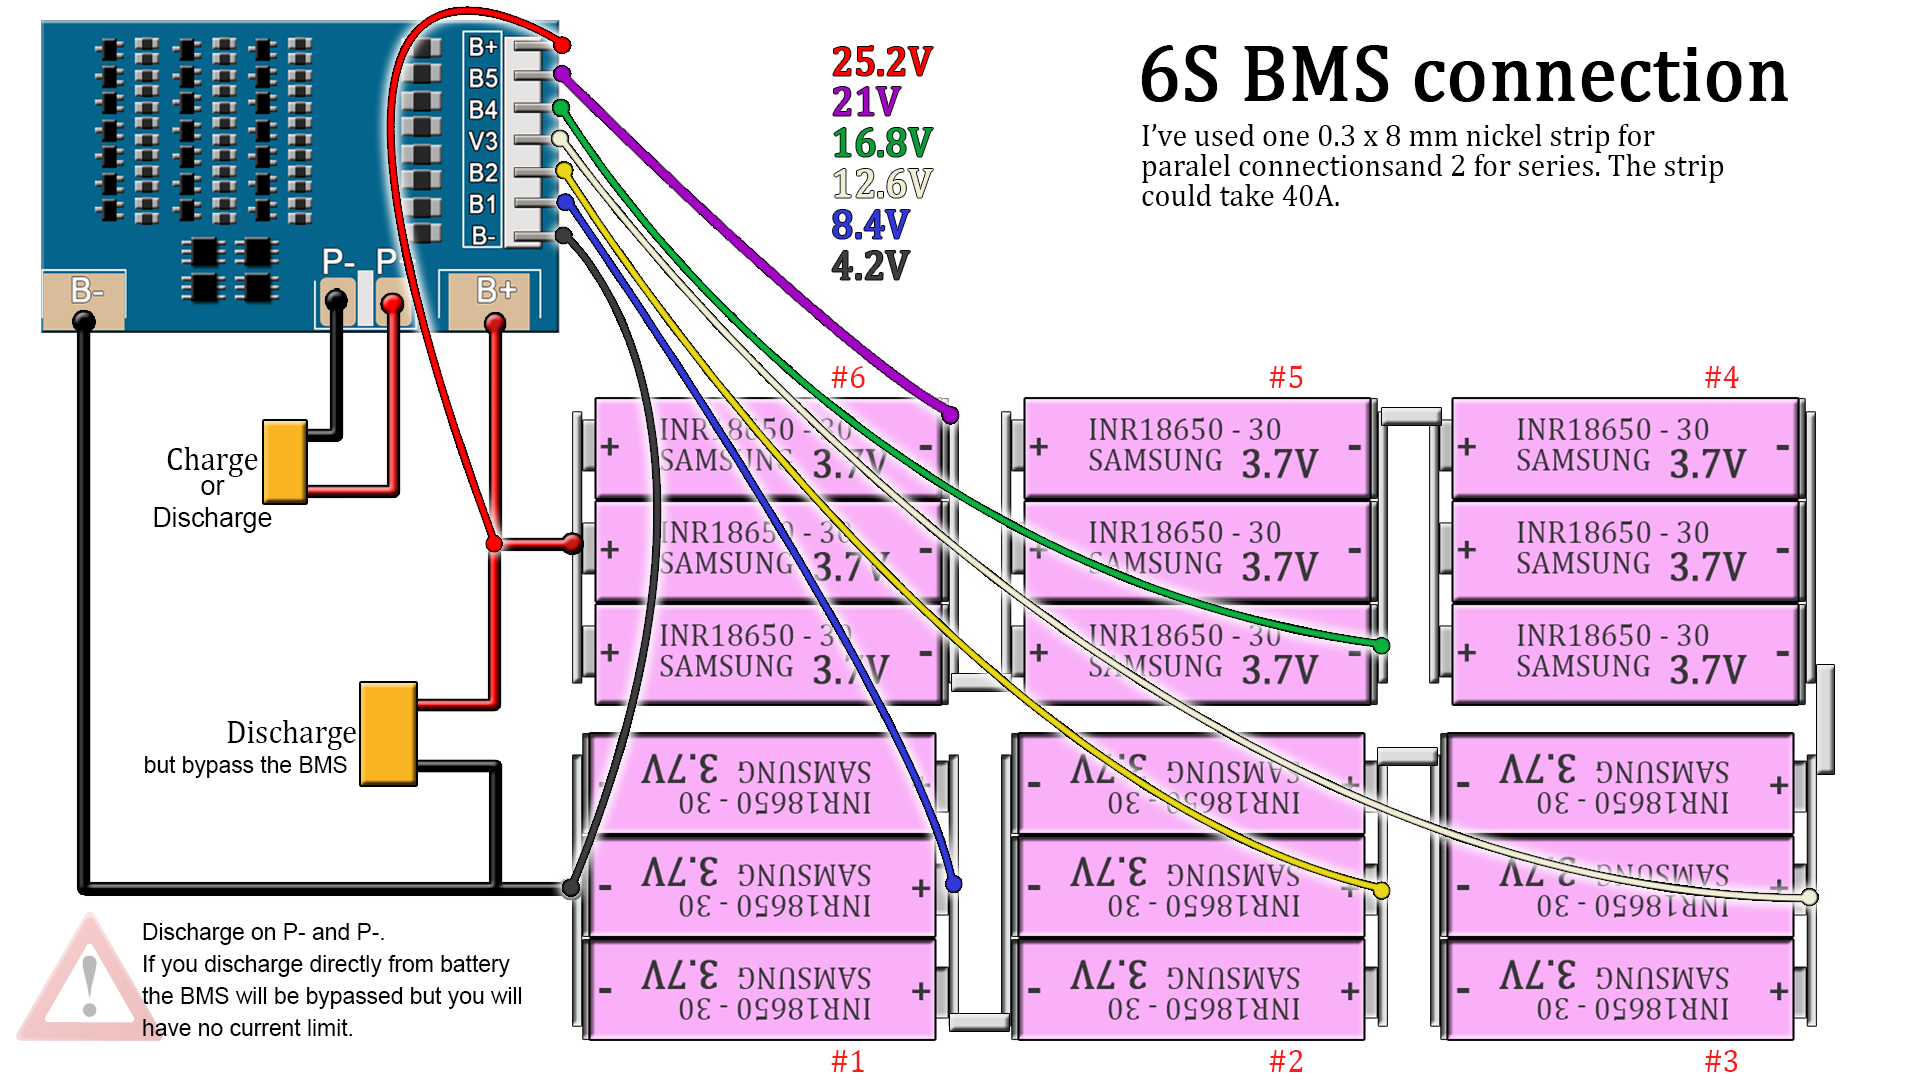
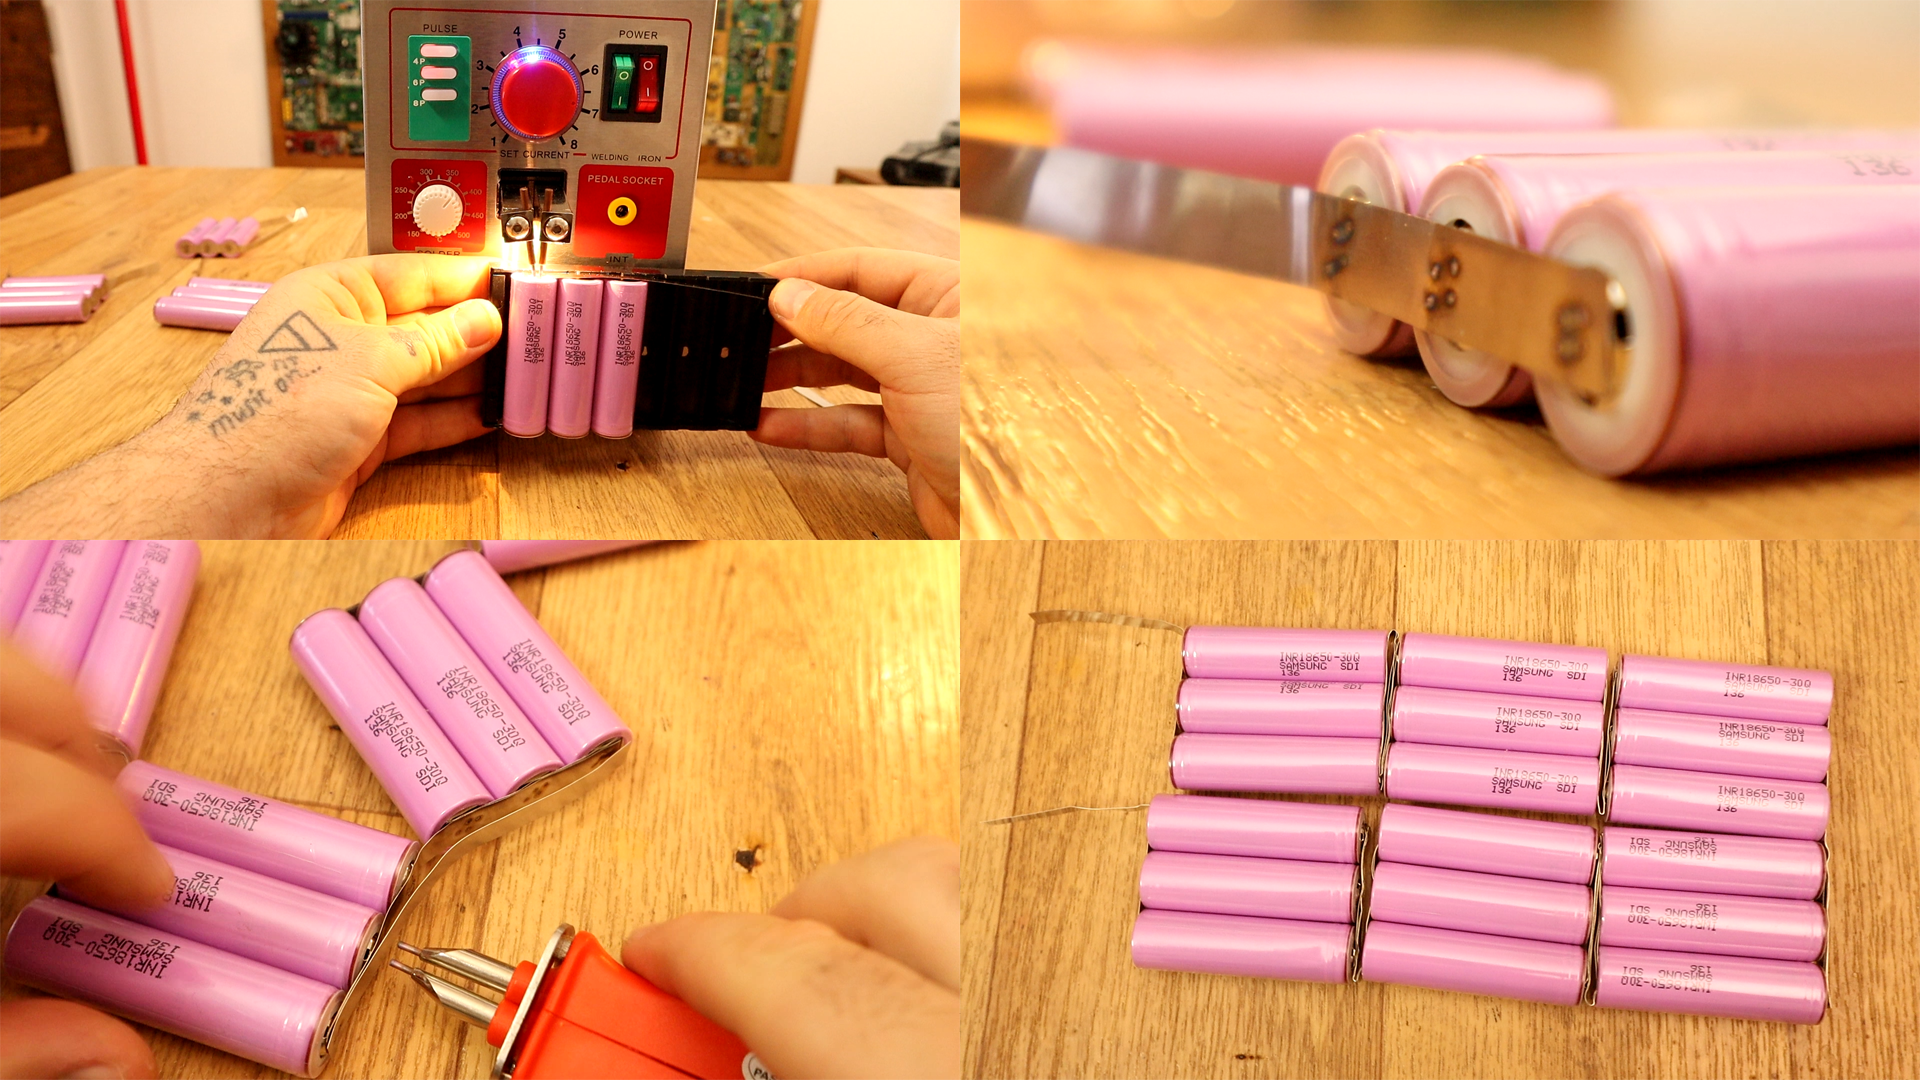
As you can see, to charge the pack we have one connector that goes to the BMS but the discharge is directly from the batteries. You have to connect each o f the 7 wires to eack pack. We start with the B- cable (black) connected to the negative side of the 6S pack. Then we connect B1 to 3.7V, B2 to 7.4 and so on till we get to B+ connected to 22.2V. To weld the batteries together I've used nickel strips. See how much current could the strip withstand. In my case I've used 8mm widt and 0.3mm thickness strips that could withstand 40A. But to be sure, I've welded 2 strips one on top of the other.
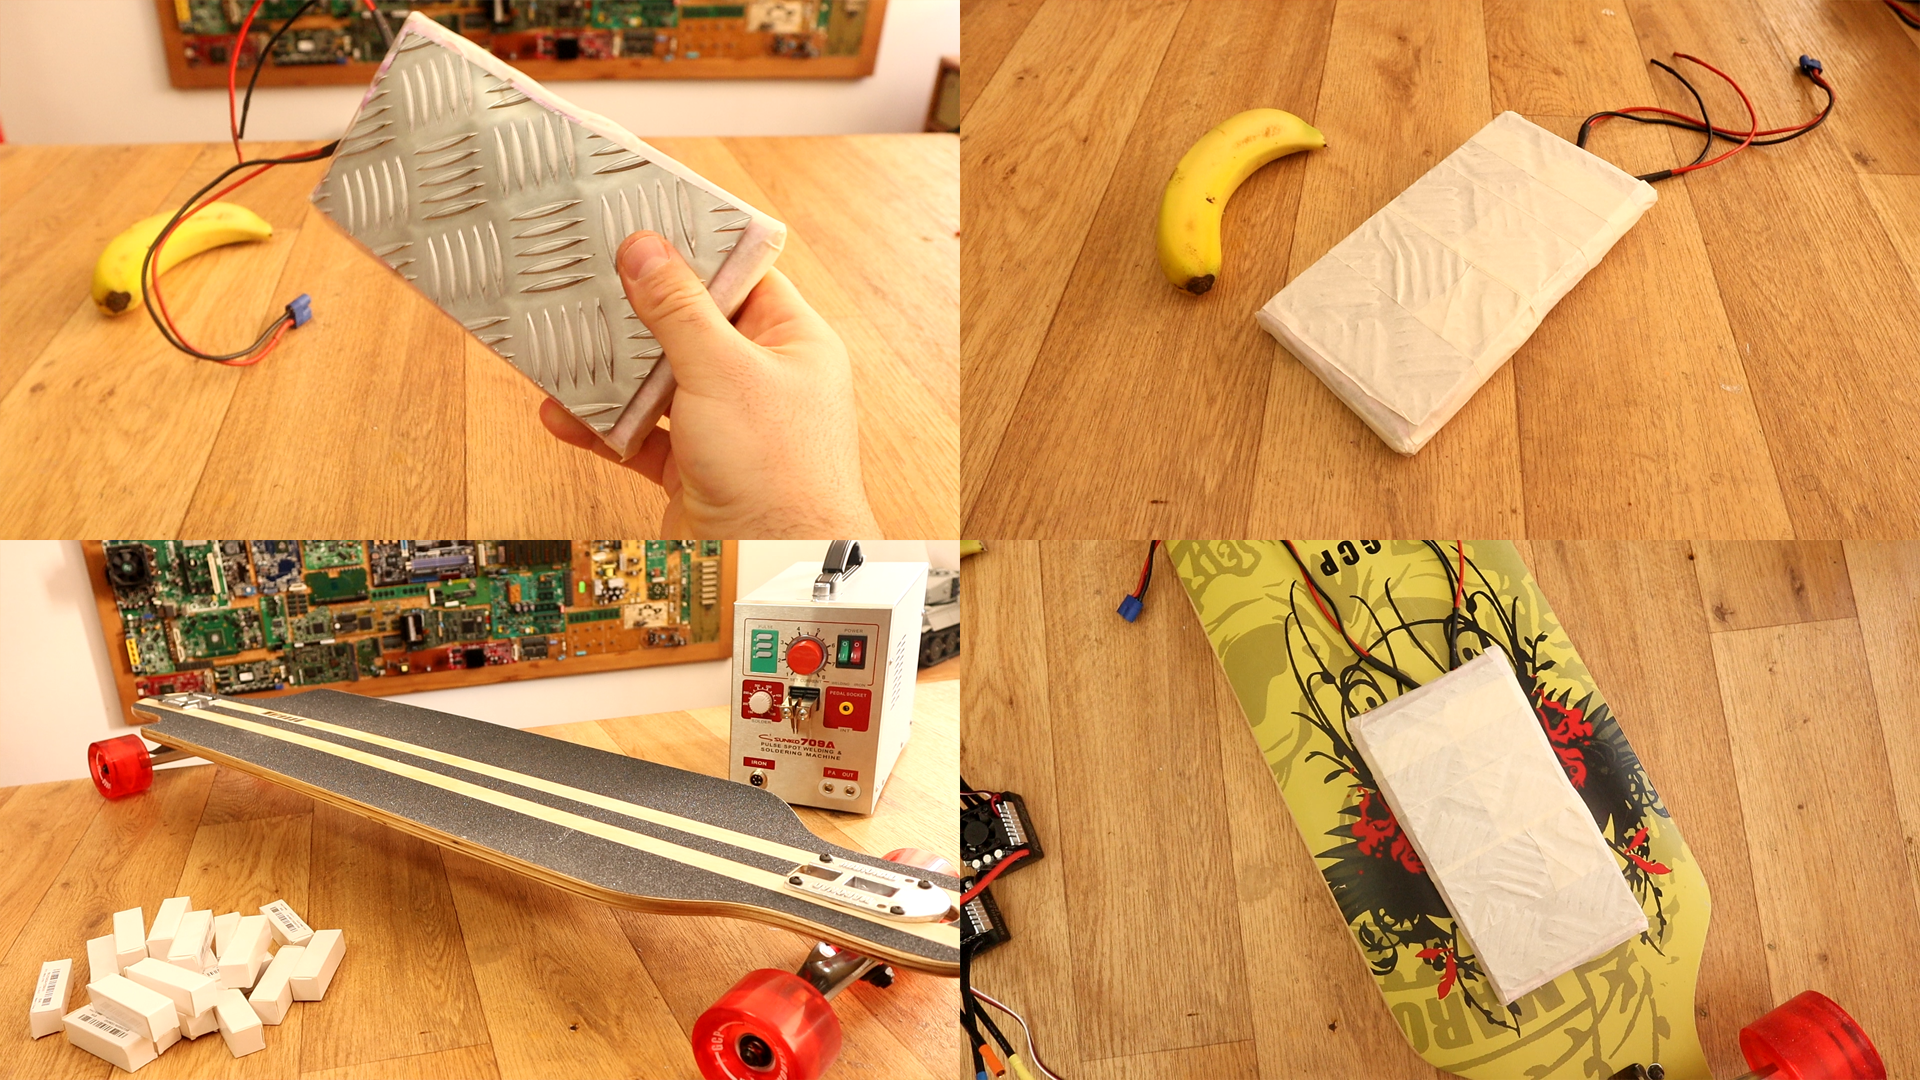
I finally solder the cables from the BMS to each pack. Then I solder thick wires to the input P- and P+ connectors and the main battery B+ and B- just as in the schematic above. I wrap the pack in some tape and I charge it to 25.2V. After a few hours the battery is full. That's it. Extra, I glue a metal plate on the bottom side of the battery pack that will act as a heat dissipator but also keep the batteries together.
And that's it. That's how I've made a battery pack of 6S: 25.2V and 9000mAh for my electric longboard project. Soon, I'll post more, maybe I will cahnge the BMS to a better one. Stay tuned for the longboard project. Thank you.