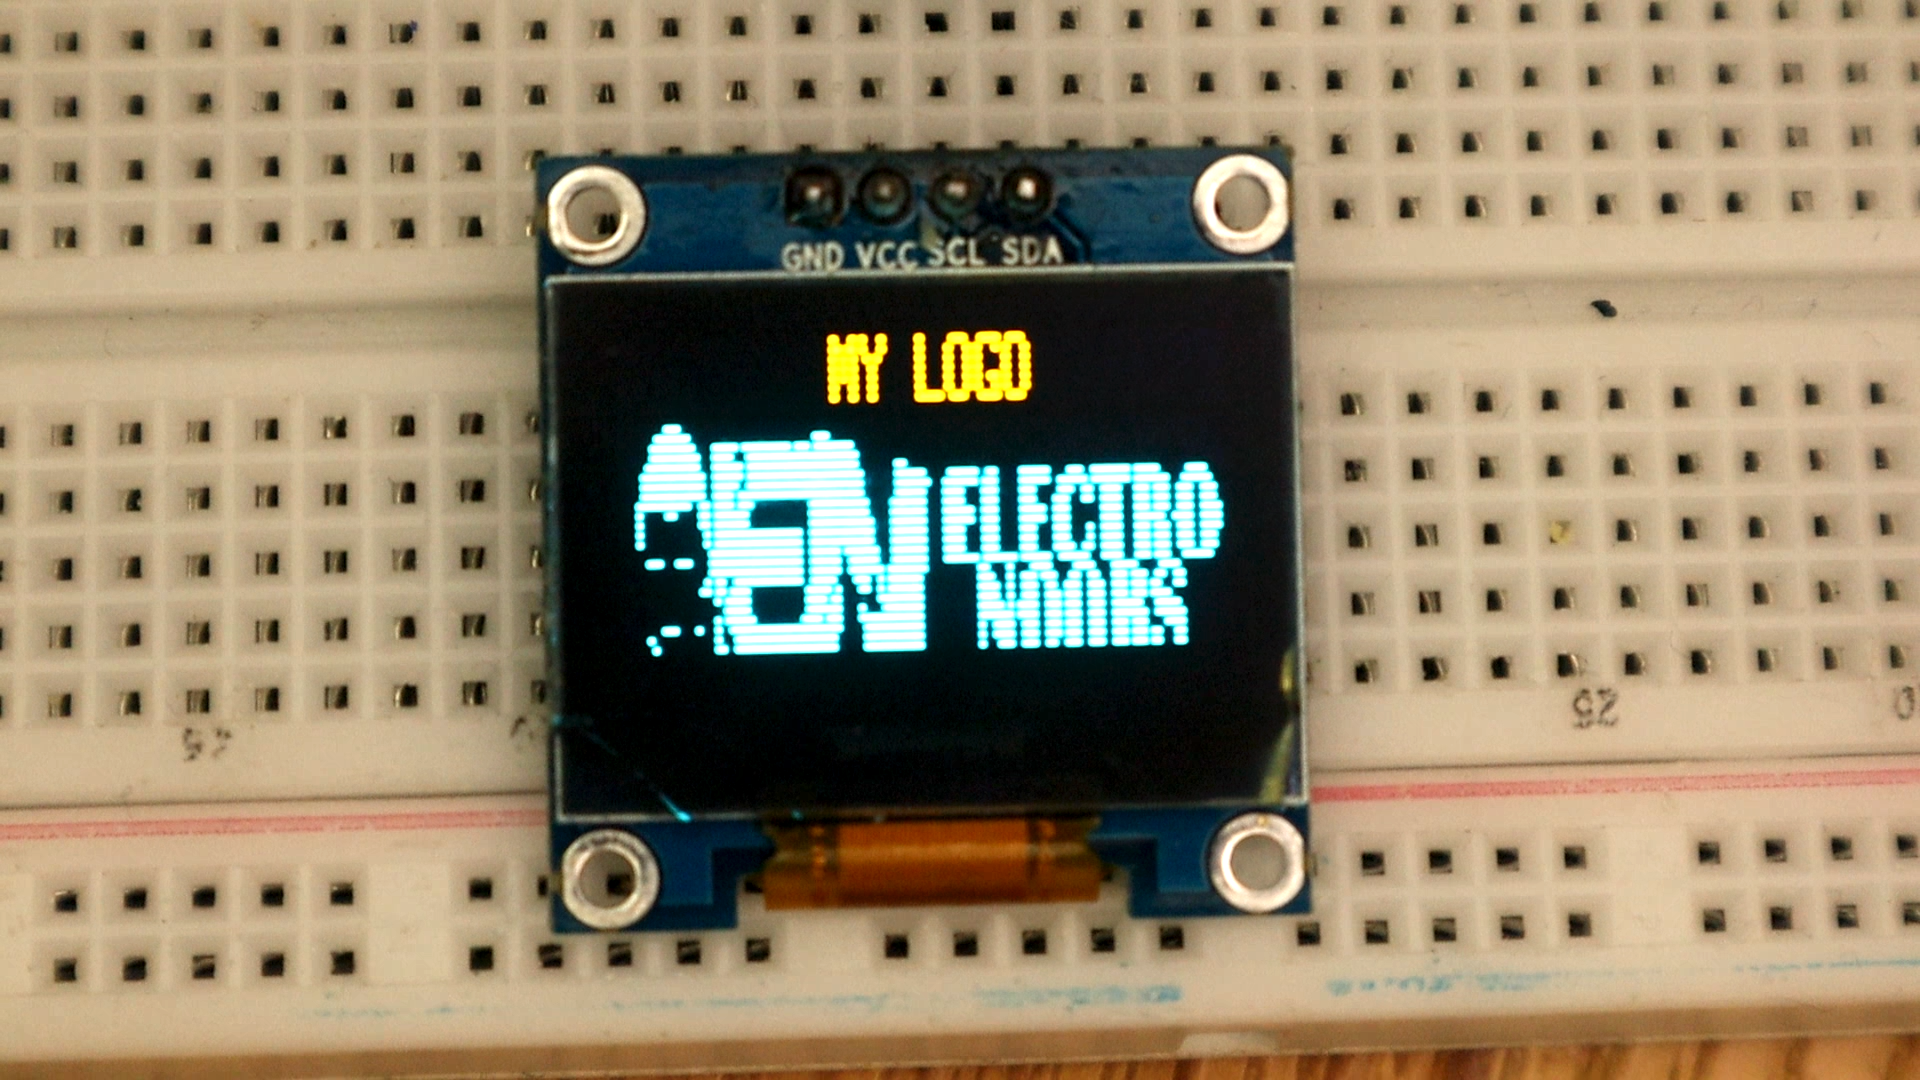

This is a very short example. How to wire up an I2C oled display to the arduino using i2c communication and then display text, numbers, some special cahracters but also some unique logos made with the image2LCD software. Below you have the schematic you need and an example code. Remember to install the i2c OLED librarie below. Read the comments in the code for more or leave a question below.
First, you need an i2c OLED display like this one on this link. This display needs only 2 pins, SCL and SDA which are clock and data.

Ok, make the i2c connections from the Arduino to OLED display as below. The i2c pins of the arduino are A4 for data (SDA) and A5 for clock (SCL). Connect those pins and supply 5V and GND and that's it. Next, download the libraries from below, and uplaod the example code.
First of all, you need the Adafruit_GFX library and Adafruit_SSD1306 in order to work. For that, go below and downlaod those libraries. They will be a in two .zip files. Open Arduino IDE and go to sketch, include library, add .zip library and select the downlaoded files one by one. Now the libraries are installed. You could downlaod the example code or just copy/paste it from below.
/*  OLED i2c Arduino example with unique logos
 * Schematic: https://www.electronoobs.com/eng_arduino_tut52_sch1.php
 * Tutorial: https://www.electronoobs.com/eng_arduino_tut52.php
 */


static const unsigned char PROGMEM  LOGO[] =
{
/* 0X00,0X01,0X80,0X00,0X1F,0X00, */
0X00,0X38,0X00,0X00,0X00,0X00,0X00,0X00,0X00,0X00,0X00,0X00,0X00,0X00,0X00,0X00,
0X00,0XFE,0X00,0X00,0X00,0X70,0X00,0X00,0X00,0X00,0X00,0X00,0X00,0X00,0X00,0X00,
0X01,0XFF,0X0F,0XBF,0XF7,0X7F,0X80,0X00,0X00,0X00,0X00,0X00,0X00,0X00,0X00,0X00,
0X01,0XFF,0X8F,0X1F,0XFF,0XFF,0XC0,0X00,0X00,0X00,0X00,0X00,0X00,0X00,0X00,0X00,
0X03,0XFF,0X8F,0XDF,0XFF,0XFF,0XC0,0X30,0X00,0X00,0X00,0X00,0X00,0X00,0X00,0X00,
0X07,0XFF,0XCF,0XDF,0XFF,0XFF,0XE0,0X3F,0X07,0XE6,0X0F,0XC3,0X9F,0XEF,0X81,0XE0,
0X07,0XFF,0XCF,0X9F,0XFF,0XFF,0XE0,0X3F,0X8F,0XEE,0X0F,0XCF,0XDF,0XEF,0XE3,0XF0,
0X07,0XFF,0XCF,0X7F,0XFF,0XFF,0XE0,0X3F,0X0F,0X0E,0X0E,0X0E,0X67,0X8E,0XE7,0X38,
0X0F,0XFE,0X6F,0X70,0X00,0XFF,0XF0,0X7F,0X0F,0X0E,0X0E,0X1C,0X67,0X8E,0XE7,0X38,
0X08,0X30,0X6F,0XE0,0X00,0XFF,0XF0,0X7F,0X0F,0XCE,0X0F,0X9C,0X07,0X8E,0XE7,0X3C,
0X08,0X00,0X6F,0XE0,0X00,0XFF,0XF8,0X7F,0X0F,0XCE,0X0F,0X9C,0X07,0X8F,0XCF,0X3C,
0X08,0X00,0X2F,0XFF,0XFC,0XFF,0XF8,0X7F,0X0F,0X0E,0X0E,0X1C,0X27,0X8E,0XE7,0X3C,
0X08,0X00,0X2F,0XFF,0XFC,0XFF,0XF8,0X7F,0X0F,0X0E,0X0E,0X1C,0X27,0X8E,0XE7,0X38,
0X00,0X00,0X1F,0XFF,0XFC,0XFD,0XFC,0X7F,0X0F,0X0E,0X0E,0X1E,0X67,0X8E,0XE7,0X38,
0X03,0X8E,0X1F,0XFF,0XFC,0XFC,0XFC,0X7F,0X0F,0XEF,0XEF,0XCF,0XC7,0X8E,0XE3,0XF0,
0X00,0X00,0X1F,0XFF,0XFC,0XFC,0XFE,0XFF,0X00,0X18,0X43,0XC1,0XE1,0XF0,0X78,0X00,
0X00,0X00,0X2C,0XFF,0XFC,0XF8,0X72,0XFE,0X00,0X1C,0X4E,0XE3,0X31,0XDC,0XCC,0X00,
0X00,0X00,0X6D,0XE0,0X01,0XF4,0X32,0XFE,0X00,0X1E,0X4E,0X67,0X39,0XDD,0X8C,0X00,
0X00,0X00,0X0B,0XE0,0X01,0XEC,0X03,0XFE,0X00,0X1E,0X4E,0X77,0X39,0XDD,0XE0,0X00,
0X00,0X00,0X03,0XE0,0X01,0XFC,0X21,0XFE,0X00,0X1F,0X5E,0X77,0X39,0XF8,0XF8,0X00,
0X00,0X00,0X0B,0XF0,0X03,0XDC,0X3F,0XFE,0X00,0X1F,0XDE,0X77,0X39,0XFC,0XFC,0X00,
0X00,0X70,0X89,0XFF,0XFF,0XFC,0X1F,0XFE,0X00,0X13,0XCE,0X77,0X39,0XDC,0X3C,0X00,
0X02,0X00,0X08,0XFF,0XFF,0XF8,0X1F,0XFE,0X00,0X13,0XCE,0X77,0X39,0XDD,0X8C,0X00,
0X01,0X00,0X0C,0XFF,0XFF,0XF8,0X1F,0XFE,0X00,0X11,0XCE,0X67,0X39,0XDD,0X8C,0X00,
0X01,0X06,0X8D,0XFF,0XFF,0XF8,0X1F,0XFE,0X00,0X11,0XC7,0XE3,0XF1,0XFC,0XFC,0X00,
0X00,0X1B,0X89,0XFF,0XFF,0XF8,0X0F,0XFC,0X00,0X00,0X01,0X80,0XC0,0X00,0X70,0X00,
0X00,0X09,0X8B,0XFF,0XFC,0XF8,0X0F,0XFC,0X00,0X00,0X00,0X00,0X00,0X00,0X00,0X00,
0X00,0X0D,0XC0,0X00,0X00,0X00,0X0F,0XFC,0X00,0X00,0X00,0X00,0X00,0X00,0X00,0X00,
0X00,0X07,0XC0,0X00,0X00,0X00,0X07,0XFC,0X00,0X00,0X00,0X00,0X00,0X00,0X00,0X00,
0X00,0X07,0X80,0X00,0X00,0X00,0X00,0XFC,0X00,0X00,0X00,0X00,0X00,0X00,0X00,0X00,
0X00,0X01,0X00,0X00,0X00,0X00,0X00,0X08,0X00,0X00,0X00,0X00,0X00,0X00,0X00,0X00,
};


#include <SPI.h>
#include <Wire.h>
#include <Adafruit_GFX.h>         //download here: https://www.electronoobs.com/eng_arduino_Adafruit_GFX.php
#include <Adafruit_SSD1306.h>     //downlaod here: https://www.electronoobs.com/eng_arduino_Adafruit_SSD1306.php
#define OLED_RESET 5
Adafruit_SSD1306 display(OLED_RESET);
#define NUMFLAKES 10
#define XPOS 0
#define YPOS 1
#define DELTAY 2


#include <DS3231.h>
DS3231  rtc(SDA, SCL);          //use the i2c pins


void setup() {

  display.begin(SSD1306_SWITCHCAPVCC, 0x3C);  // initialize with the I2C addr 0x3C (for the 128x32 or 64 from eBay)
  delay(100);
  display.clearDisplay();
  display.display();
  delay(100);
}

void loop() {

  display.clearDisplay();
  display.display();

  display.setTextSize(1);
  display.setCursor(0,0);
  display.setTextColor(WHITE);
  display.println("ELECTRONOOBS");
  display.setTextSize(2);
  display.setCursor(33,8);
  display.setTextColor(WHITE,BLACK);
  display.println("13:22");
  display.setTextSize(1);
  display.setTextColor(WHITE);
  display.println("ABCDEFGHIJKLMNOPQRSTU");

  display.display();//Finally display the created image

  delay(4000);


  display.clearDisplay();
  display.display();
  display.setTextSize(1);
  display.setCursor(45,0);
  display.setTextColor(WHITE);
  display.println("MY LOGO");
  display.drawBitmap(0, 8,  LOGO, 128, 31, 1);
  /*here we print the logo on position 0 on x and 8 on y. The size of the logo is 128 on x
  and 31 on y. the LOGO bytes are defined above and are made with the Image2LCD program*/
  display.display();//Finally display the created image
  delay(3000);

}