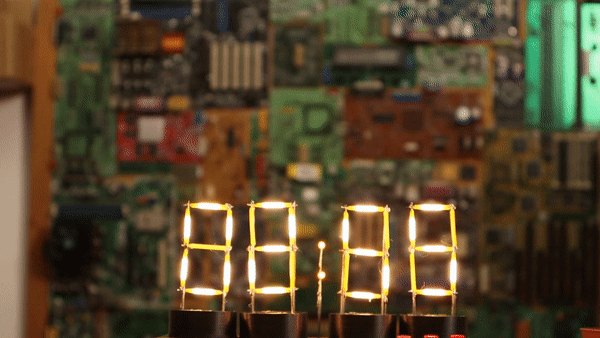
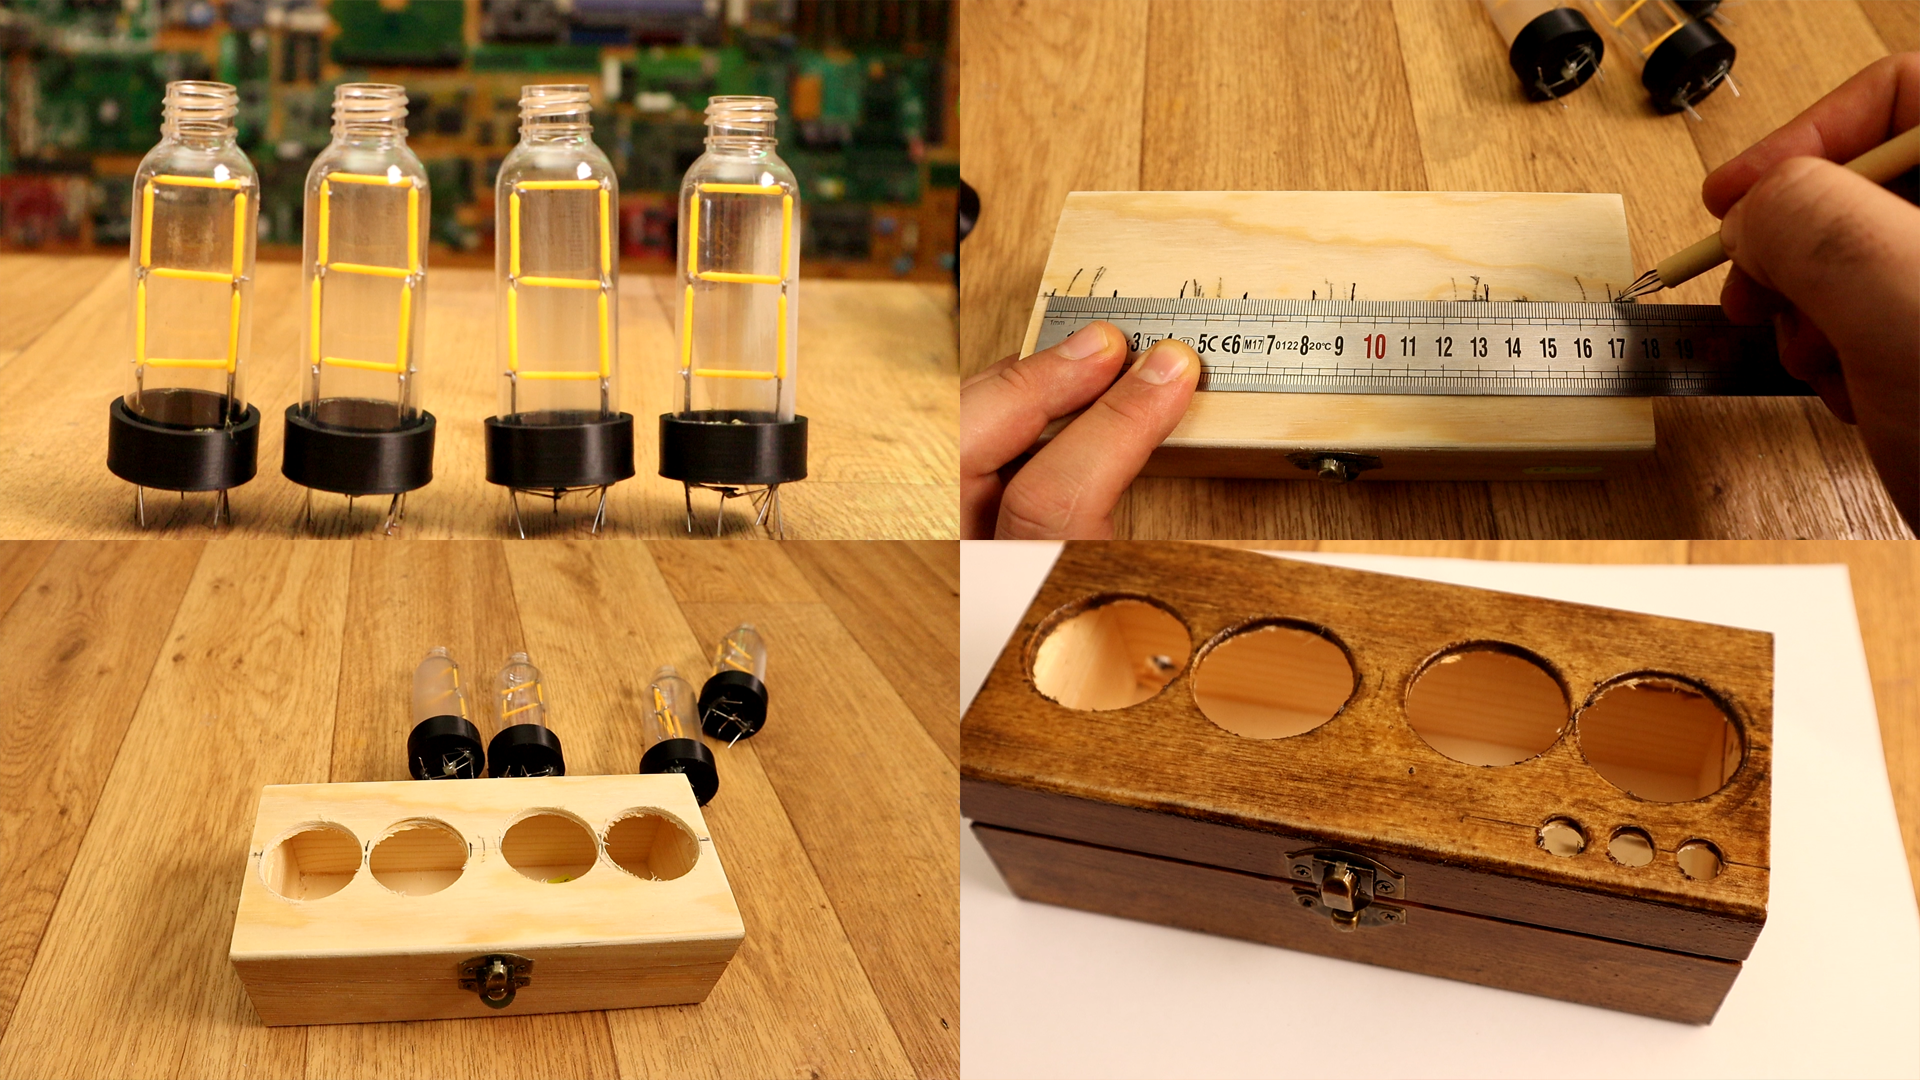
I've made some "nixie" tubes. These are actually 7 segments displays made with filament LEDs but placed in a plastic bottle so it will have a more vintage nixie look. To control the LEDs I'm usig the MAX7219 driver that could control 4 x 7 segments displays. To get the real time, I'm using the DS3231 module that works with a i2c communication so it's easy to use. The project also has 2 push buttons to set the hour and minute. All is inside a wood case painted with varnish so it will look more vintage.
First of all, download the STL files below and print them. I've made the supports using PLA material, 2 perimeters, 0.4mm nozzle and 0.2mm layer height, also 15% infill using my CR10. Now taht we have the plastic circle supports, we start by cutting some steel wires. This wire is very cheap and you could find it at any chinese bazar or home depo. We will need a total of 7 wires for the positive pins of the LEDs and 3 for GND.
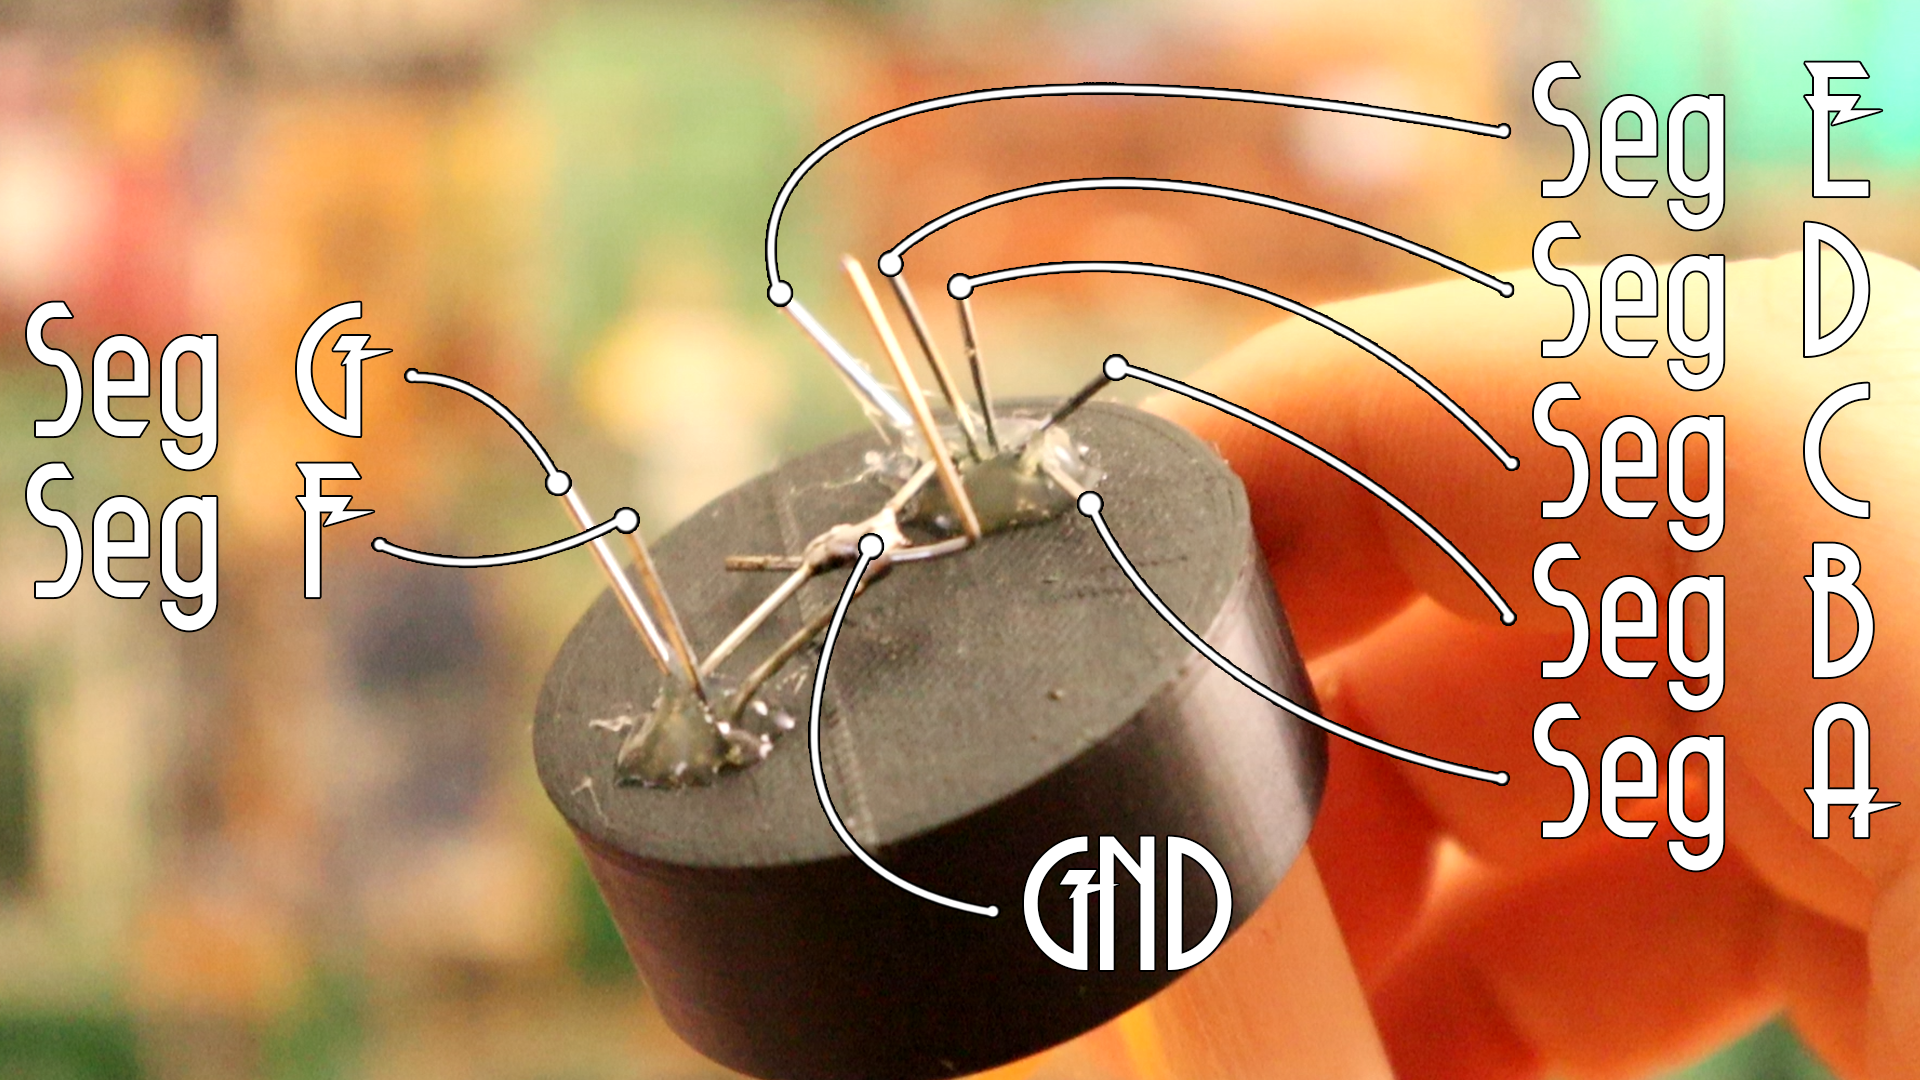
Now, we heat a bit one of the steel wires and insert it into the plastic support. As you can see in the photo belwo, I've placed the support over a cardboard box with a hole, so the wire could pass to the other side with no problems. Now I tahe one LED filament and solder it to the steel wire. I add another wire on to the other siode and solder it to the negative pin of the LED. Now I have one filament. I do the same for all 7 and make sure I give them a shape of an "8".
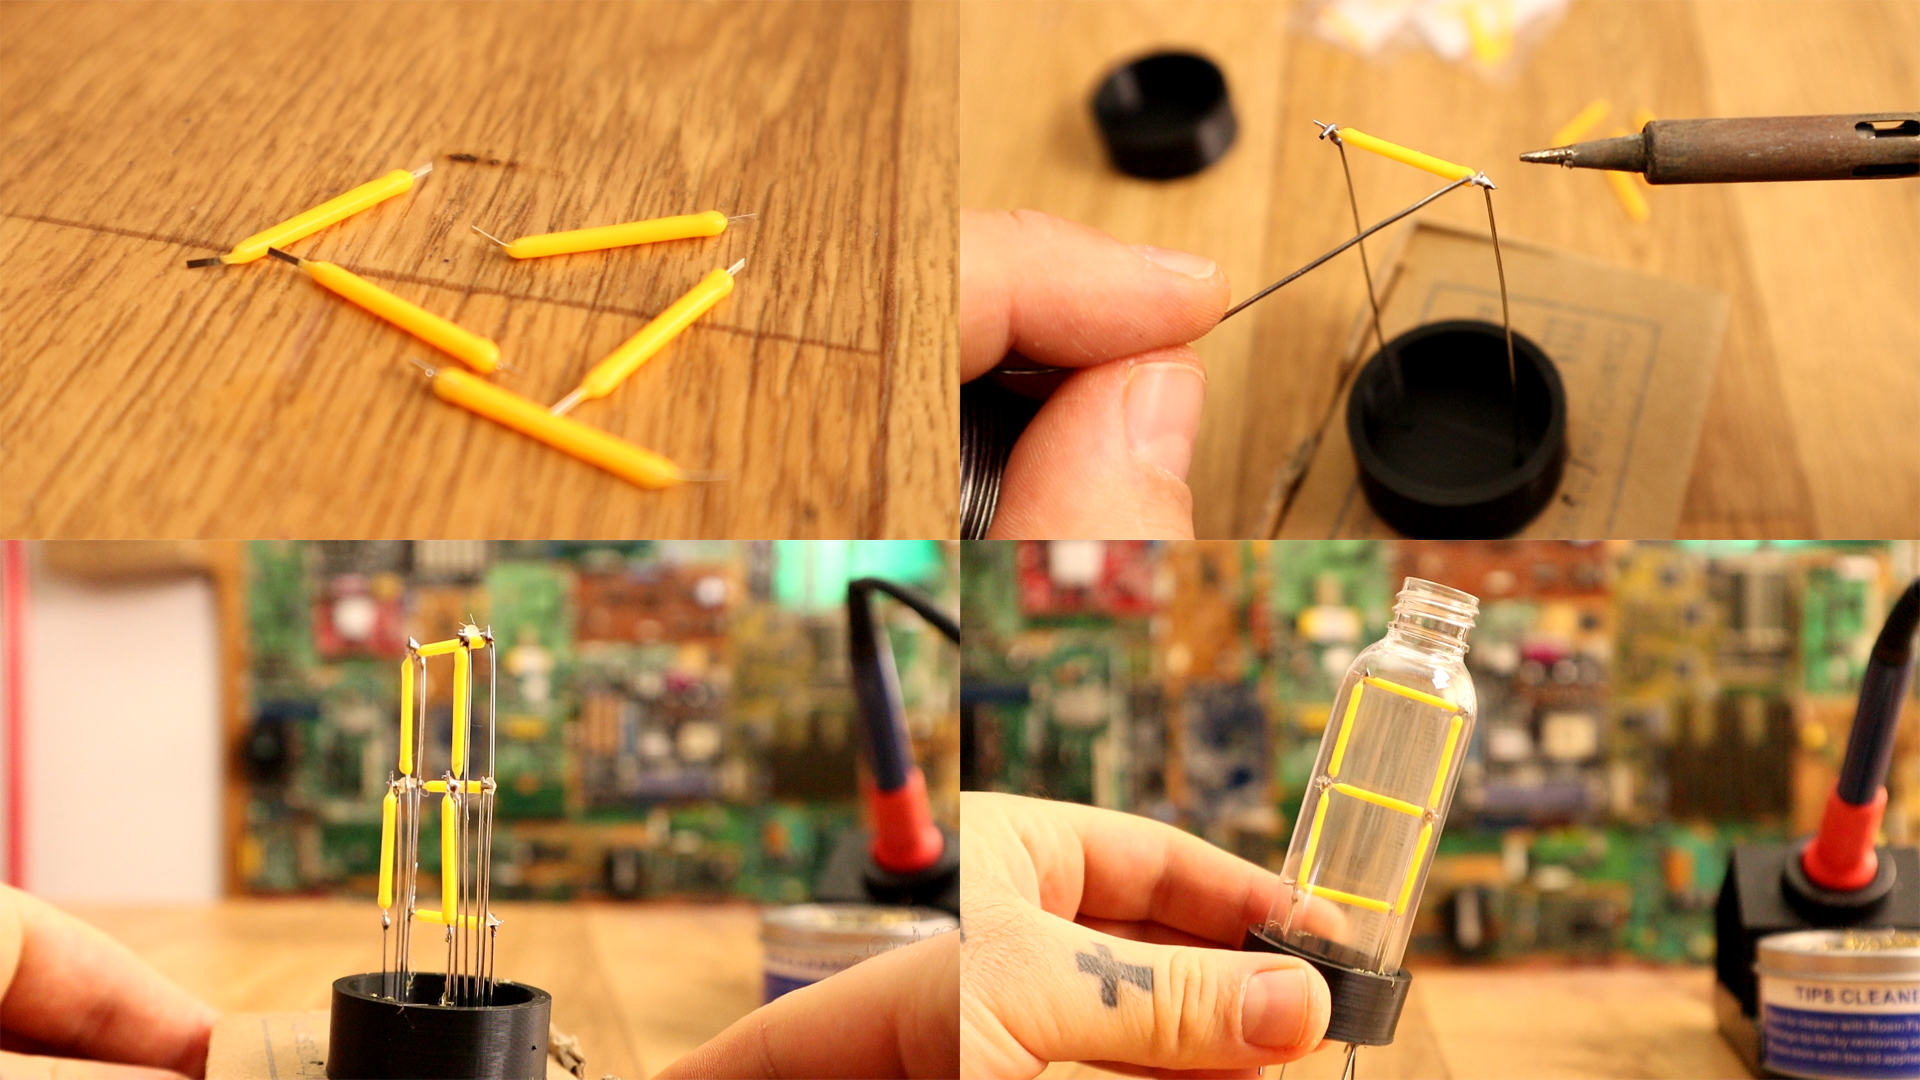
Since there is not enough space, I had to use more than one pin for the GND rail. I've used 3 wires that I've soldered together as you can see in the picture below. So now we have 8 pins, 7 for the segments and 1 for GND. The base of out tube is ready. Test each LED connection before closing the tube. All is there to do is to place a plastic bottle over. If you ahve glass bottle even better!!!
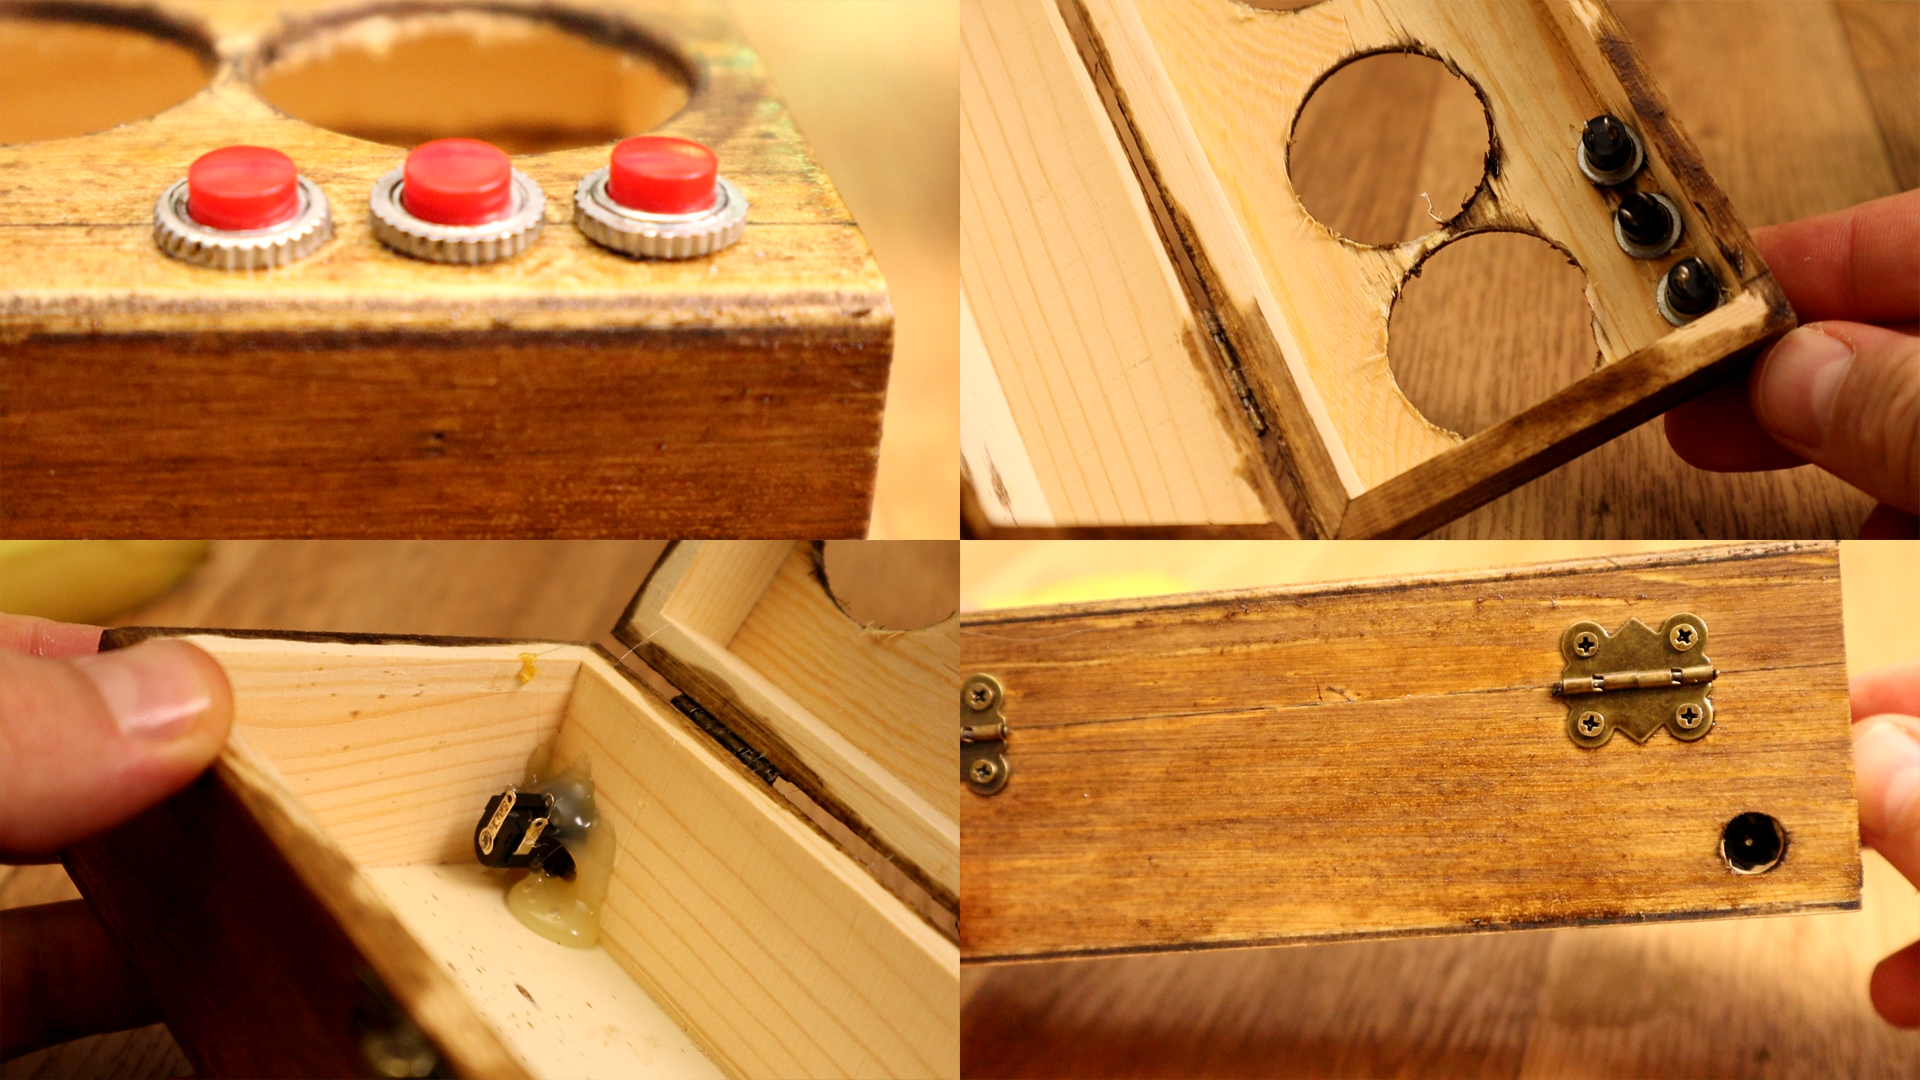
Ok, so now I have 4 tubes as the previous one. Is time to prepare the case. For that I've used a 3 dollars wood case. I've made some measurements and drilled 4 holes for the tubes but also 3 8mm holes on one corner for some buttons. The final scheamtic will use only 2 buttons so 2 holes is enough. On the back, I've made another 8mm hole for the DC plug. Finally, using dark varnish I paint the case to give it a more vintage look. And that's it.
Now we have to place the push buttons on the corner and the DC plug on the back. To do taht I just screw the buttons in place and for the DC plug I use a bit of hot hlue and glue it on the back of the case as you can see in the photos below. I will later use a 12V DC transformer connected to that DC plug to supply the entire circuit.
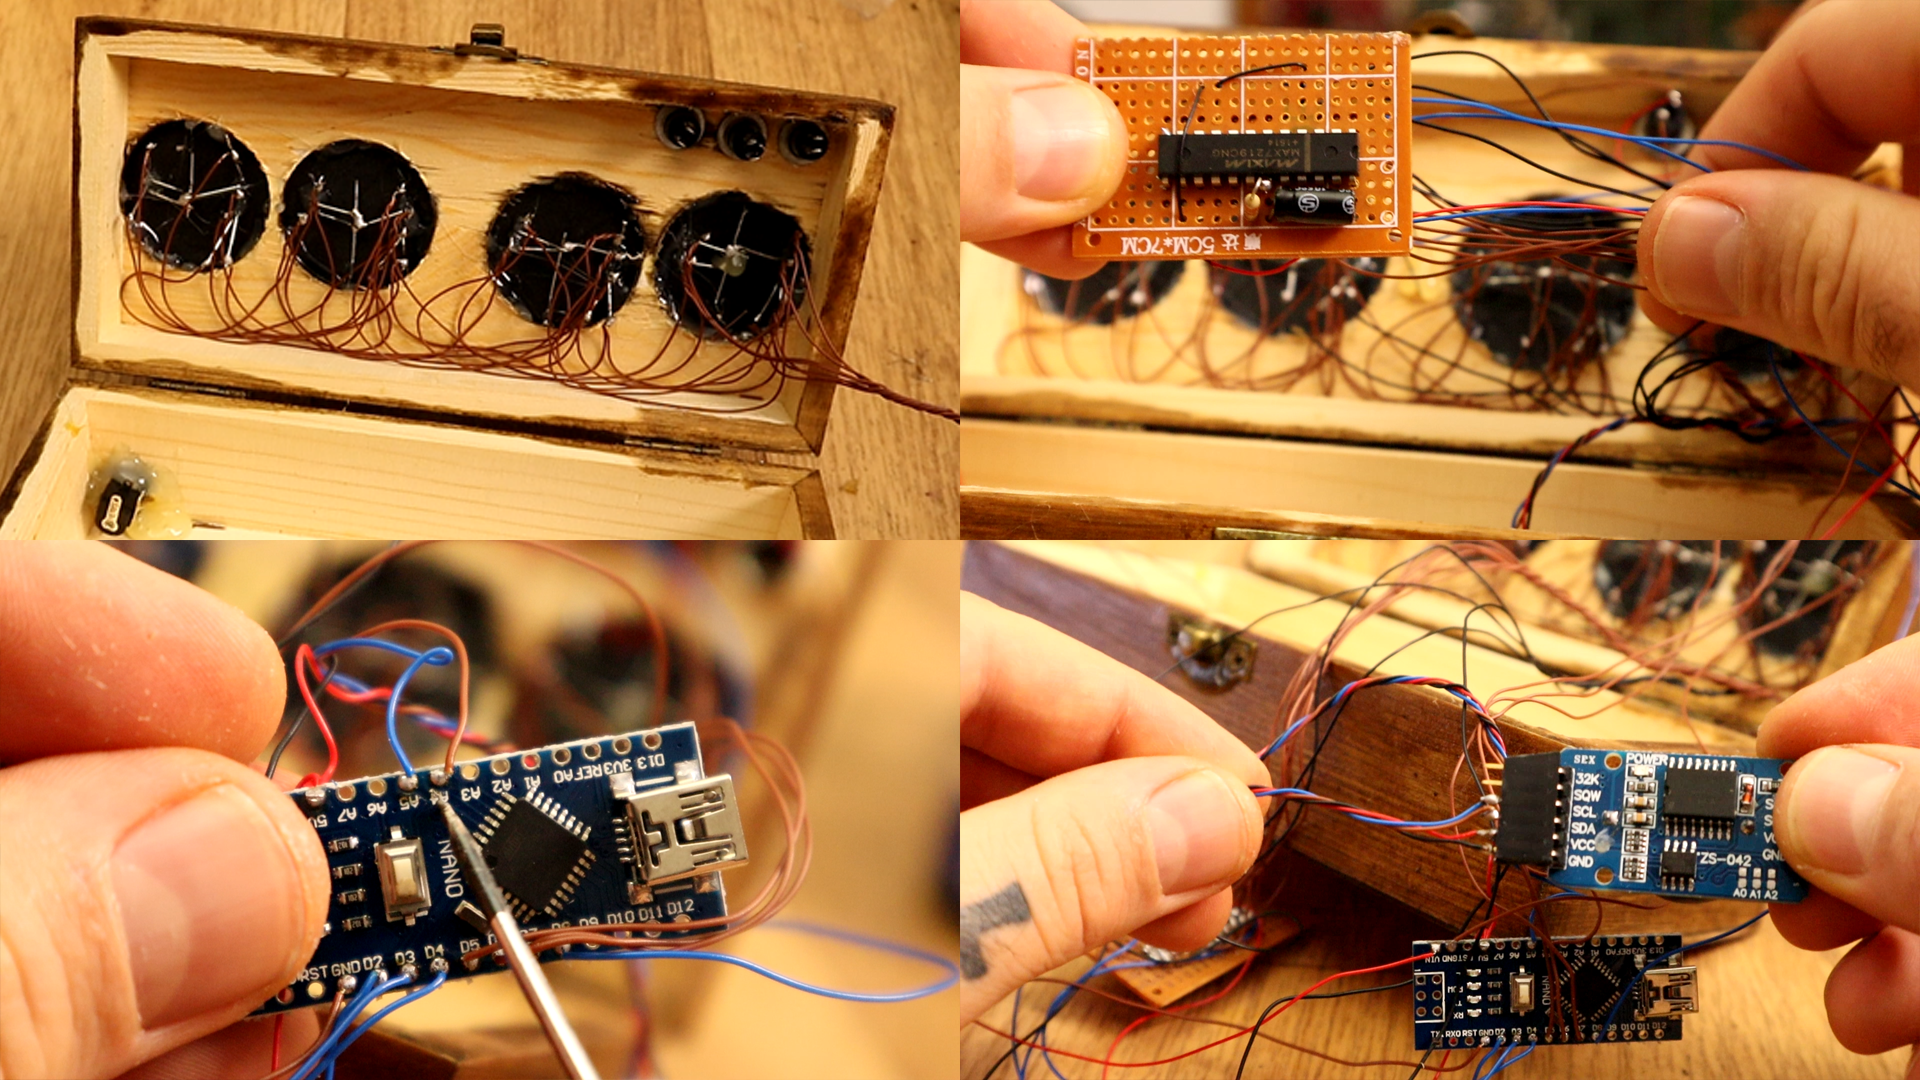
Ok, below you have the full scheamtic for this project. We need an Arduino NANO, the MAX7219 driver for 4 7 segment displays, the buttons, 2 3mm LEDs, the DC connector and the tubes. Make the connections as below having in mind which is each segment of the tubes. Connect all the A segments together, all the B segments and so on... Then we have 4 GND connections, one for each tube. Connect all wires to the MAX7219 driver and the driver to the Arduino CLK DIN, and LOAD pins which are D2, D4 and D2.
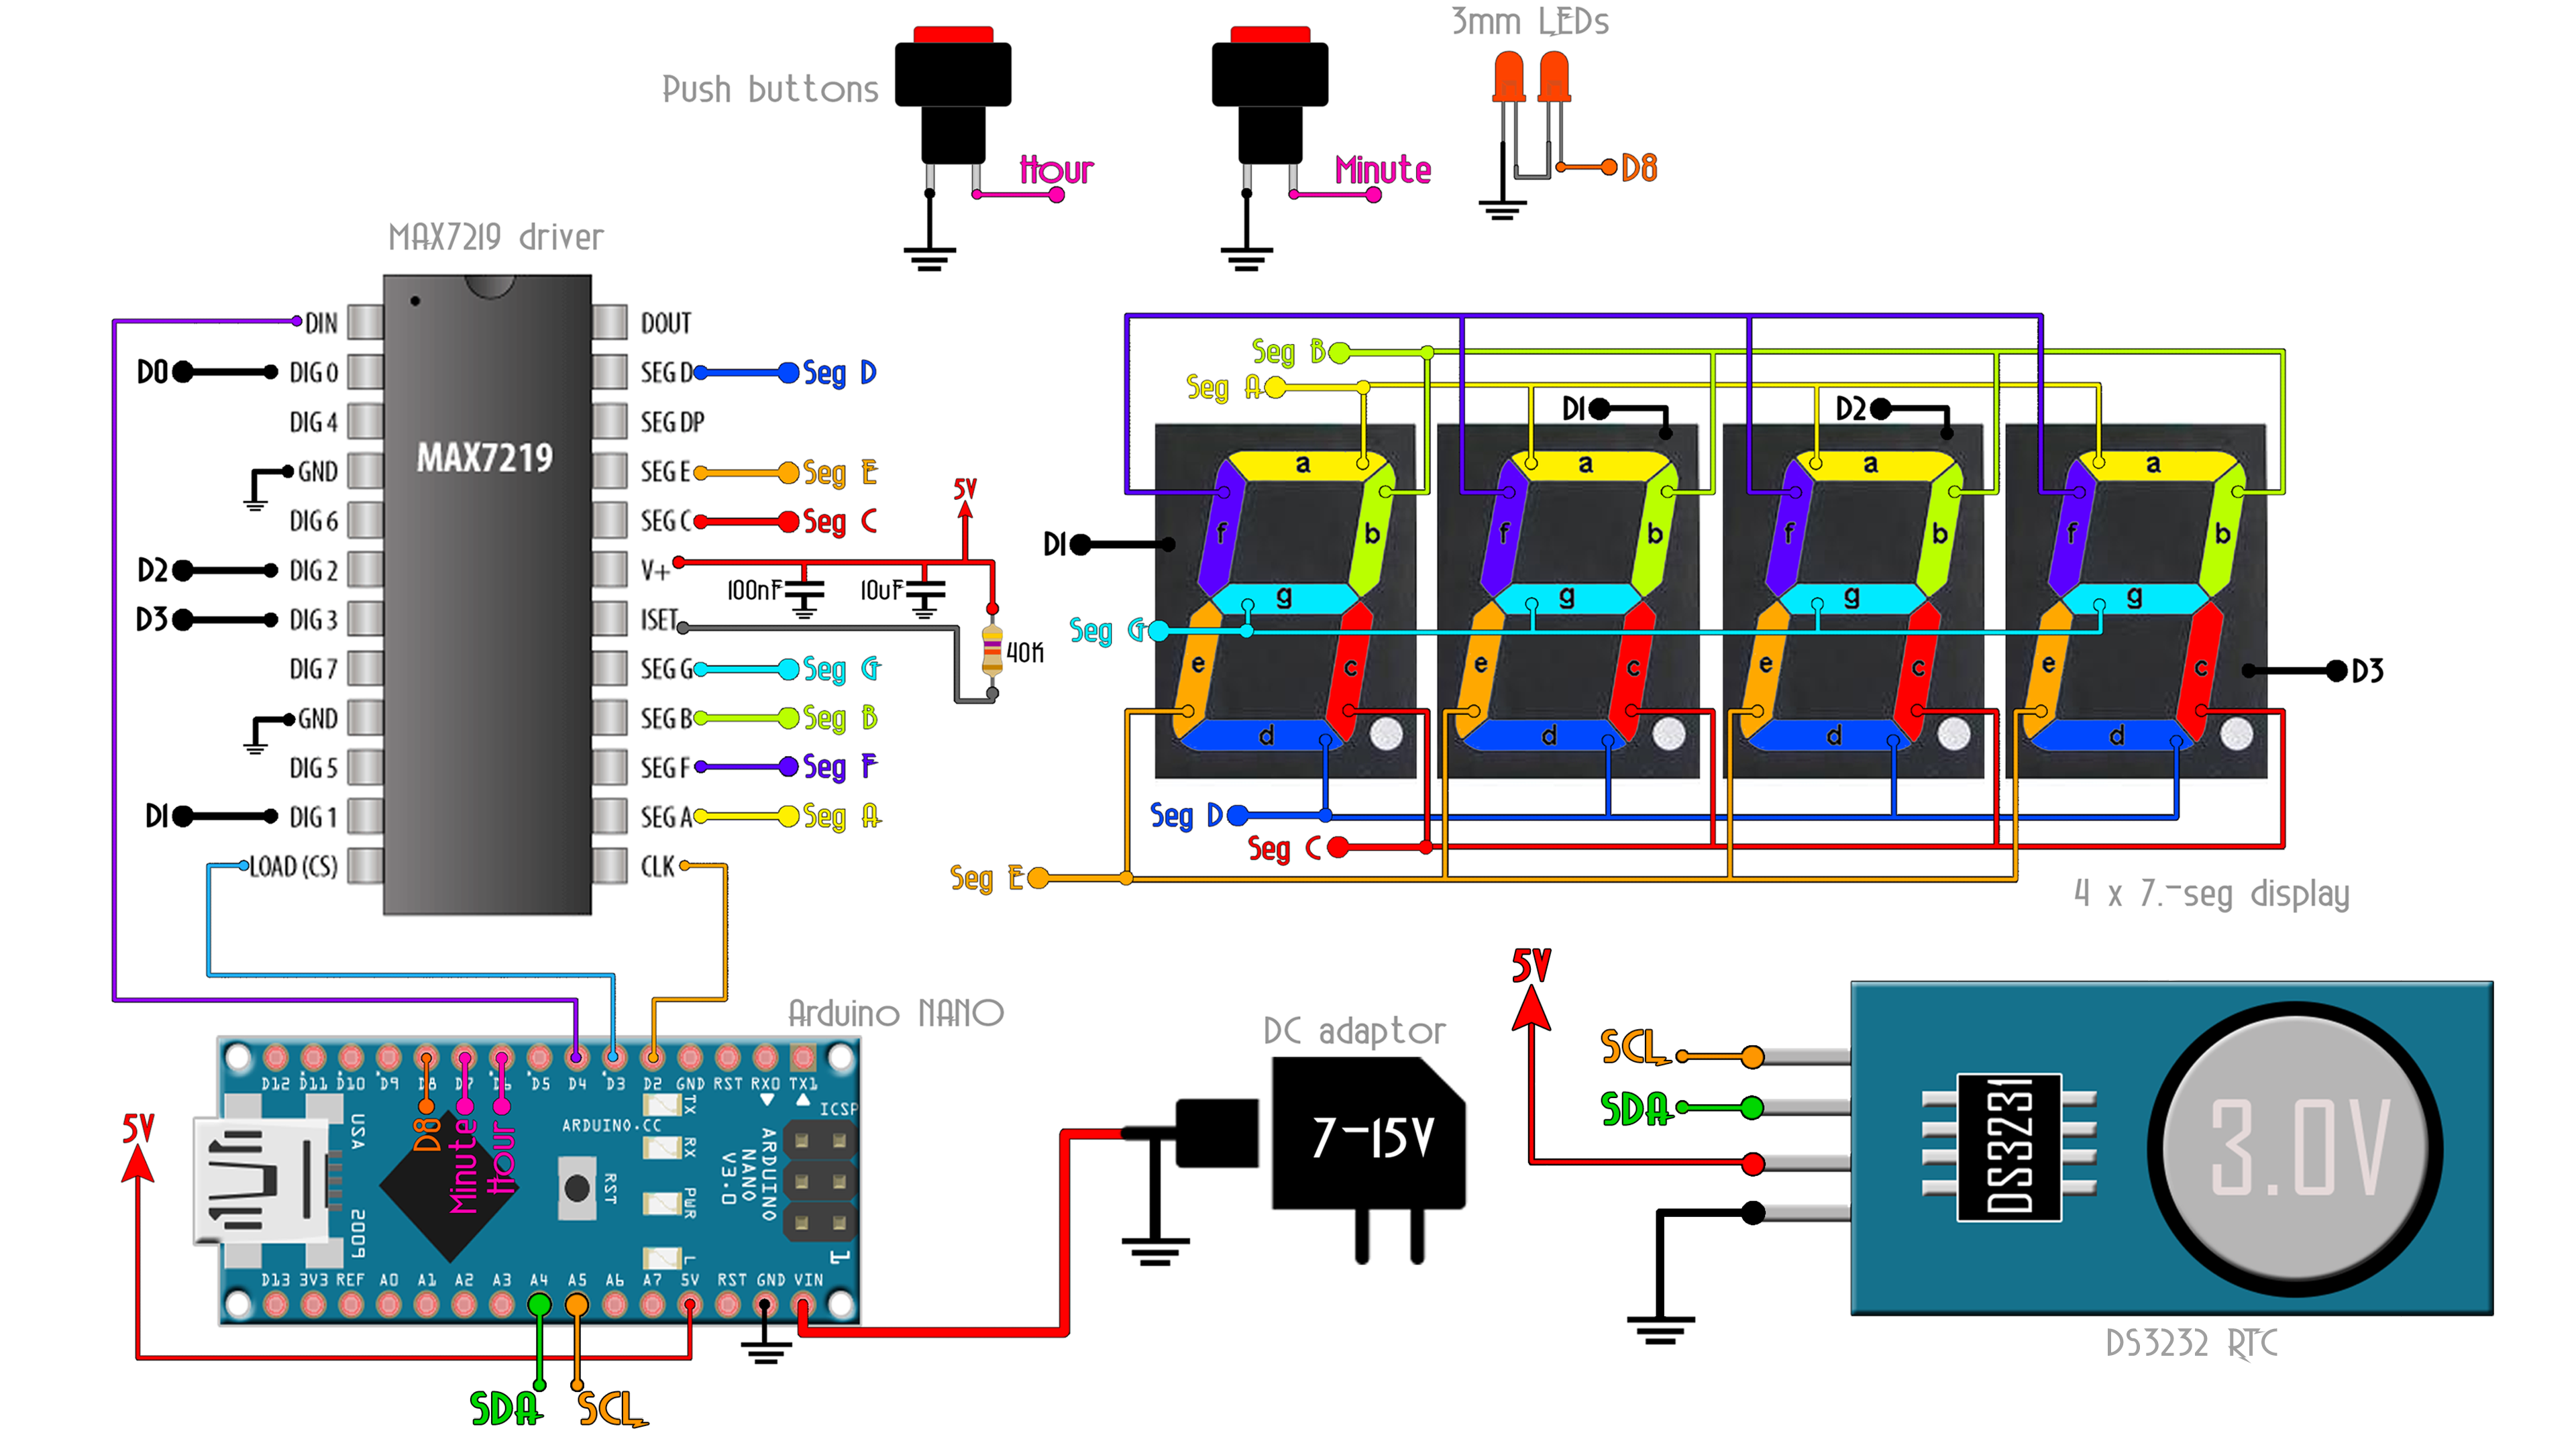
The hour and minute buttons are connected to digital pins D6 and D7 and the second LED to D8. I connect all the segments with thin wires as you can see below. I then make the connections to the MAX7219 driver for the segments and 4 GND pins. Finally, I connect the driver to the Arduino and the RTC to the i2c pins which are A4 and A5 for data and clock. Oh, and I connect the DC plug to the Vin pin of the Arduino so we could supply the entire circuit.