This setup is very common. We have many types of IR remotes. Those, basically are sending a infrared light signal that is usually encoded. To emit light, they usually use an IR LED: That light will touch the receiver, which is usually a phototransistor. This will decode and give at the output the received signal. If we attach a microcontroller to this setup, we could read the signal for each pressed button of the remote and control anything with that.
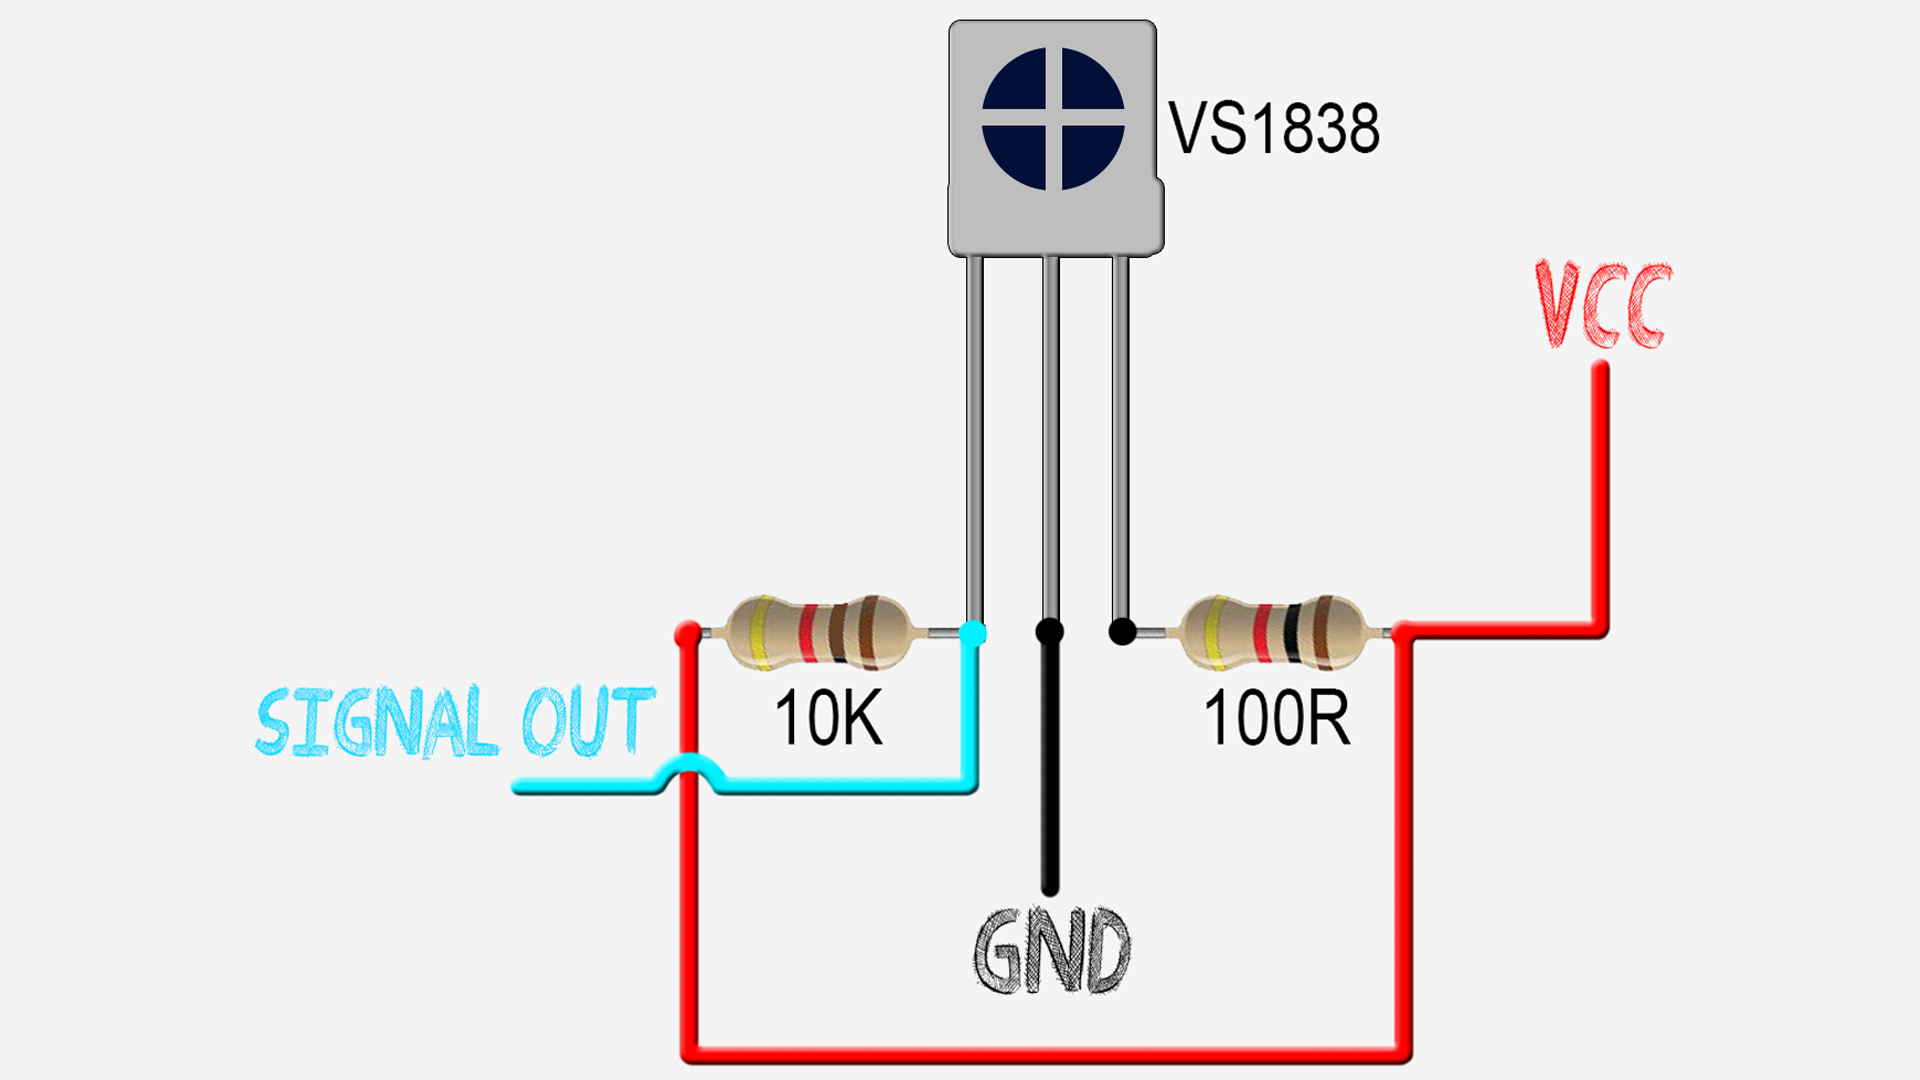
We will use the VS1838 IR receiver. But, in order to work properly it needs a simple configuration that we could see below in the next schematic. We need to limit the current so a 100ohm resistor is placed between Vcc pin adn 5V. Aslo, the output needs a pullup so a 10K ohms resistor is placed between signal out pin and Vcc.
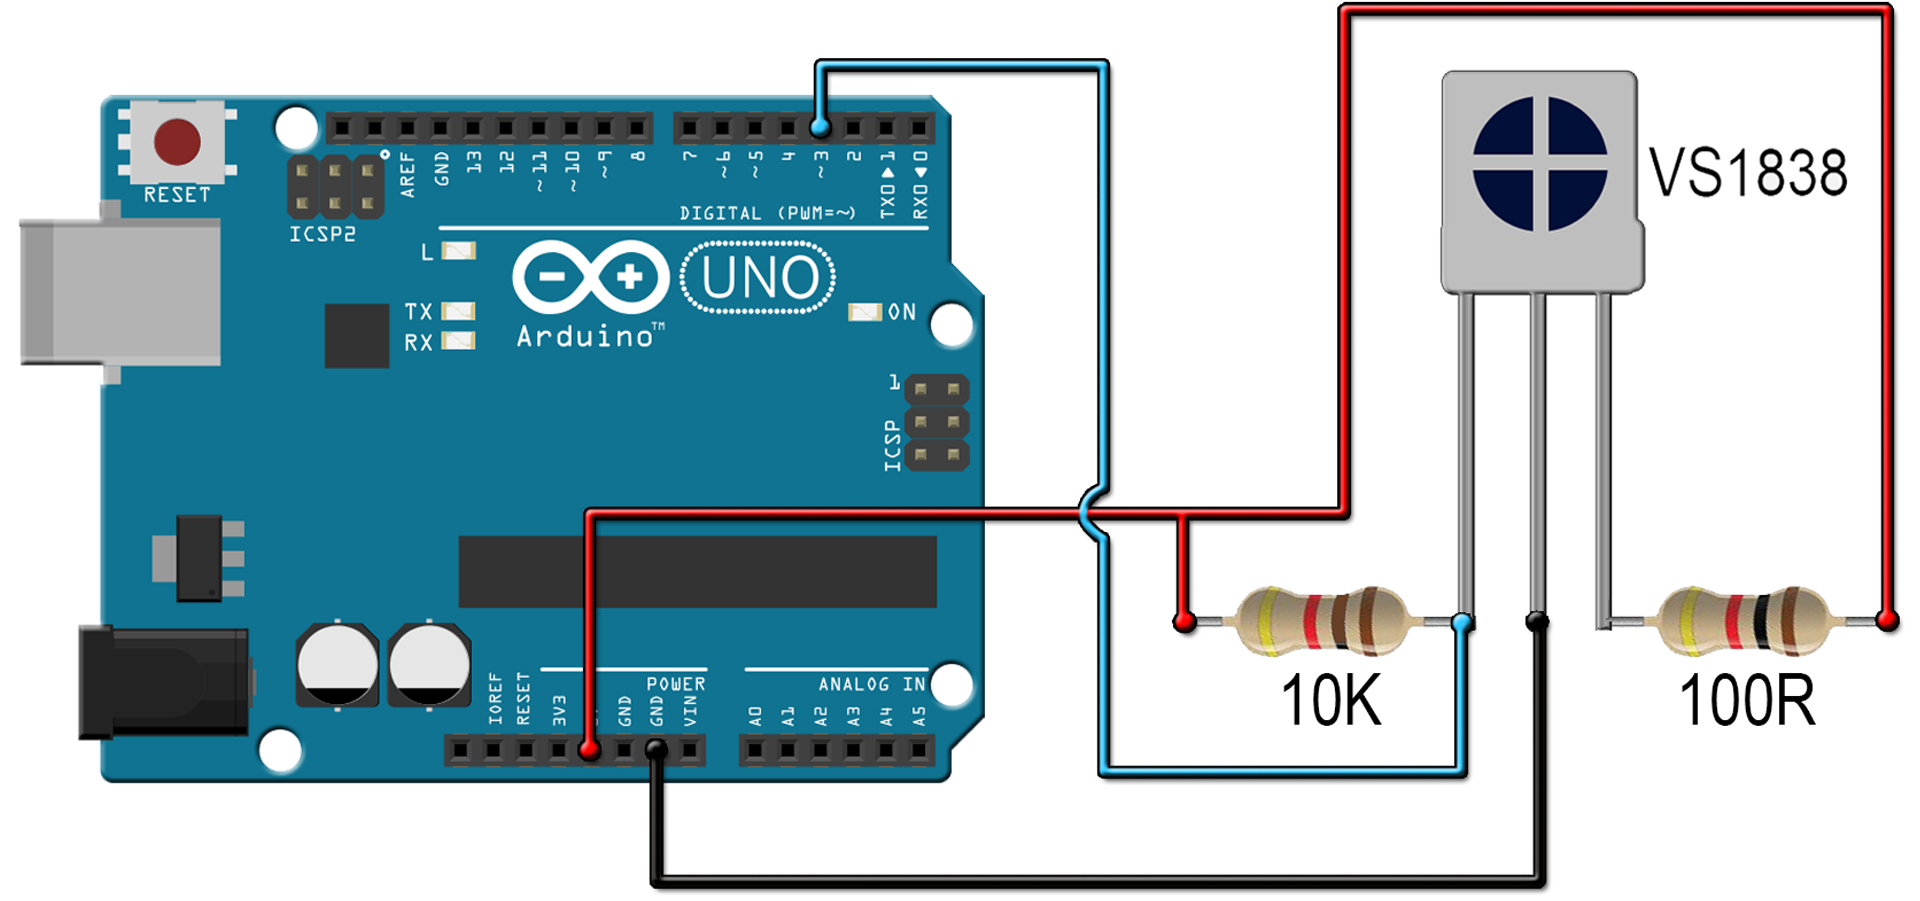
Now the receiver will give a modulated signal each time it receives a IR light from the emmiter. To read and decode the signal, we attach the VS1838 signal to digital pin D3 of an Arduino as seen below.
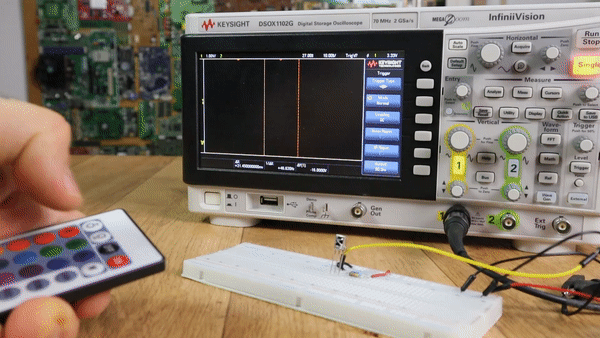
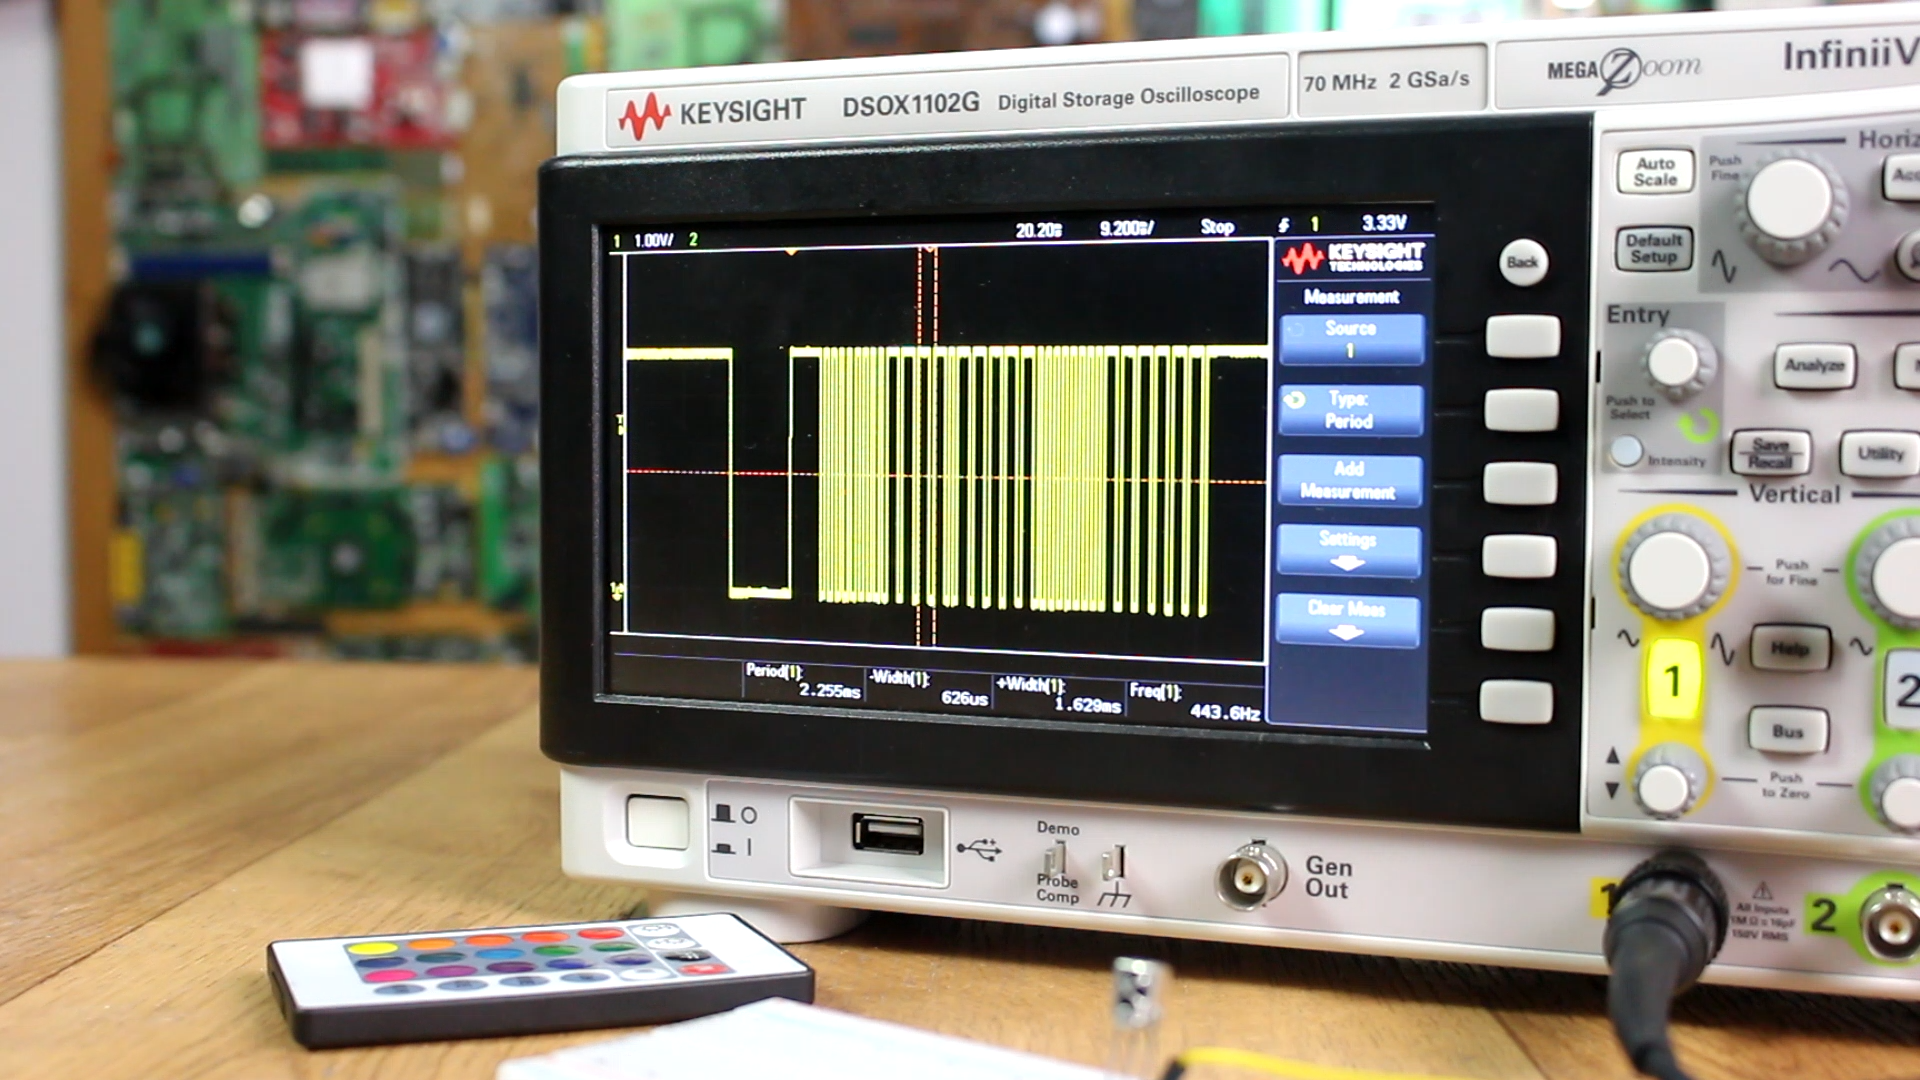
Now, the signal can be decoded with the Arduino. But the signal si strange and will eb different for each type of remote. Below we have an example of the signal from the colors remote when the "ON" button is pressed. As you can see, the signal has different frequencies and we can't know which is a "1" and which a "0".
For taht, we will use a library for Arduino that will decode the signal and give us a numeric value for each button. Donwload the library from a link below.
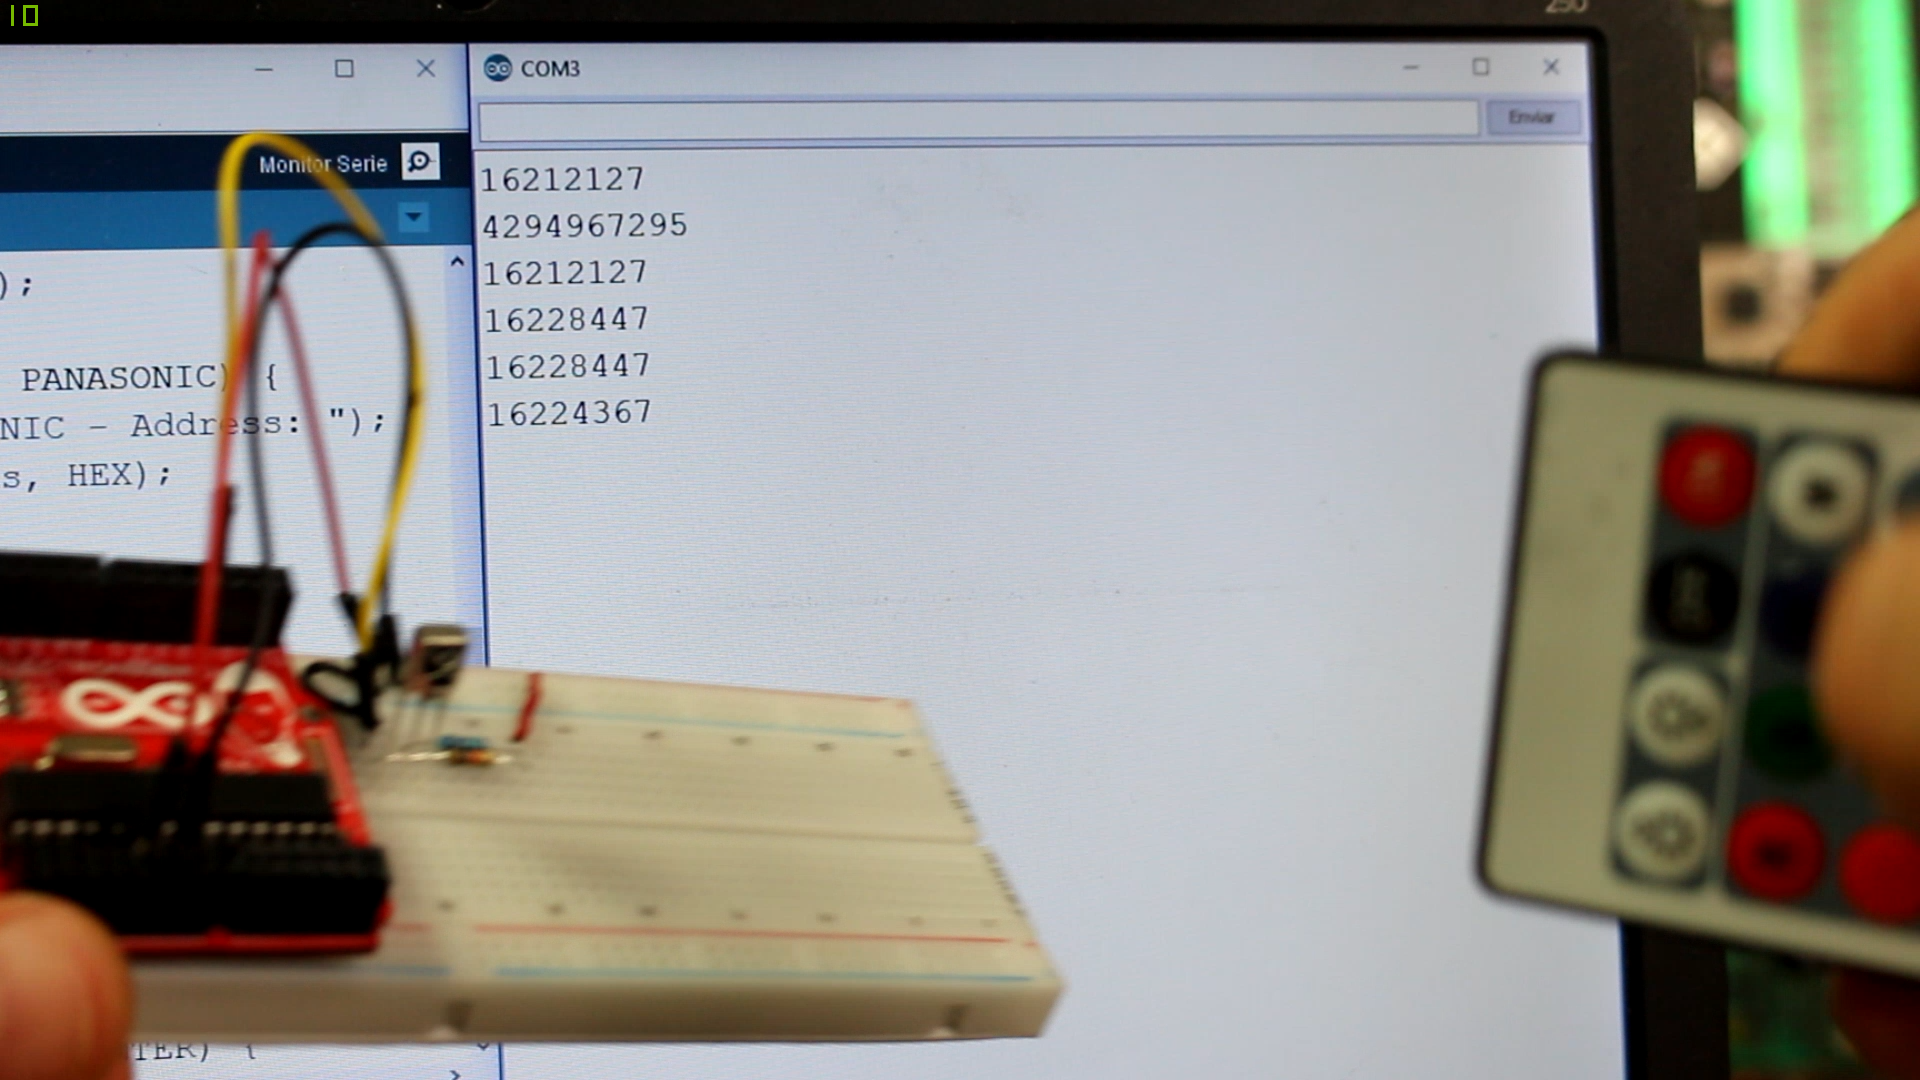
Now that you have the library downloaded in z .zip format, open Arduino IDE, go to sketch, include library, add .zip library and select the downloaded file. Now the library is installed. Copy or download the example code below and uplaod it to your Arduino with the IR schematic connected. This code should print on the serial monitor the received values from the IR remote.
#include <IRremote.h>

int RECV_PIN = 3;
IRrecv irrecv(RECV_PIN);
decode_results results;


void setup()
{
  Serial.begin(9600);
  irrecv.enableIRIn(); // Start the receiver
}


//Infinite loop
void loop() {
  if (irrecv.decode(&results)) {
    Serial.println(results.value, DEC);
    dump(&results);
    irrecv.resume(); // Receive the next value
  }
}

//Dumps the result and prints the numeric received dada and type of remote
void dump(decode_results *results) {
  // Dumps out the decode_results structure.
  // Call this after IRrecv::decode()
  int count = results->rawlen;
  if (results->decode_type == UNKNOWN) {
    Serial.print("Unknown encoding: ");
  }
  else if (results->decode_type == NEC) {
    Serial.print("Decoded NEC: ");
  }
  else if (results->decode_type == SONY) {
    Serial.print("Decoded SONY: ");
  }
  else if (results->decode_type == RC5) {
    Serial.print("Decoded RC5: ");
  }
  else if (results->decode_type == RC6) {
    Serial.print("Decoded RC6: ");
  }
  else if (results->decode_type == PANASONIC) {
    Serial.print("Decoded PANASONIC - Address: ");
    Serial.print(results->address, HEX);
    Serial.print(" Value: ");
  }
  else if (results->decode_type == LG) {
    Serial.print("Decoded LG: ");
  }
  else if (results->decode_type == JVC) {
    Serial.print("Decoded JVC: ");
  }
  else if (results->decode_type == AIWA_RC_T501) {
    Serial.print("Decoded AIWA RC T501: ");
  }
  else if (results->decode_type == WHYNTER) {
    Serial.print("Decoded Whynter: ");
  }
  Serial.print(results->value, HEX);
  Serial.print(" (");
  Serial.print(results->bits, DEC);
  Serial.println(" bits)");
  Serial.print("Raw (");
  Serial.print(count, DEC);
  Serial.print("): ");

  for (int i = 1; i < count; i++) {
    if (i & 1) {
      Serial.print(results->rawbuf[i]*USECPERTICK, DEC);
    }
    else {
      Serial.write('-');
      Serial.print((unsigned long) results->rawbuf[i]*USECPERTICK, DEC);
    }
    Serial.print(" ");
  }
  Serial.println();
}
Upload the code and open the Arduino serial monitor at a baud rate of 9600. Now press buttons on your IR remote and see the result on the serial monitor. You can have the decimal number printed or the type of remote.