


Go below and download the Adalight code for the Arduino. Open it in the Arduino IDE and make sure you have already installed the FastLED library before. There in the code, all we have to do is to define the pin, in my case digital pin 7, and amount of LEDs, in my case 59. Compile, select the COM port and upload the code to the Arduino.
Now download from below the Prismatic software. This will generate the data for the perimeter colors of our screen. Install it following the default settings. You may want to start the installation as an admin, otherwise your windows might not let you install it.
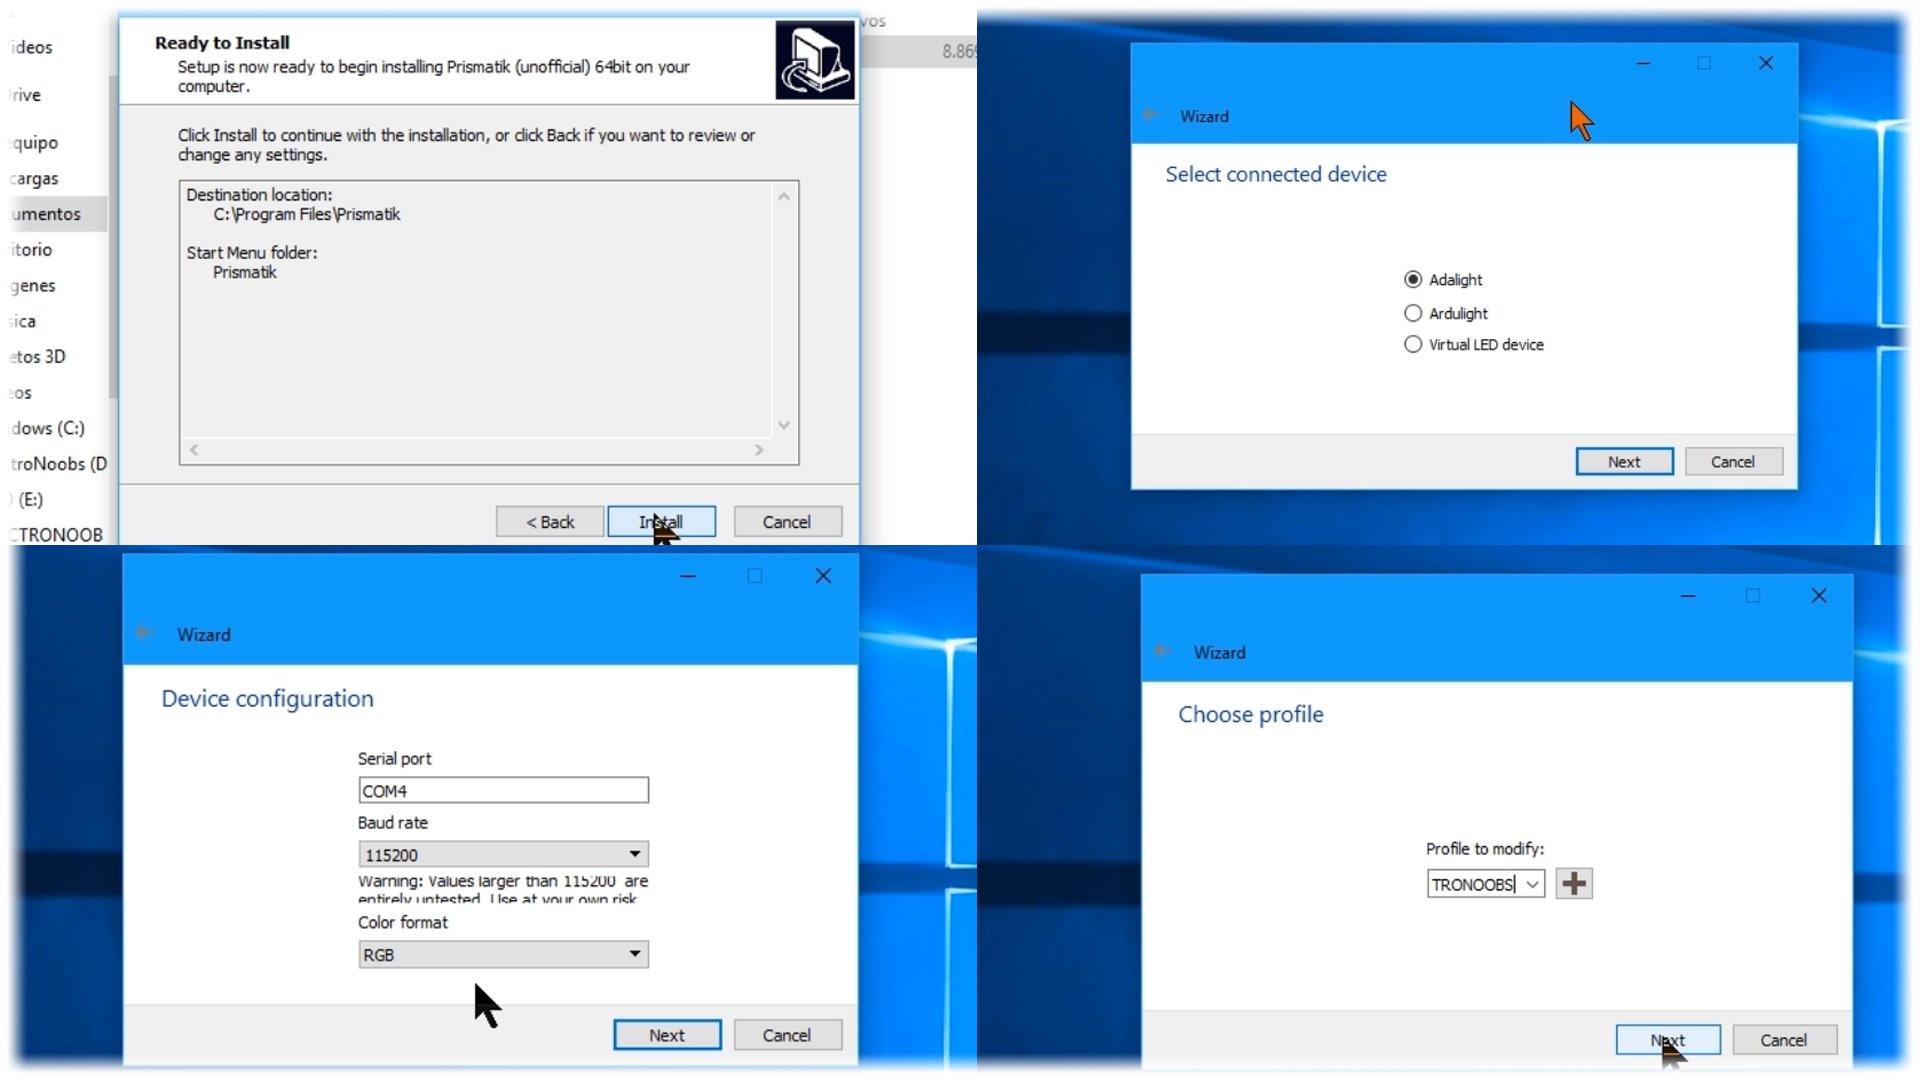
Now run the application. The first time you run it, you will get the configuration wizard. Select Adalight and click next. There, select the USB com that you are using for the Arduino board (COM4 in my case). The baud rate has to be the same as here in the code that we have uploaded before, in this case 115200. Select RGB color format and click next. Give a name to your setup, I’ll name it ELECTRONOOBS.
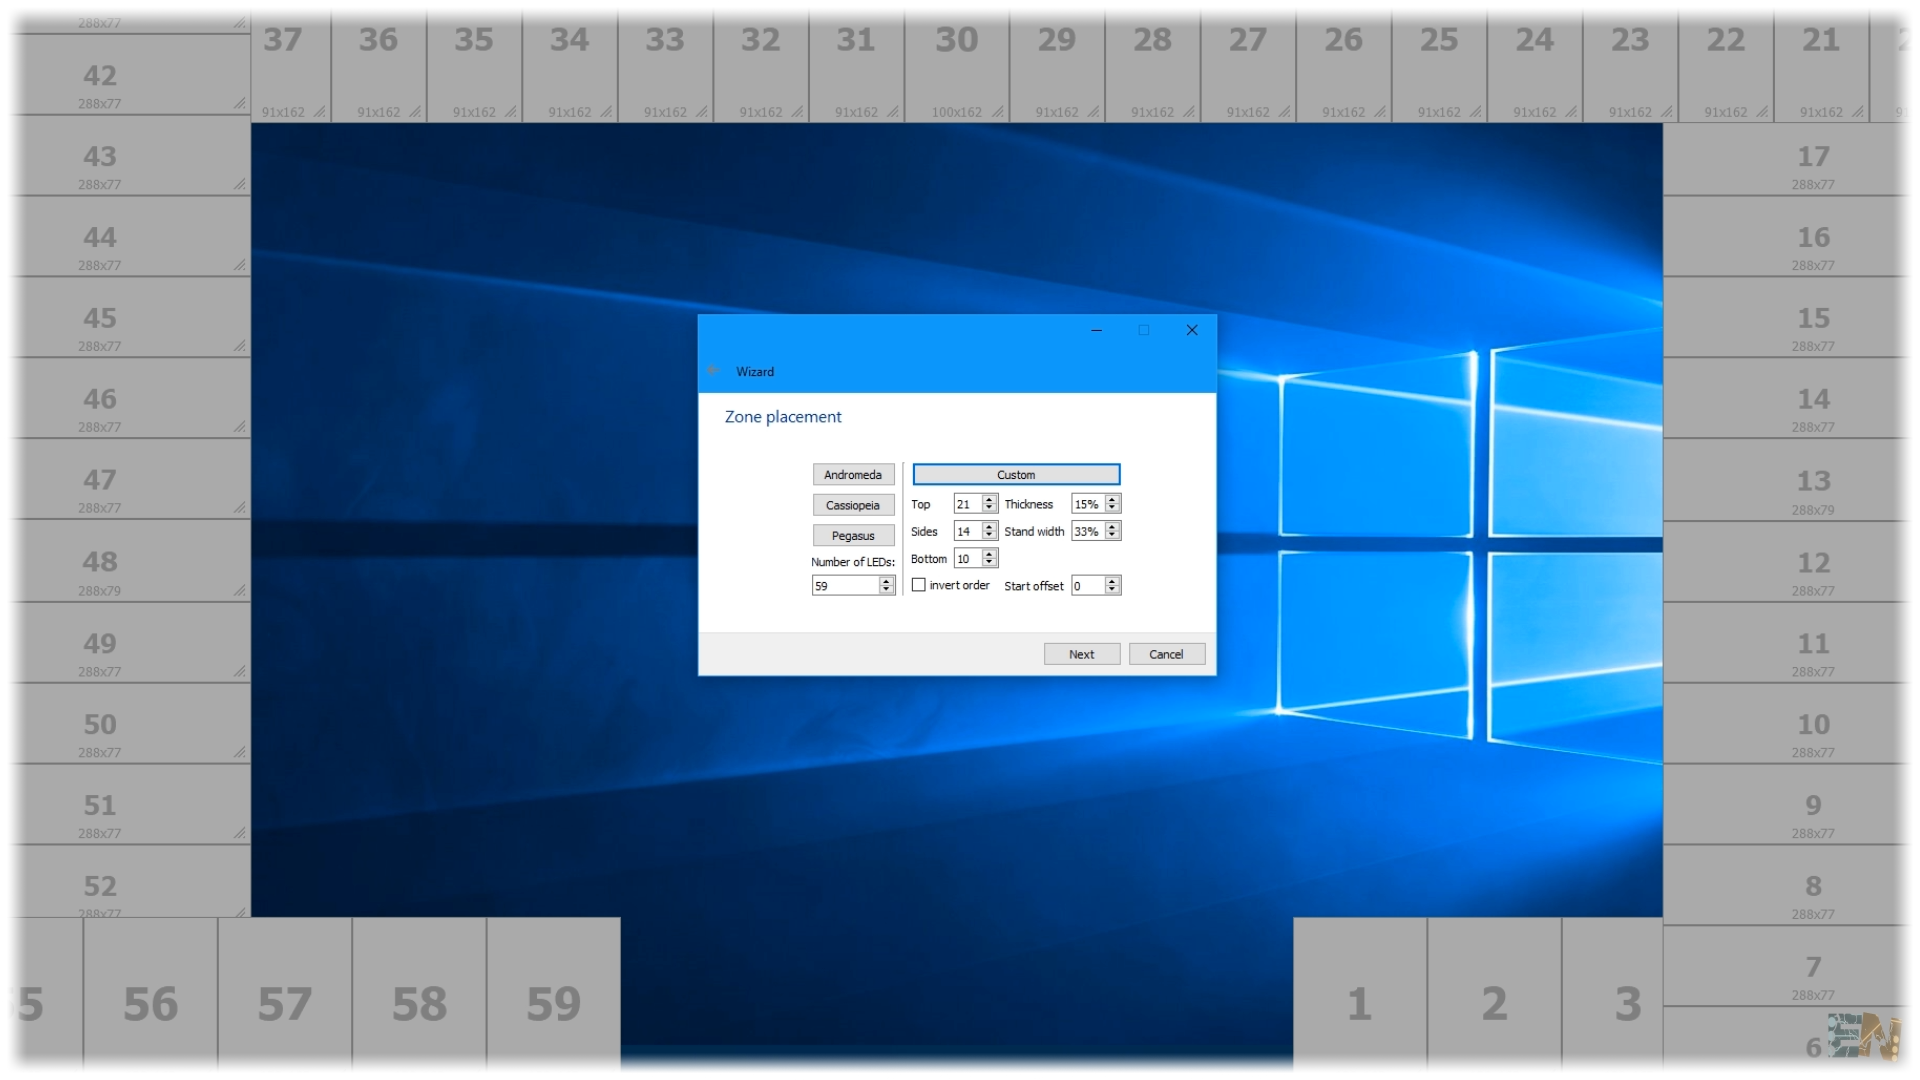
Now, here is the interesting part. Define the amount of LEDs you have on the top part. In my case, I’ve placed 21 on the top part of the screen. 14 on the sides and 10 on the bottom. Click custom and see how this will look like. The stand offset will give you the space between this bottom LEDs. If you have a full perimeter, live this to 0 percent. You could customize this as you please manually. I live it like this for now.
Press next and here adjust each color till you match the color of your background wall, in my case white. Click next and we are done. Now play any RGB test video that you’ll fint in the description and there you go. You can now watch movies with AMBILIGHT effects and that is awesome. The application also has sound effect where the LEDs will blink according to the music you play.
Well guys, there you have it. I hope that you’ve enjoyed this tutorial and learn something new about addressable LEDs control. The tutorial is very easy and the schematic is just a few connections, but this project looks so cool. If you would like to support my projects, check my PATREON page link, I would really appreciate that guys, Thanks to you all.


