Below you have the full tutorial where I go through each step. But in this post we will see just how to create two separate pages in Nextion and change from one to the eext. Make sure you go to NEXTION.com and download their editor because we will work with that software. In this psot you will also have the TFT files I've created and the pictures, videos or anything else that you need, ready for download.
Let’s start with something easy. First go to this link and download NEXTION editor software. Once downloaded and installed, run this software. Go to file and select new and give this new project a name. Next it will ask you what model of display you have. In this case, mine is this one (NX1060P101-011C-I) of 10 inches. Then select the orientation. In my case I leave it at 0 in horizontal mode. Click OK and start the project.

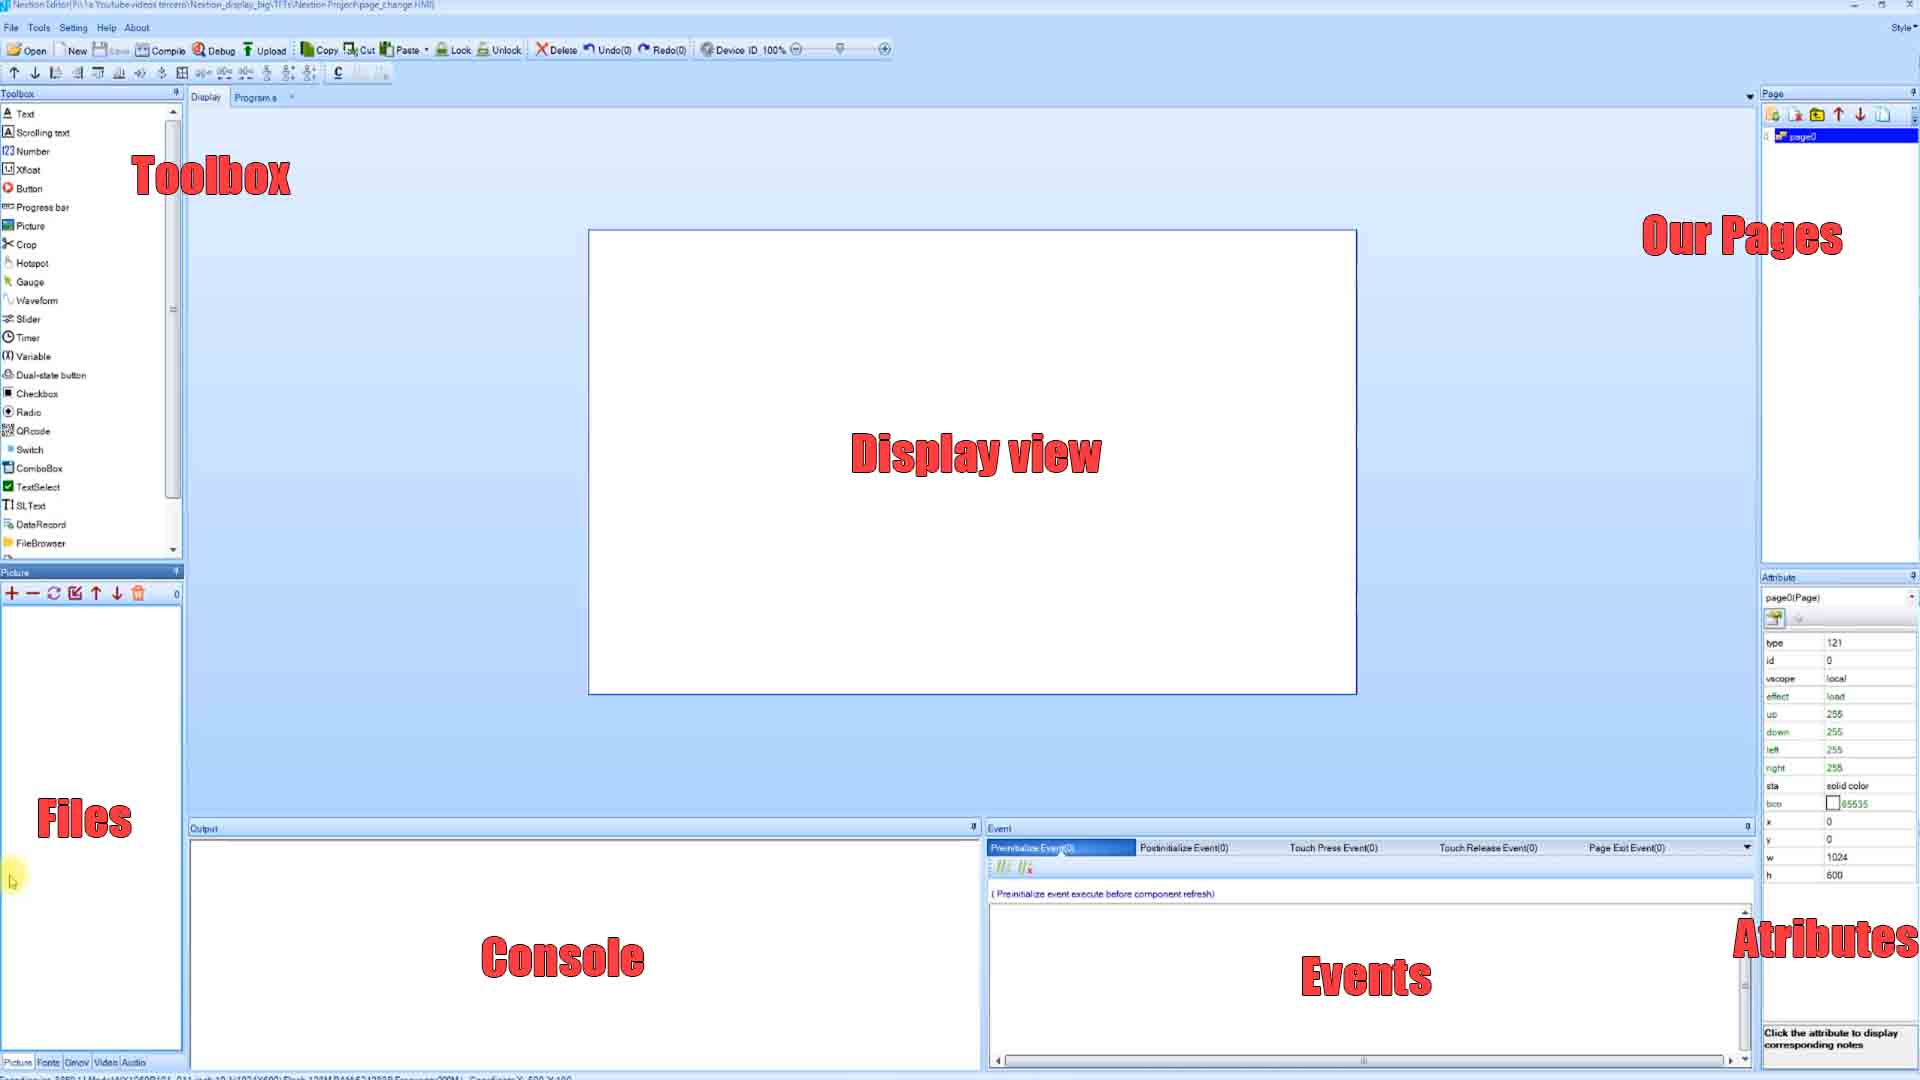
In the middle, is our screen editor, on the left top side we have our tools that we can add to the screen. Below taht we have the files such as pictures, videos, audio files and text fonts. On the right top part we have our screen pages, which by default, we start with just the first page but later we can add more. Below that we have the attributes of each selected tool. Below the display we have our events which basically is the code part taht we run each time something happens such as "a push of a button" for example. The first example is to create two pages and be able to switch from one to the next. Is very important to have multiple pages when you want to make a more complex project.
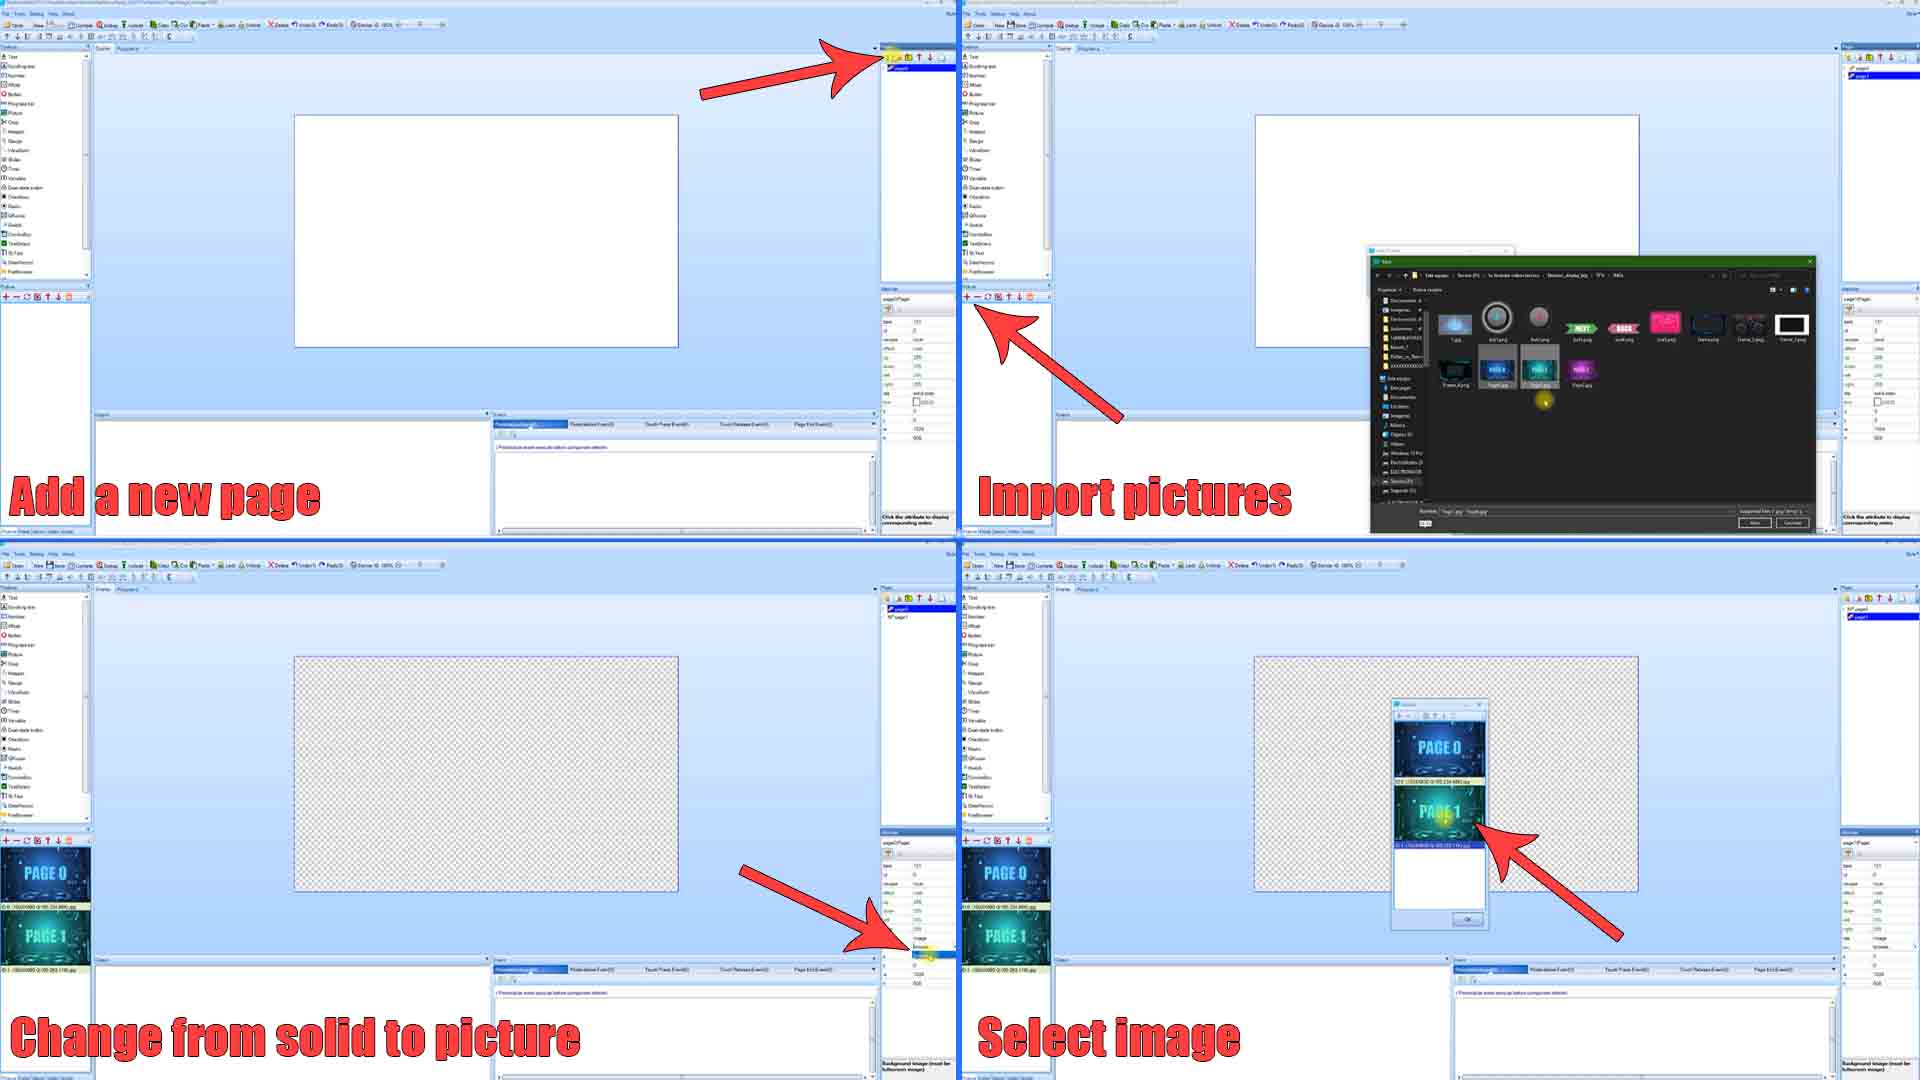
So go to the pages tab on the right top sidebar and create a new page by clicking the plus icon. Let’s upload some pictures. Go to the picture tab on the left bottom sidebar and click the plus icon. Here I’ve prepared two pictures of 1024 by 600 pixels, since that’s the resolution of this display. Now click the page 0. In attributes on the rigth bottom sidebar, in sta, change from solid color to image. Then in pic, click browse and select the first picture. Now click the page 1 and do the same process, but in pic select the second picture. As you will see, now we have two pages with different backgrounds. Let’s see how to change from one page to the next one.
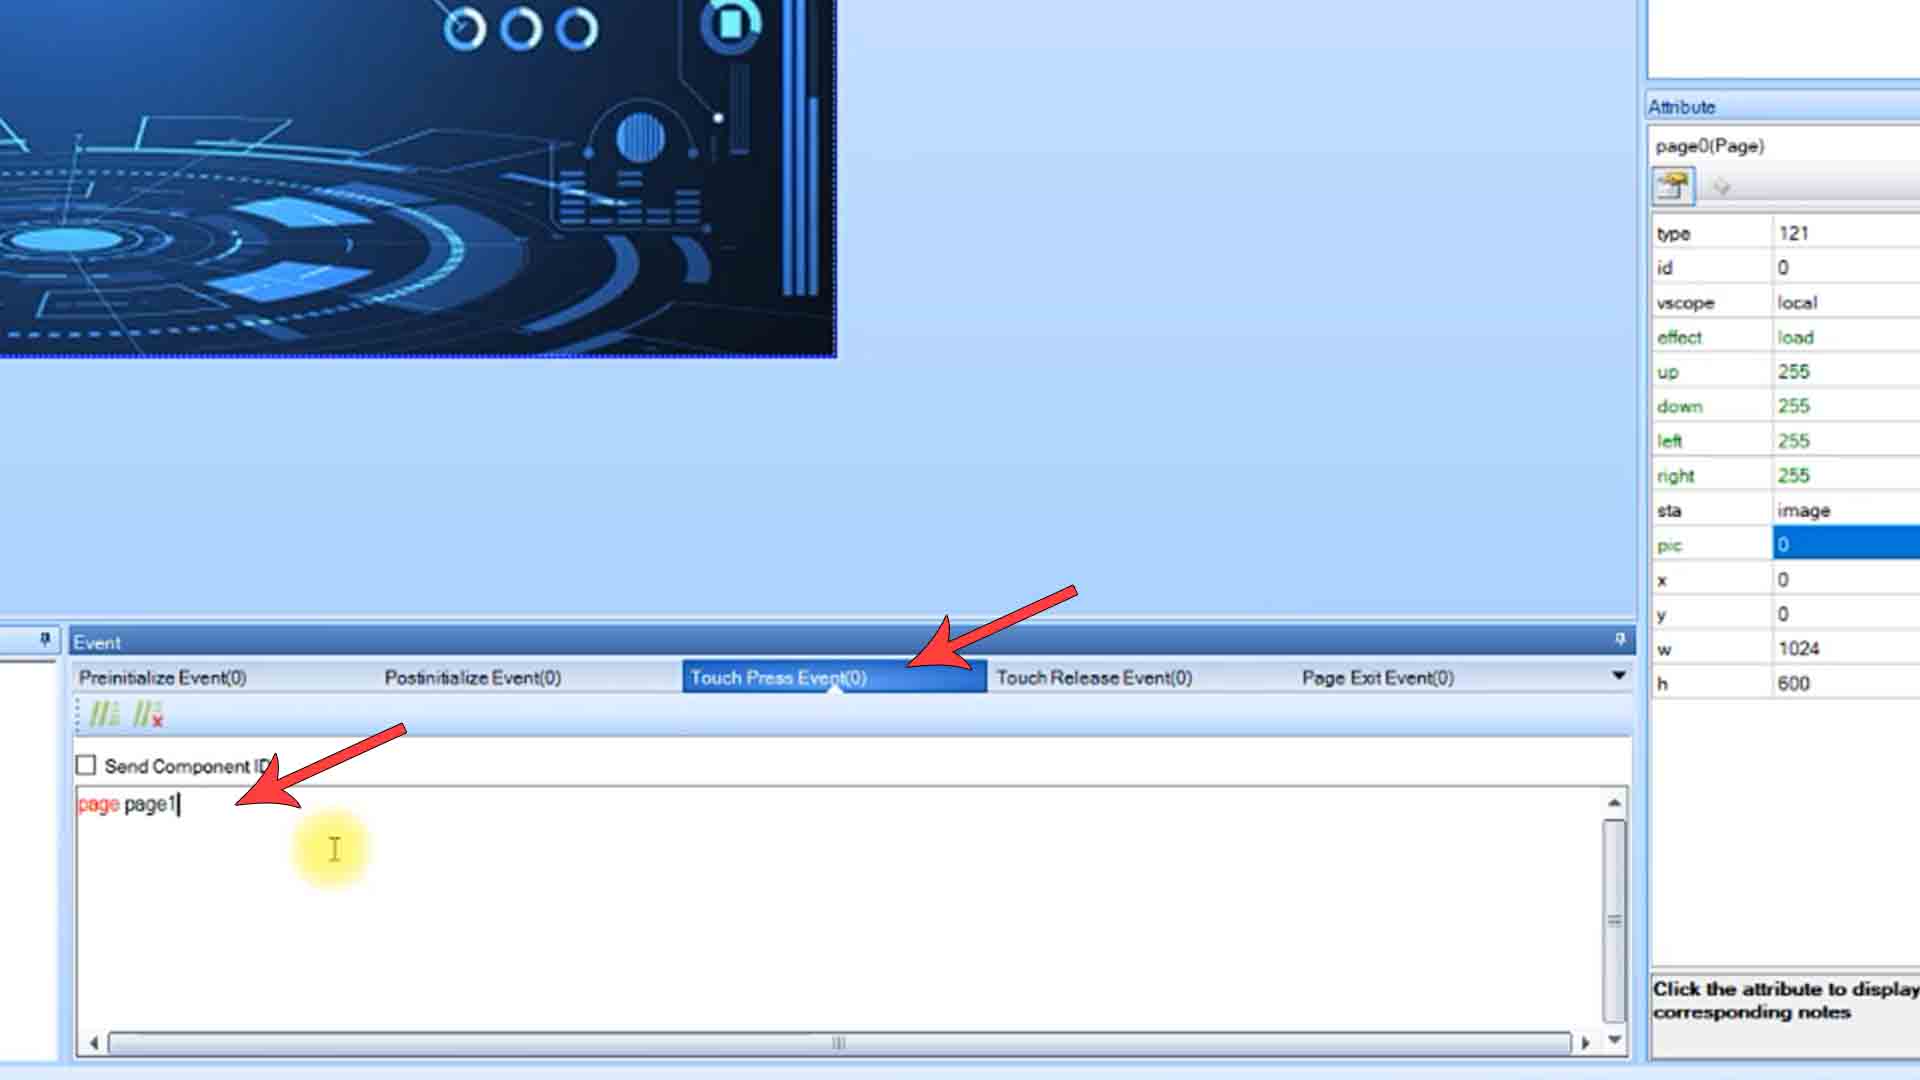
Below the display we have the event blocks. The most common are the press and release events. Select page 0 and click the press event. All the code we type here will be executed each time we press the screen of the page 0. So I place this code: page page1. This will tell the display to change to page 1. Now select page 1 and do the same by in the code I type, page page 0, so we go back to that page.
Click the debug button and as you will see, when we click the screen, we change from one page to the next. At this point, you could add a third page and do the same but this time we go from page 0 to page 1, then to page 2 then back to page 0 or any order that you want. That was easy.
So how to copy the file to the display? Well, go to file and click TFT output. Select where you want to save the TFT file and click output. Then copy that TFT file to a micro SD card. Then insert the SD card into the display without powering it on. Then power it on and the new TFT file will be copied to the screen memory. When you get to 100%, power off the screen and remove the SD card. Then power it back on and you can now use the TFT file you have just created. Pretty easy.
I hope you like this tutorial and maybe you have learned something new. If my videos help you, consider supporting my work on my PATREON or a donation on my PayPal. Thanks again and see you later guys.