Let’s make the most basic and blink an LED. The PCB has an on-board LED connected to GPIO 25. Create a new project and save it on your computer. Let's give it a name such as blink dot pi for example. In order to use the pins, we import Pin from machine and in order to create delays we use Timer. I define my LED as a pin for the GPIO 25 and define it as output. I also create a boolean LED state and equal it to true. I create my timer to click each 1 hertz so it will blink each 1 second. Now, each time the timer clicks, I invert the LED state and with LED dot value, I write that value to the LED where true is the LED on and false is the LED off. Press the play button and the LED is now blinking.
Copy the code from below or download the .py file. Paste it or open it on thonny and after you connect the PICO, press the runn button. You will see the LED blinking. Nice
from machine import Pin, Timer

led = Pin(25, Pin.OUT)
LED_state = True
tim = Timer()

def tick(timer):
    global led, LED_state
    LED_state = not LED_state
    led.value(LED_state)

tim.init(freq=1, mode=Timer.PERIODIC, callback=tick)
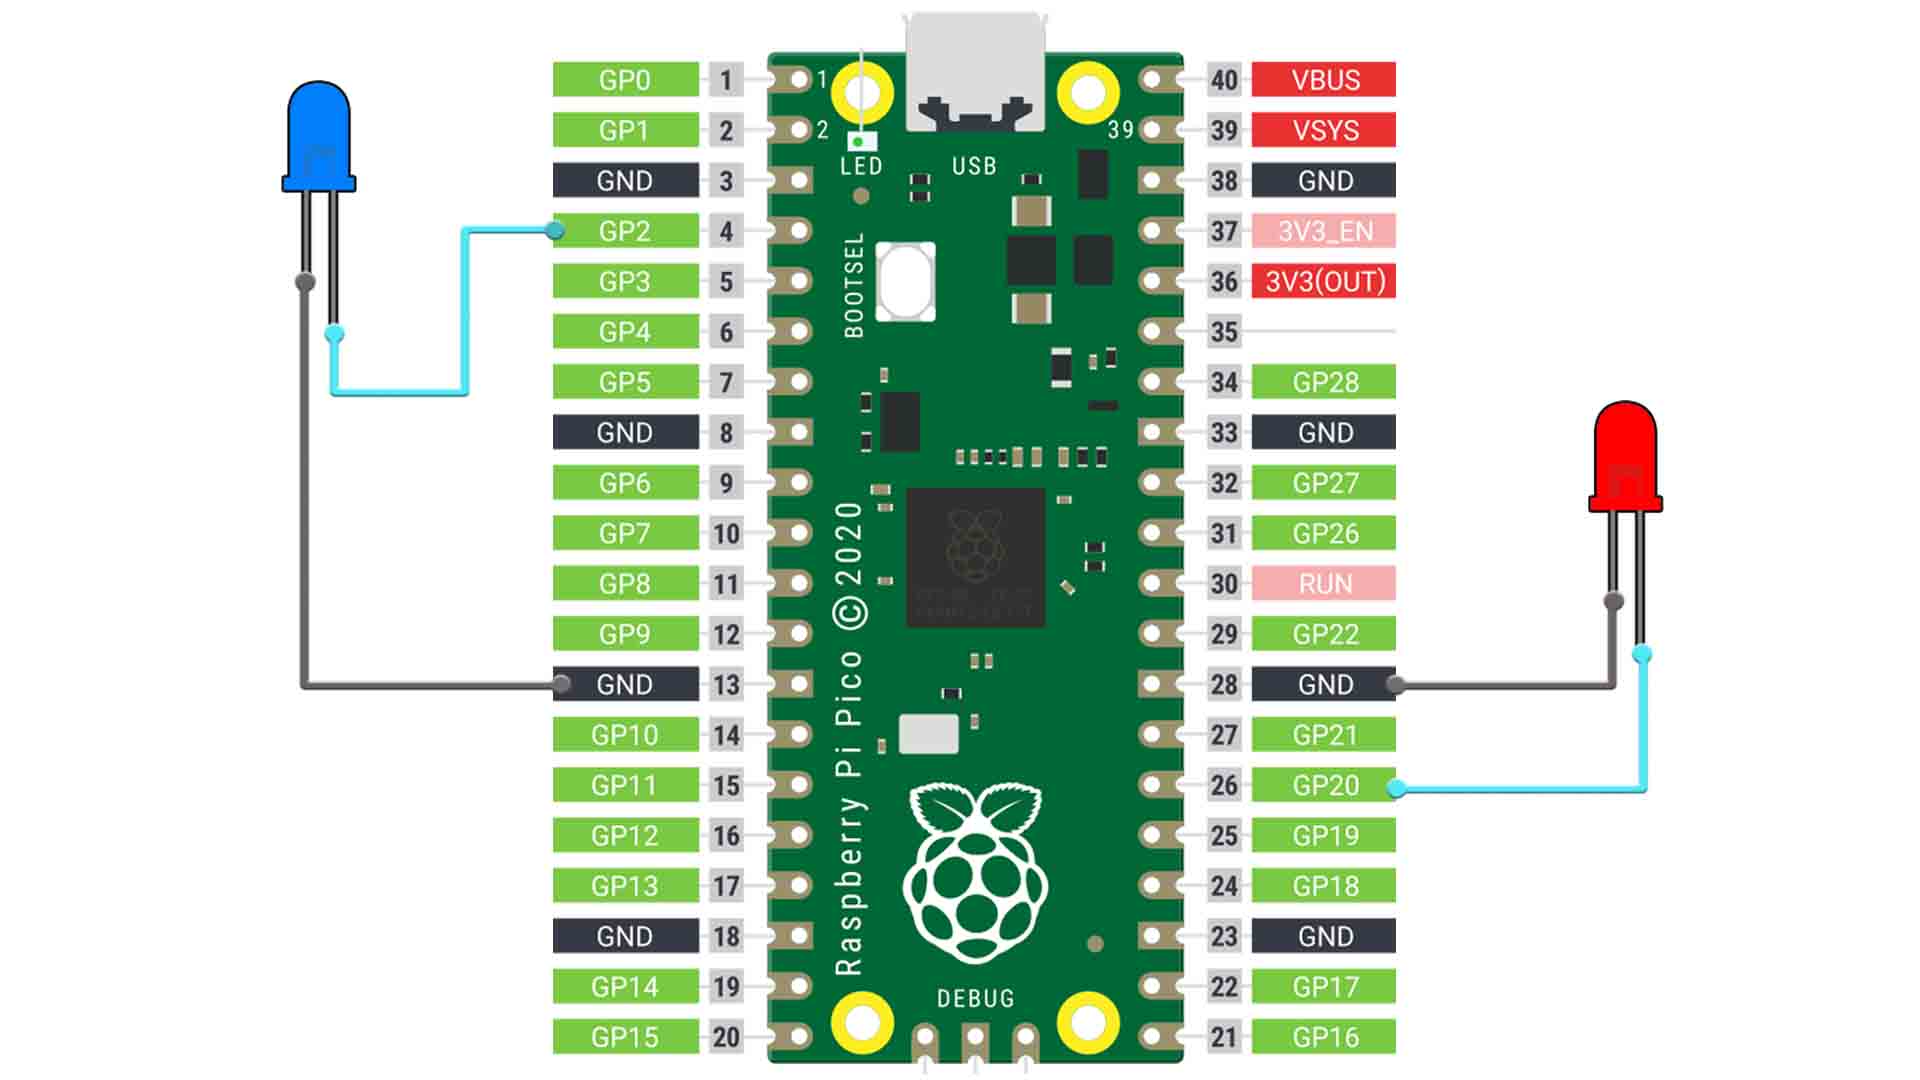
That was easy. Here I have another code that will blink two LEDs at the same time, one on GPIO 2 and another one let's say on GP 20. As you can see in the video below, this time I’m toggling the LEDs in an alternate mode. Get the schematic and code from below, download it or copy+paste.
from machine import Pin, Timer

led1 = Pin(2, Pin.OUT)
led2 = Pin(20, Pin.OUT)

LED_state1 = True
LED_state2 = False

tim = Timer()

def tick(timer):
    global led1, led2, LED_state1, LED_state2
    LED_state1 = not LED_state1
    LED_state2 = not LED_state2
    led1.value(0)
    led2.value(0)

tim.init(freq=1, mode=Timer.PERIODIC, callback=tick)