Panel Cookies
Weather Based Music Generator
Help me by sharing this post

PREVIOUS POST       NEXT POST

Author Andrei
16/07/2019
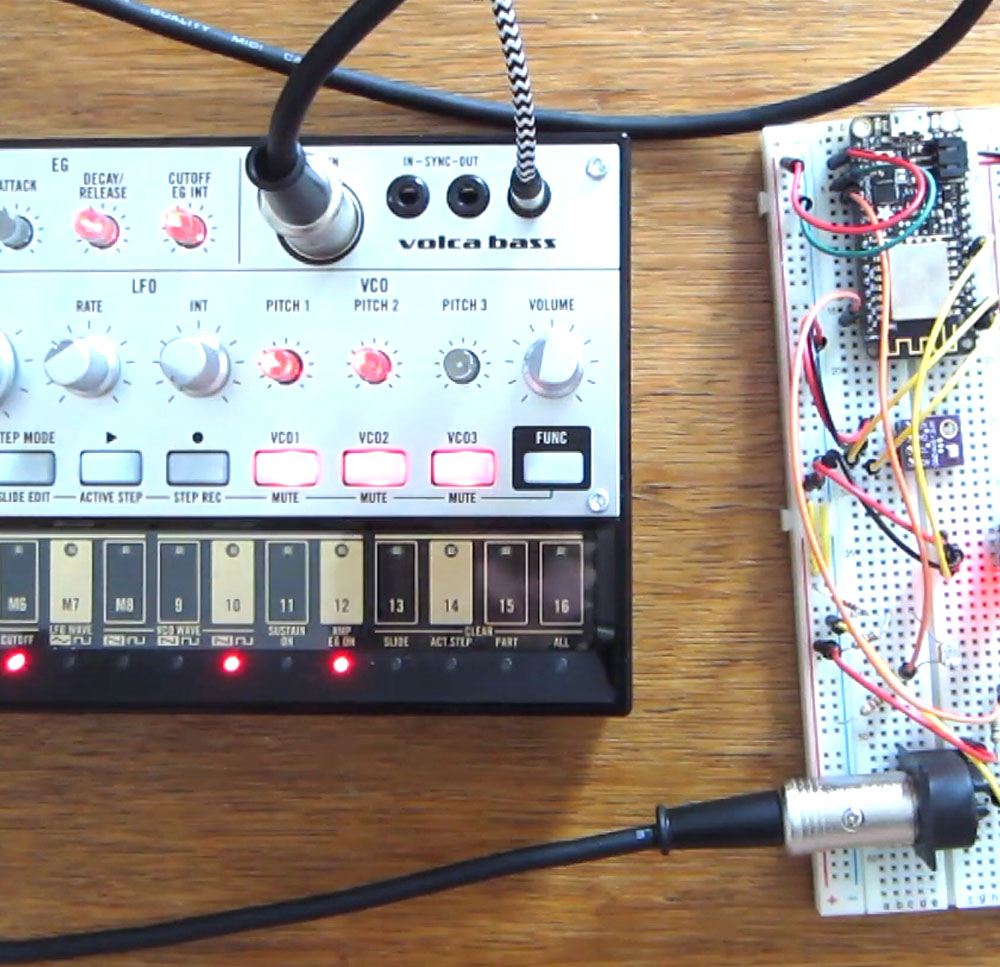
how to make your own little Weather based Music generator. It's based on an ESP8266, kind of like an Arduino, and it responds to temperature, rain and light intensity from an LDR resistor. As the creator says, don't expect it to make entire songs or chord progressions. This project was posted by OttoNL and you can see the full post here. It is more like Generative Music people sometimes make with Modular Synthesizers. But it's a little less random then that, it does stick to certain Scales for instance.
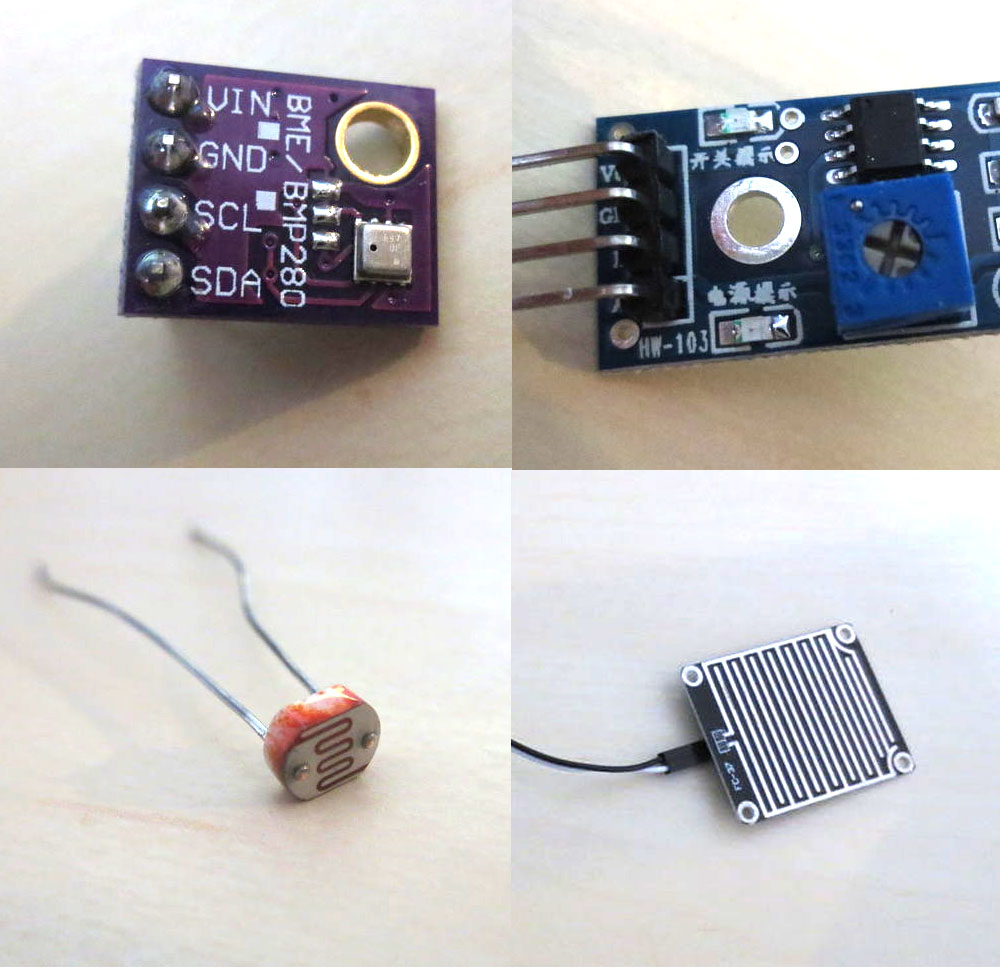
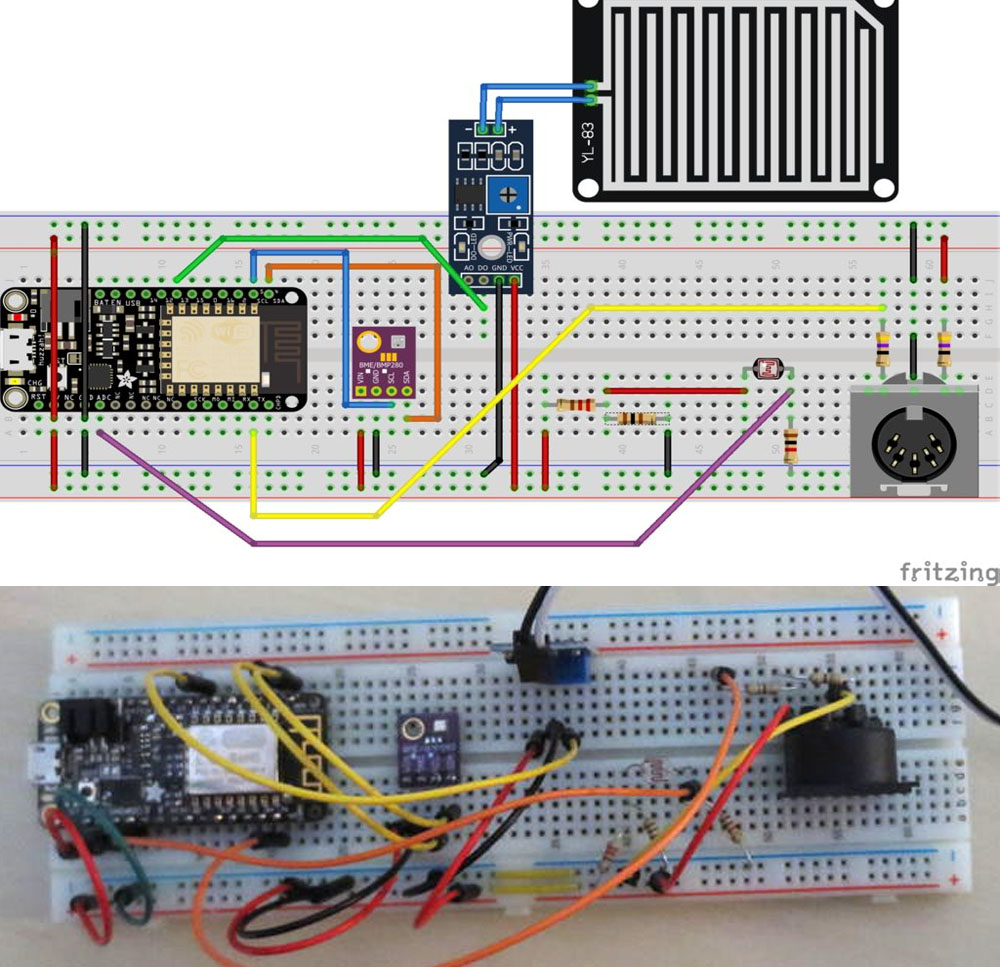
For this you will need: AN ESP8266, 1250 mAh LiPo battery with JST connector from Adafruit, the BME280 Temperature, Humidity and Barometric Pressure Sensor, Arduino Rain Sensor' from eBay (HW-103?), 25K LDR, Some Resistors, Female Midi Connector (5 Pin Din) suitable for PCB mounting, Jumper Wires, Breadboard or some sort of Prototyping board and a computer.


As mentioned, he used the Adafruit ESP, but it should just work fine with a NodeMCU. He recommends the V2 version as he believes it fits a lot better on a breadboard and you can get them very cheap from eBay or AliExpress. he believes on a NodeMCU the pin Labeled D1 is actually GPIO5 for instance, so you always need a Pinout chart handy. Not a big issue at all, but just convenient for newbies they labeled the Adafruit one so clearly.

First off, we connect the BME280, because there are some variations in this model. As you can see from the pictures this one has the one big hole, but there are also some with 2 holes. You can see it has 4 In and Outputs, 1 for power, one for ground and a SCL and SDA. This means it communicates via I2C. Other models communicate via SPI. This might require a different Library or at least different code and different wiring. The S in SPI stands for Serial and I can't say if this will interfere with the Midi part of this project as that's also working via Serial connection.


Simply connect a Midi cable, make sure to set your Synth/Keyboard to respond to channel 1 or change the code and see if it works! Let's see and hear what you do with it. If you make changes, upgrades, tweaks (like to the Light sensor and Temperature values. Outside it might work better or worse then inside) anything.

Apart this post, if you have your own project and you need good quality PCBs, consider using the services of JLCPCB.com which will offer you quite good services, I use their services a lot of my PCBs.

Consider supporting ELECTRONOOBS on PATREEON.


Help me by sharing this post

PREVIOUS POST       NEXT POST


yt_link
insta_link
fb_link
twitter_link
Blog#85 - Music Generator

Last tutorials

All about Arduino PWM frequencies
Tesla Coil on PCB
RLC Transistor Tester PCB with Arduino
Ferrofluid 3D printed Bluetooth Speaker
10A Bharger/Protection Module

ADVERTISERS


Affiliate Disclosure

ADVERTISERS


PCBWAY PCB service


Curso Arduino Online nivel bajo