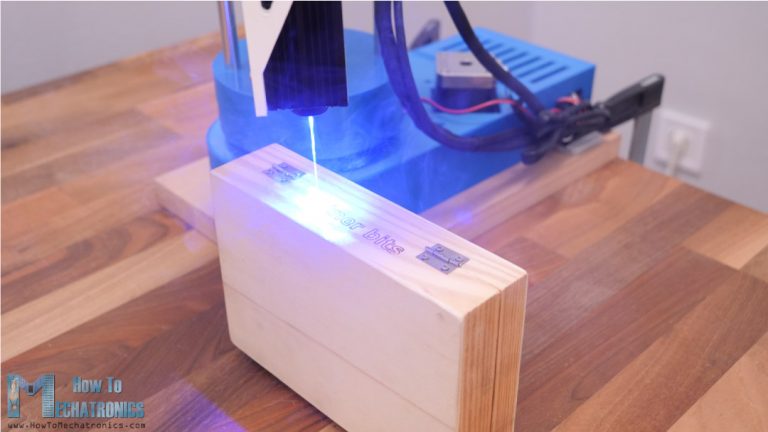
Wow, HowToMechatroinics has got for us yet another amazing project. This is a Robot arm Laser engraver made with Arduino, RAMPs and Marlin firmware together with all the 3D printed parts that he designed. The SCARA robot has 4 degrees of freedom which are driven by 4 NEMA 17 stepper motors and controlled using an Arduino board. In the original video I used an Arduino UNO board in combination with a CNC Shield, but now we will use an Arduino MEGA board in combination with a RAMPs board. We need this combination because we will use the Marlin 3D Printer firmware for controlling the robot. As for the mechanical part, I just had to change the gripper mechanism with a laser module. In this case, I’m using 5.5W laser module which is good enough for engraving. A cool feature that we get with this SCARA robot setup is that we can have a bigger range of the Z-axis movement and so we can laser engraver taller objects.
Also, the working area is pretty impressive considering the small footprint of the robot. It can use the area in front of it as well as on both sides. We can actually set it up to use almost the entire 360 degrees around the robot as a working area. We can do that thanks to the open-source Marling 3D printer firmware which has options for laser engraving and SCARA robot setup.
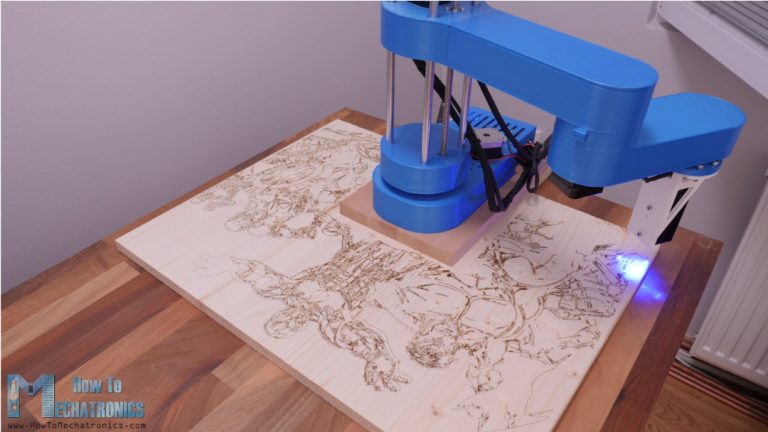
For generating the G-codes I’m using yet another open-source software, Inkscape and a plugin for it called Inkscape-Lasertools. We can generate G-codes with contours only or with contours and infill from the same vector image, and we have various options like adjusting the laser beam, travel speed, infill speed, perimeter speed, laser on and off commands including PWM control of the laser and so on. Nevertheless, now I will walk you through the entire process of setting up a SCARA robot to work as a laser engraver. We will take a look at the design of this SCARA robot, how to install and configure the Marlin firmware according to our machine, and how to prepare the drawings and the G-codes for engraving. See more on his full tutorial HERE.