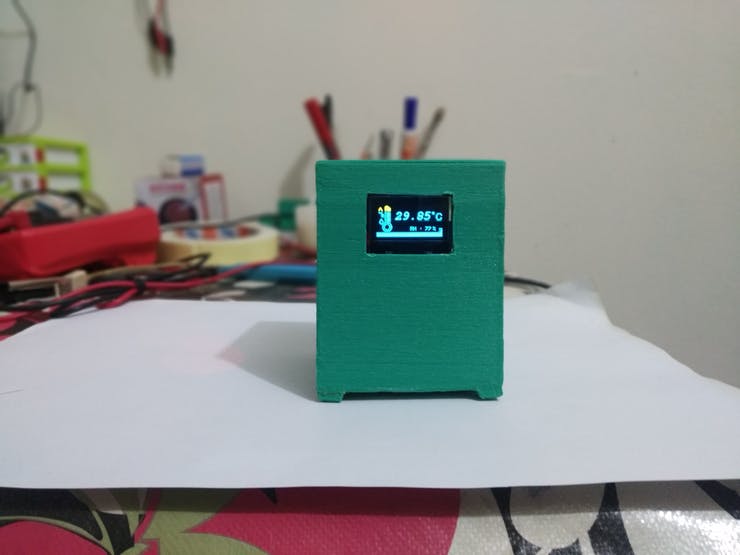
A weather station that can show local atmospheric pressure, temperature humidity and UV index without any internet connection.
For a long time, I wanted to make a weather station without using the internet. It is great to measure the weather data on your surrounding and take a look at the data when wanted. so, I make a cool-looking local weather station that can measure your surrounding air pressure, temperature, humidity, and the UV index of the day (if you place it near the window). Wait it has more! ???? it also has a Clock screen for showing Time, date, and day of the wee
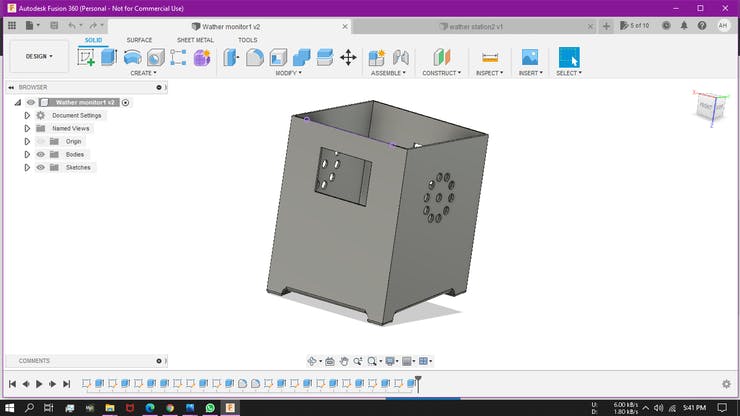
I use Autodesk fusion 360 to create the enclosure and print it with green PLA. It needs supports and I print it with 20% infill with 70mm/s speed on my Ender 3. You'll find the STL file for the Enclosure with this project.
BMP280 is atmospheric pressure and temperature sensor and it uses I2C or SPI protocol to communicate with the Arduino. Here I use SPI. To using SPI, connect-
In the code part, to use this sensor we need a library. first of all, I include the library in the code #include . you can download the library from here. Then I define the SPI pin for the sensor. In the setup function, I initialize the BMP sensor, and in the loop function, I read the pressure and temperature data using bmp.readPressure() and bmp.readTemperature() command. I divide the pressure value by 100 to measure the pressure in the hPa unit. To measure the altitude I use bmp.readAltitude(1005.47) command. Here you have to change the value (1005.47) according to your area's average pressure.
This weather station also has a time screen that can show the current time, date, and day of the weak. For this purpose, I use the DS231 RTC module, which uses the I2C protocol to communicate. so to use this, connect-
first of all, you have to set the time and date on the RTC using the DS3231_set.ino program from the library Example.
In the main program, I include the library #include and read the time data as per the instruction from the library. here I use the example from the library as a reference for the code. I created a case for every day of a week to find the current day.
I use this sensor to measure the humidity. For that, I connect its data out to Arduino D2. And in the program, I include the DHT library #include then in the setup I initialize the sensor and in the loop, I read the humidity value using dht.readHumidity() command.
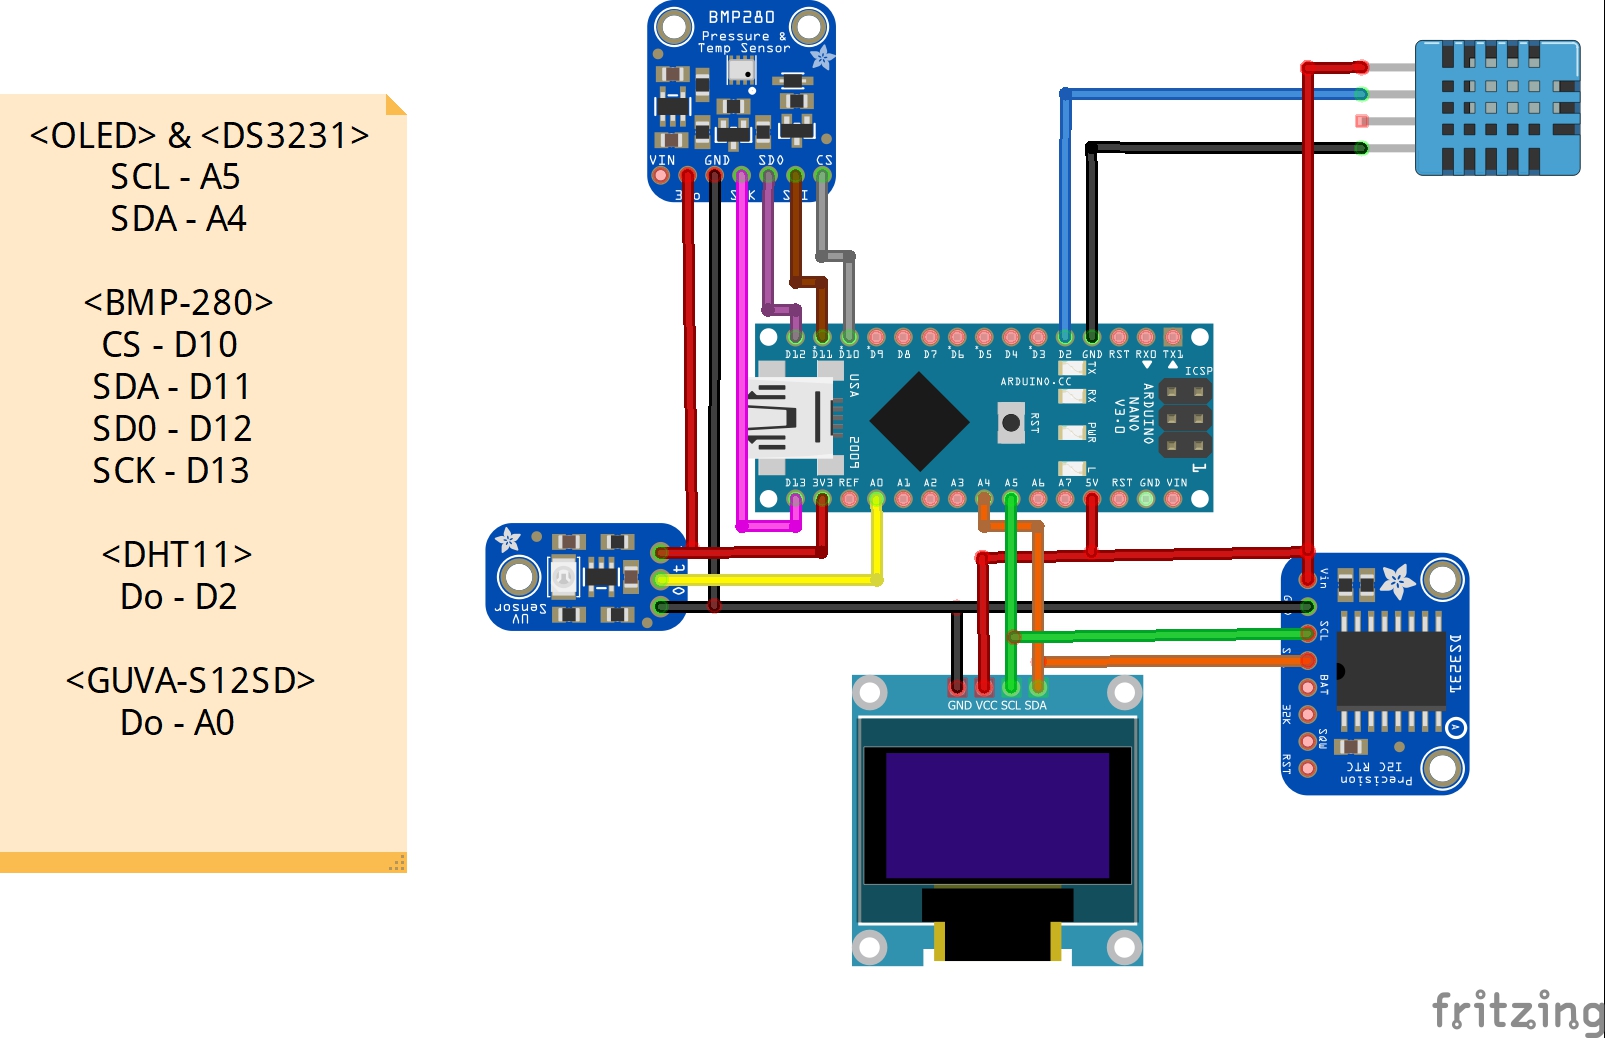
I use a 0.96" 128*64 OLED display for this project, it uses I2C protocol so I connect it to Arduino as follow-
In the program, at first, I include the Adafruit_SSD1306 and Adafruit_GFX library
#include <Adafruit_GFX.h>
#include <Adafruit_SSD1306.h>
then I create the display variable and also add some bitmap for displaying some images. In the setup, I initialize the display. then in the loop, I display every data using the display.print() function. I display the data on four pages, Time, Pressure, temperature & humidity, and UV_index. there is a 5-second delay between every page.