As you can see now below, the receiver will create a PWM signal just as any other comercial radio receiver. The PWM signal will ahve the same frequency as the commercial ones and a pulse from 1000us up to 2000us. So it could be use with drones or any other RC machine.
The transmitter schematic is the same so check it here. But the code for the tranmitter is different, since we will use the Joystick as well. So download the code from below, upload it to the transmitter board and then we could jump to the PWM reciever part.
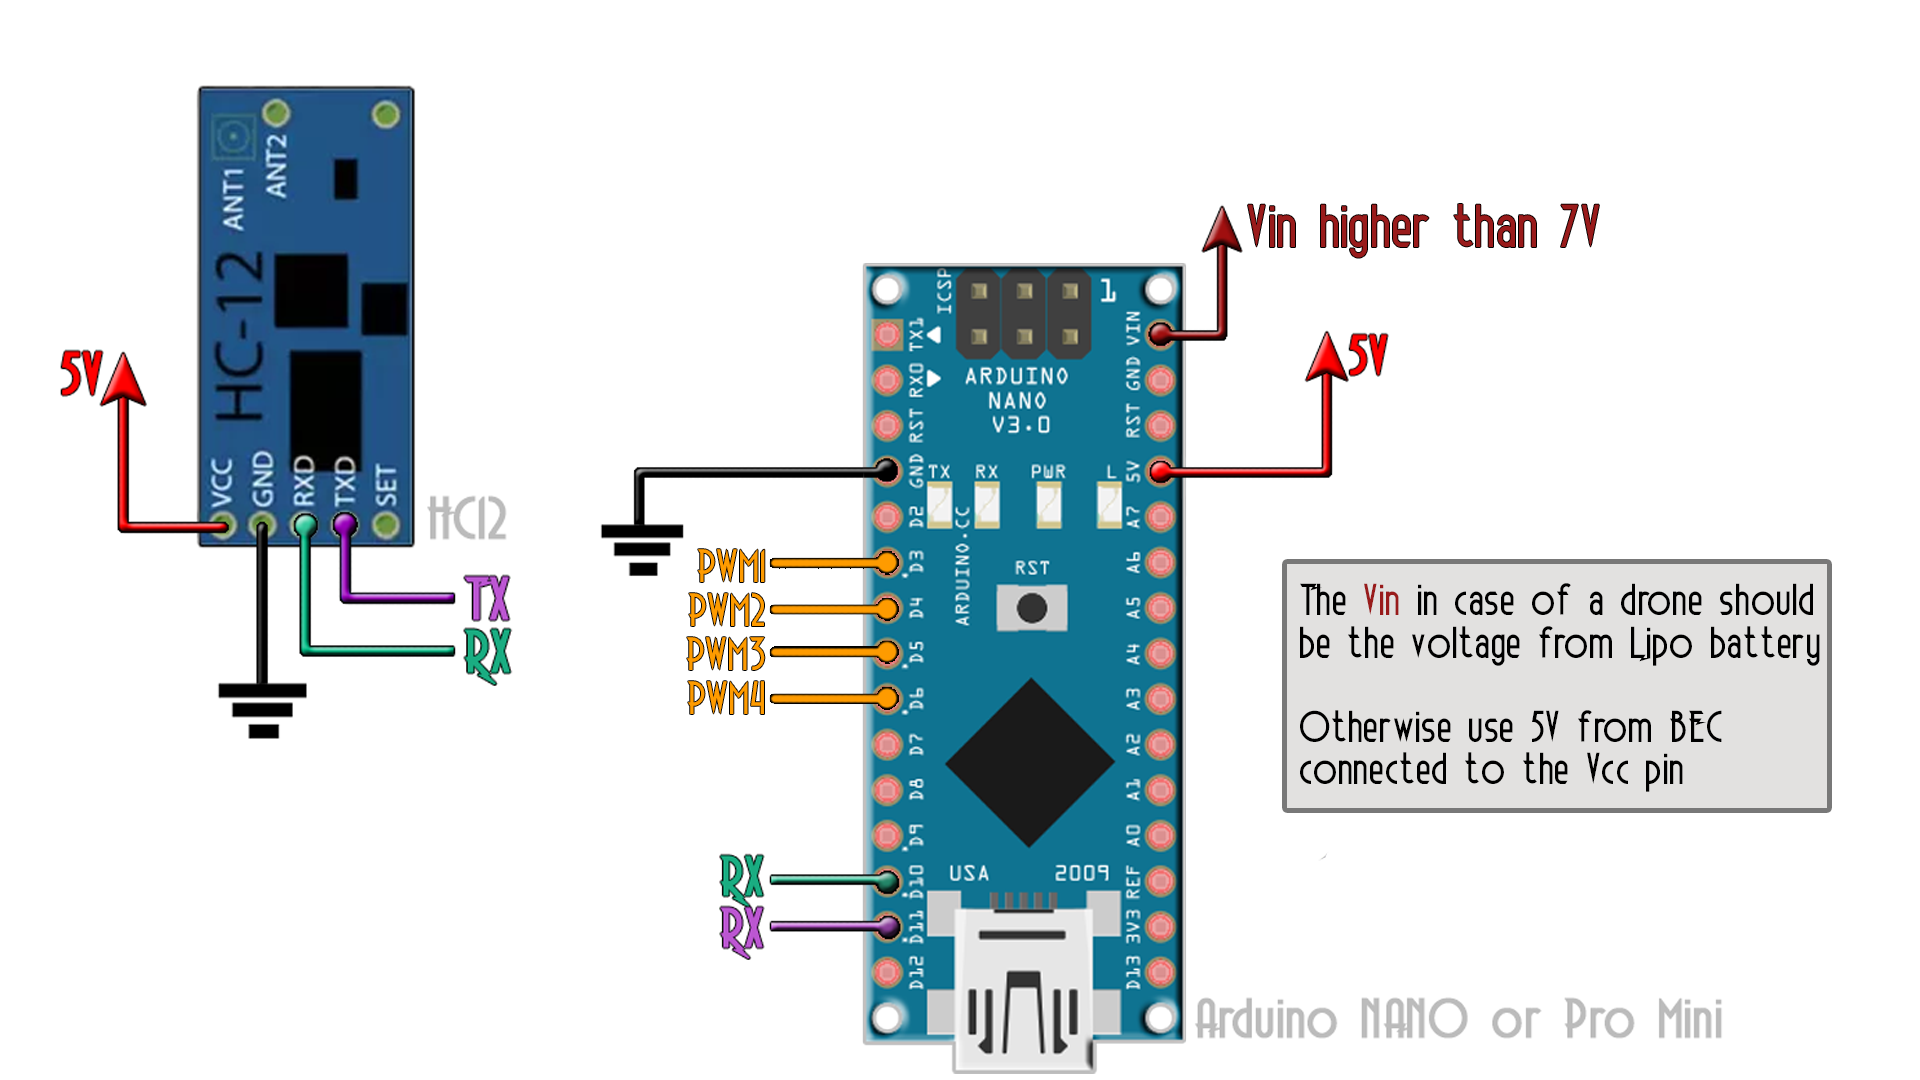
As you can see the receiver is more than simple. Just the HC-12 module, the arduino and 4 PWM outputs. To supply this we shoudl connect it to a voltage above 7V, so in case of a drone to the lipo battery. Or connect 5V directly from the BEC. Now uplaod the next receiver code and the PWM receiver is ready. If we connect the oscilloscope to the pins we coudl see a PWM signal from 1000 to 2000us for each of the 4 channels.