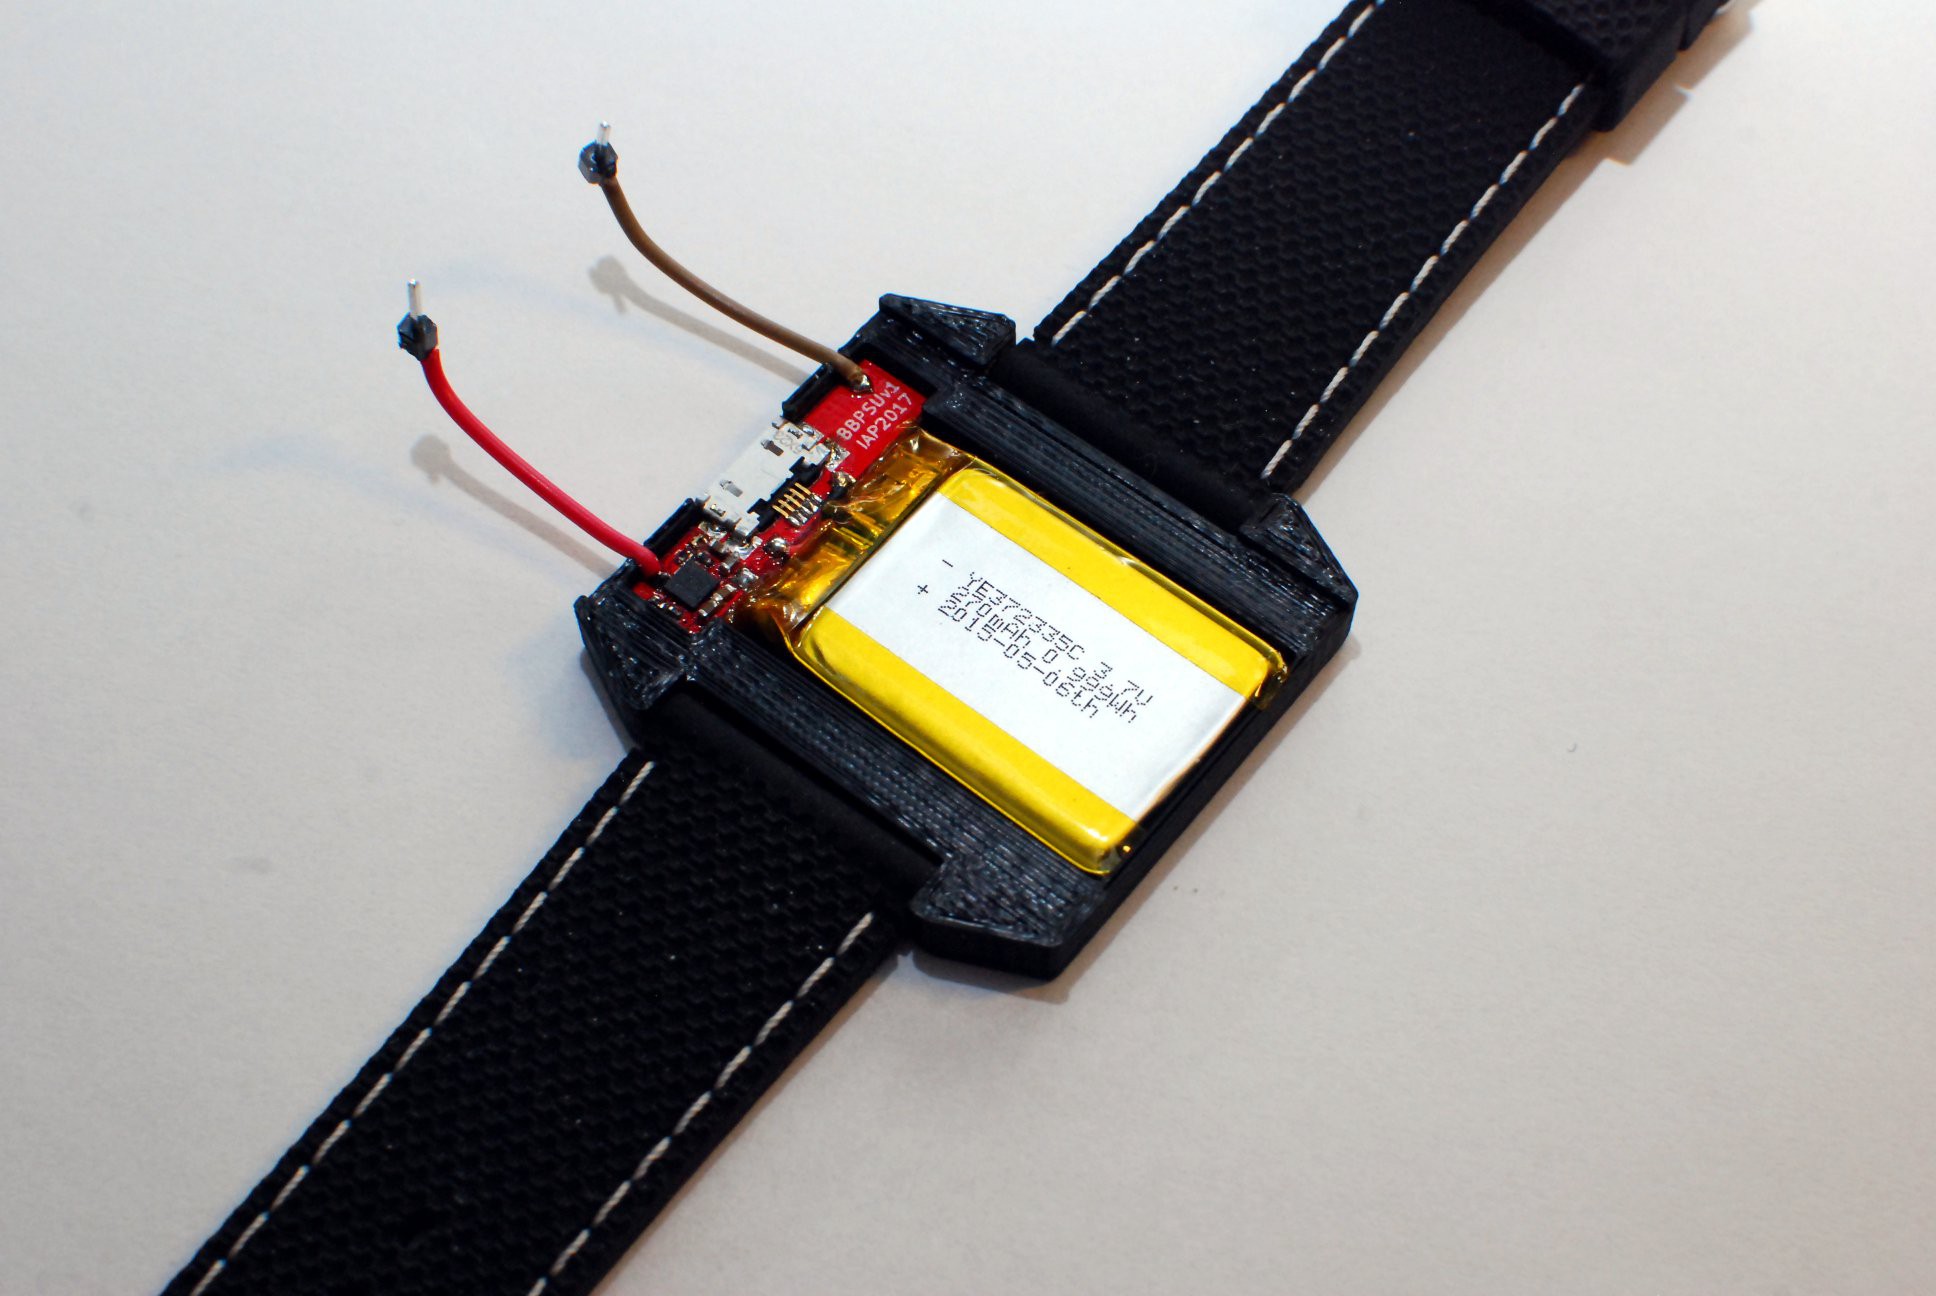
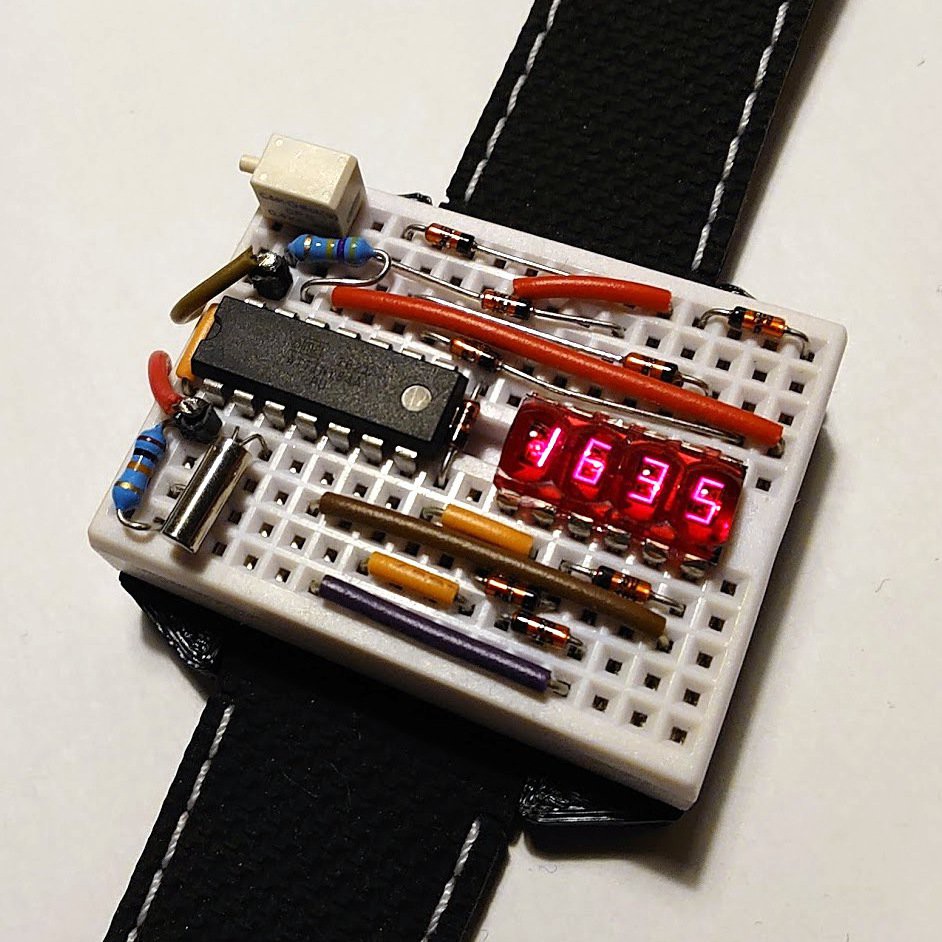
Here's a fun project making a geeky wristwatch, using the QDSP-6064 bubble LED display. The clock components are plugged in to a "breadboard". These type of boards are usually used for prototyping electronic circuits. Now you can have an electronics prototyping platform on your wrist at all times! There is an rechargeable PSU underneath the bread board, delivering 3.1V. The PSU is charged via an USB-micro connector on the side.
The MCU chosen for this project is an 14 pin ATtiny84A. The MCU is run of a 32768Hz crystal, used both for CPU clock and RTC timer (using timer0). This makes it use 10uA in idle, while only the RTC is running. It uses about 24mA with the LED display active.

The low I/O count on this ATtiny84A mean that the segment driver pins are also used for the cathode pins for each digit. This is accomplished by having diodes in series with the MCU outputs, making an OR-ing circuit for two of the segments. The shcottky diodes also drops the voltage down to an appropriate voltage for the LED-segments.
The PSU for this bread board wristwatch / wearable prototype platform is the STNS01 from ST-Microelectronics. This IC has an integrated Li-Po battery charger and 3.1V LDO. The Li-Po battery is connected to the J5 and J6 pads. The 3.1V to the breadboard are connected to the J3 and J4 pads.
The bottom case is made for a Li-Po battery of size 37x23x3.5mm.
FW for the ATtiny84A is available on github.